
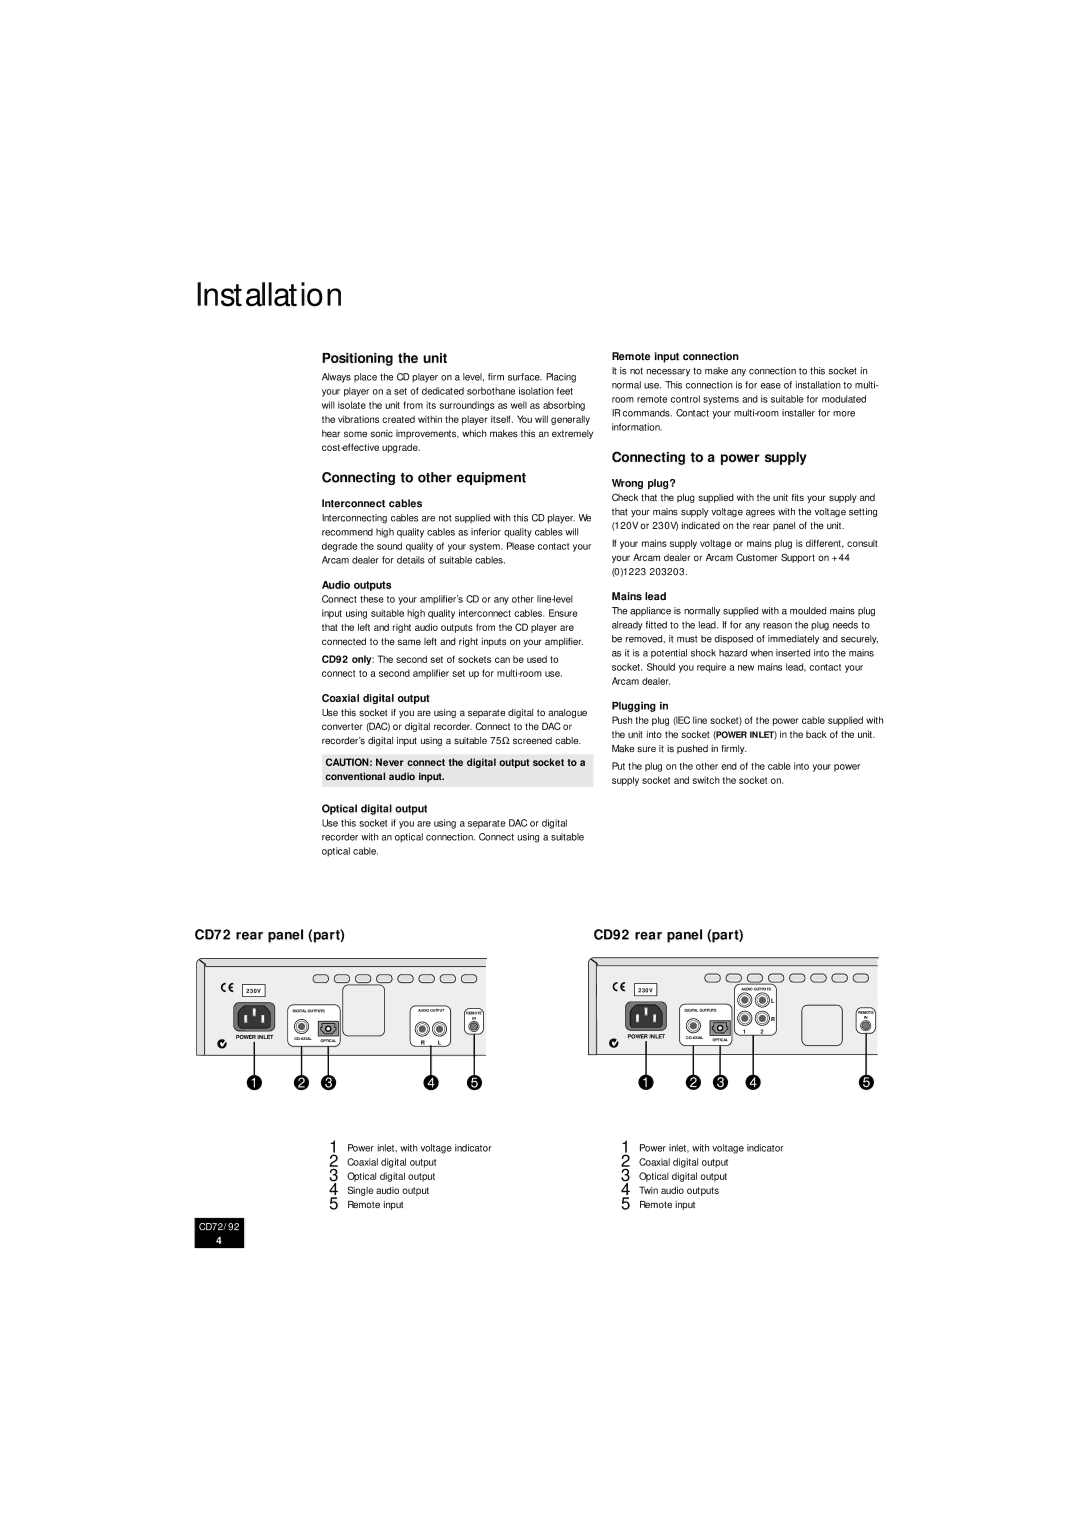
CD72, CD92 specifications
The Arcam CD72 and CD92 are both renowned models in the realm of high-fidelity audio, offering exceptional sound quality and build characteristics that appeal to both audiophiles and casual listeners alike. As part of Arcam's commitment to producing top-tier music playback solutions, both of these CD players have garnered praise for their engineering and performance.The Arcam CD72 is notable for its Precision, a technology that ensures minimal noise and crosstalk during playback. This results in audio that's remarkably clear and free from distortion, allowing listeners to experience music as the artist intended. The CD72's build quality is robust, featuring a heavy chassis that effectively minimizes vibrations, which can affect sound quality. The CD72 also comes equipped with a Wolfson DAC, which is praised for its high-resolution audio capabilities, delivering a smooth and rich sound signature that enhances the overall listening experience.
Moving up the line, the Arcam CD92 offers even more advanced features and technology. One of its standout characteristics is the inclusion of a more sophisticated digital-to-analog converter, which provides an enhanced dynamic range and greater detail in audio reproduction. The CD92 also benefits from improved filtering technology, leading to a more accurate soundstage and the ability to reproduce intricate musical details.
Additionally, both models support CD-R and CD-RW formats, making them versatile for various media. The ergonomic design of the players, combined with intuitive controls, ensures that users can navigate through their music collections with ease and convenience.
The remote control functionality further adds to user experience, allowing for seamless operation from a distance. Both CD72 and CD92 are also compatible with digital output for those looking to connect to external DACs or integrate into more extensive audio systems.
In summary, the Arcam CD72 and CD92 stand as testaments to the brand’s dedication to delivering high-quality audio experiences. With their advanced technologies, solid build quality, and user-centered designs, these CD players have solidified their positions as excellent choices for anyone serious about their music playback needs. Whether experiencing the nuanced soundscapes from the CD72 or the refined clarity of the CD92, users are bound to appreciate the artistry and craftsmanship inherent in these devices.