The remote-control and trigger inputs
The REMOTE IN input can be used to pass RC5 codes to the DV135 if it is installed in a position (or system) where infrared cannot be used. If this is required, please contact your dealer for further information.
The trigger in input can be used to switch the DV135 in and out of
In normal use there is no need to make any connections to these inputs.
Inserting the batteries into the remote control
![]() The remote control input requires a mono
The remote control input requires a mono
3.5mm jack, with the
tip active and the sleeve
grounded.
The remote control signals
must be in modulated RC5
format (at 36kHz), with a
voltage level of between
5V and 12V.
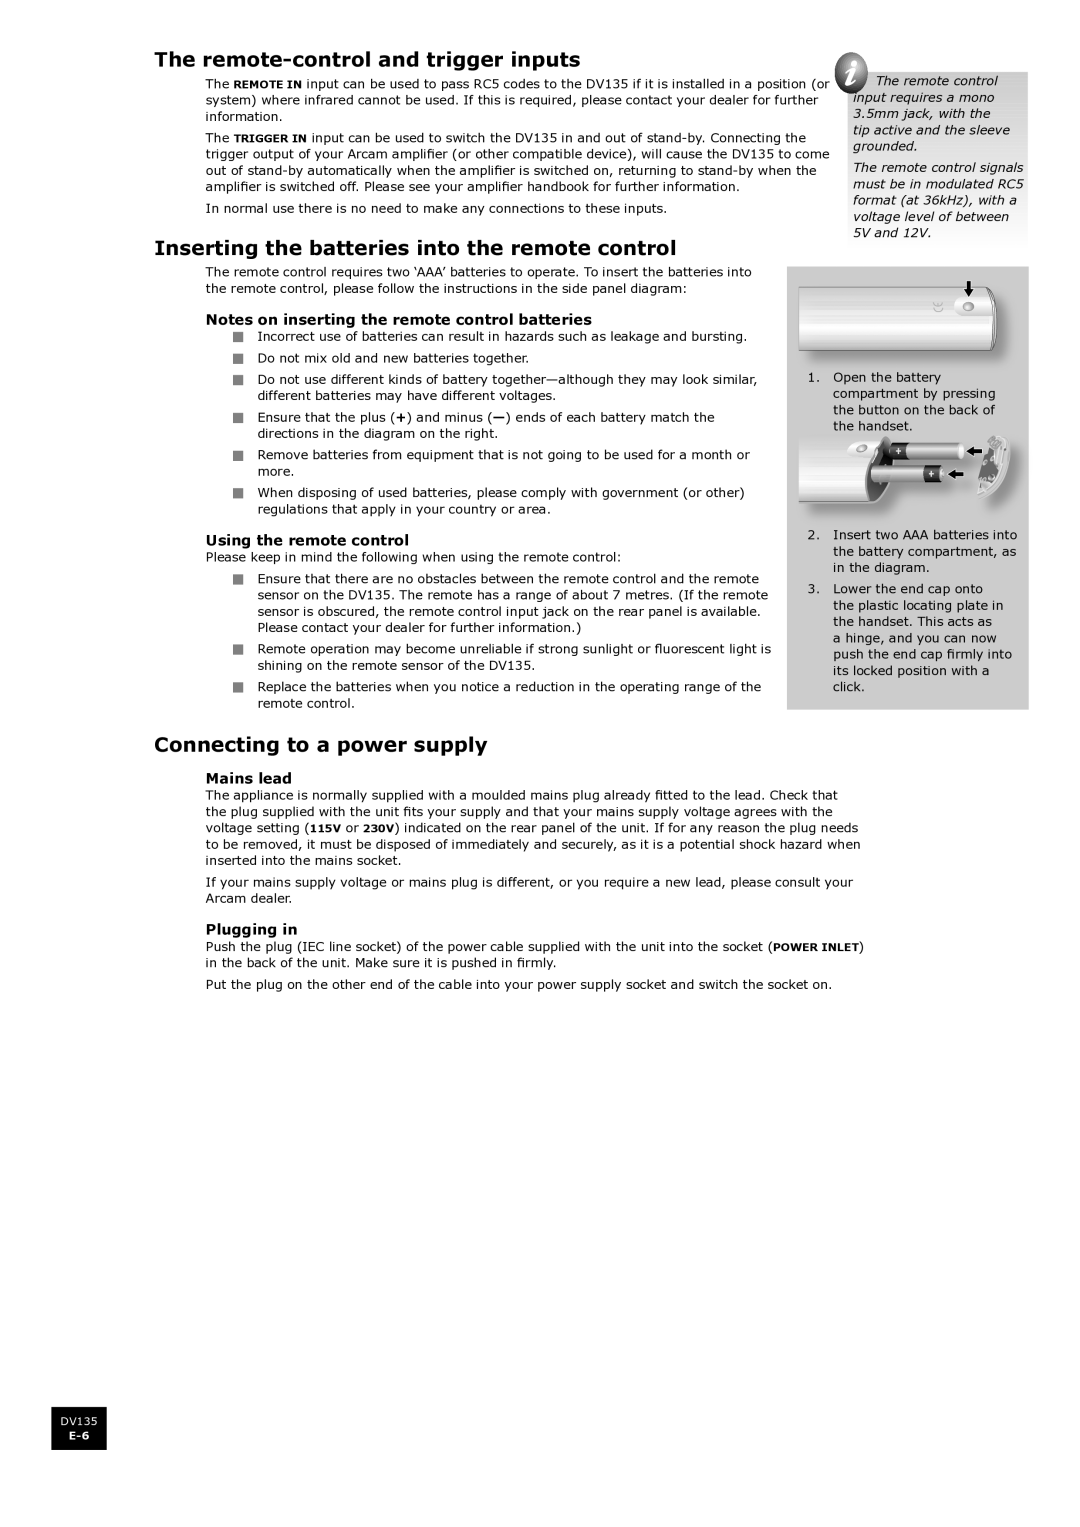
The remote control requires two ‘AAA’ batteries to operate. To insert the batteries into the remote control, please follow the instructions in the side panel diagram:
Notes on inserting the remote control batteries
<Incorrect use of batteries can result in hazards such as leakage and bursting.
<Do not mix old and new batteries together.
<Do not use different kinds of battery
<Ensure that the plus (+) and minus
<Remove batteries from equipment that is not going to be used for a month or more.
<When disposing of used batteries, please comply with government (or other) regulations that apply in your country or area.
Using the remote control
Please keep in mind the following when using the remote control:
<Ensure that there are no obstacles between the remote control and the remote sensor on the DV135. The remote has a range of about 7 metres. (If the remote sensor is obscured, the remote control input jack on the rear panel is available. Please contact your dealer for further information.)
<Remote operation may become unreliable if strong sunlight or fluorescent light is shining on the remote sensor of the DV135.
<Replace the batteries when you notice a reduction in the operating range of the remote control.
1.Open the battery compartment by pressing the button on the back of the handset.
2.Insert two AAA batteries into the battery compartment, as in the diagram.
3.Lower the end cap onto the plastic locating plate in the handset. This acts as a hinge, and you can now push the end cap firmly into its locked position with a click.
Connecting to a power supply
Mains lead
The appliance is normally supplied with a moulded mains plug already fitted to the lead. Check that the plug supplied with the unit fits your supply and that your mains supply voltage agrees with the voltage setting (115V or 230V) indicated on the rear panel of the unit. If for any reason the plug needs to be removed, it must be disposed of immediately and securely, as it is a potential shock hazard when inserted into the mains socket.
If your mains supply voltage or mains plug is different, or you require a new lead, please consult your Arcam dealer.
Plugging in
Push the plug (IEC line socket) of the power cable supplied with the unit into the socket (POWER INLET) in the back of the unit. Make sure it is pushed in firmly.
Put the plug on the other end of the cable into your power supply socket and switch the socket on.
DV135