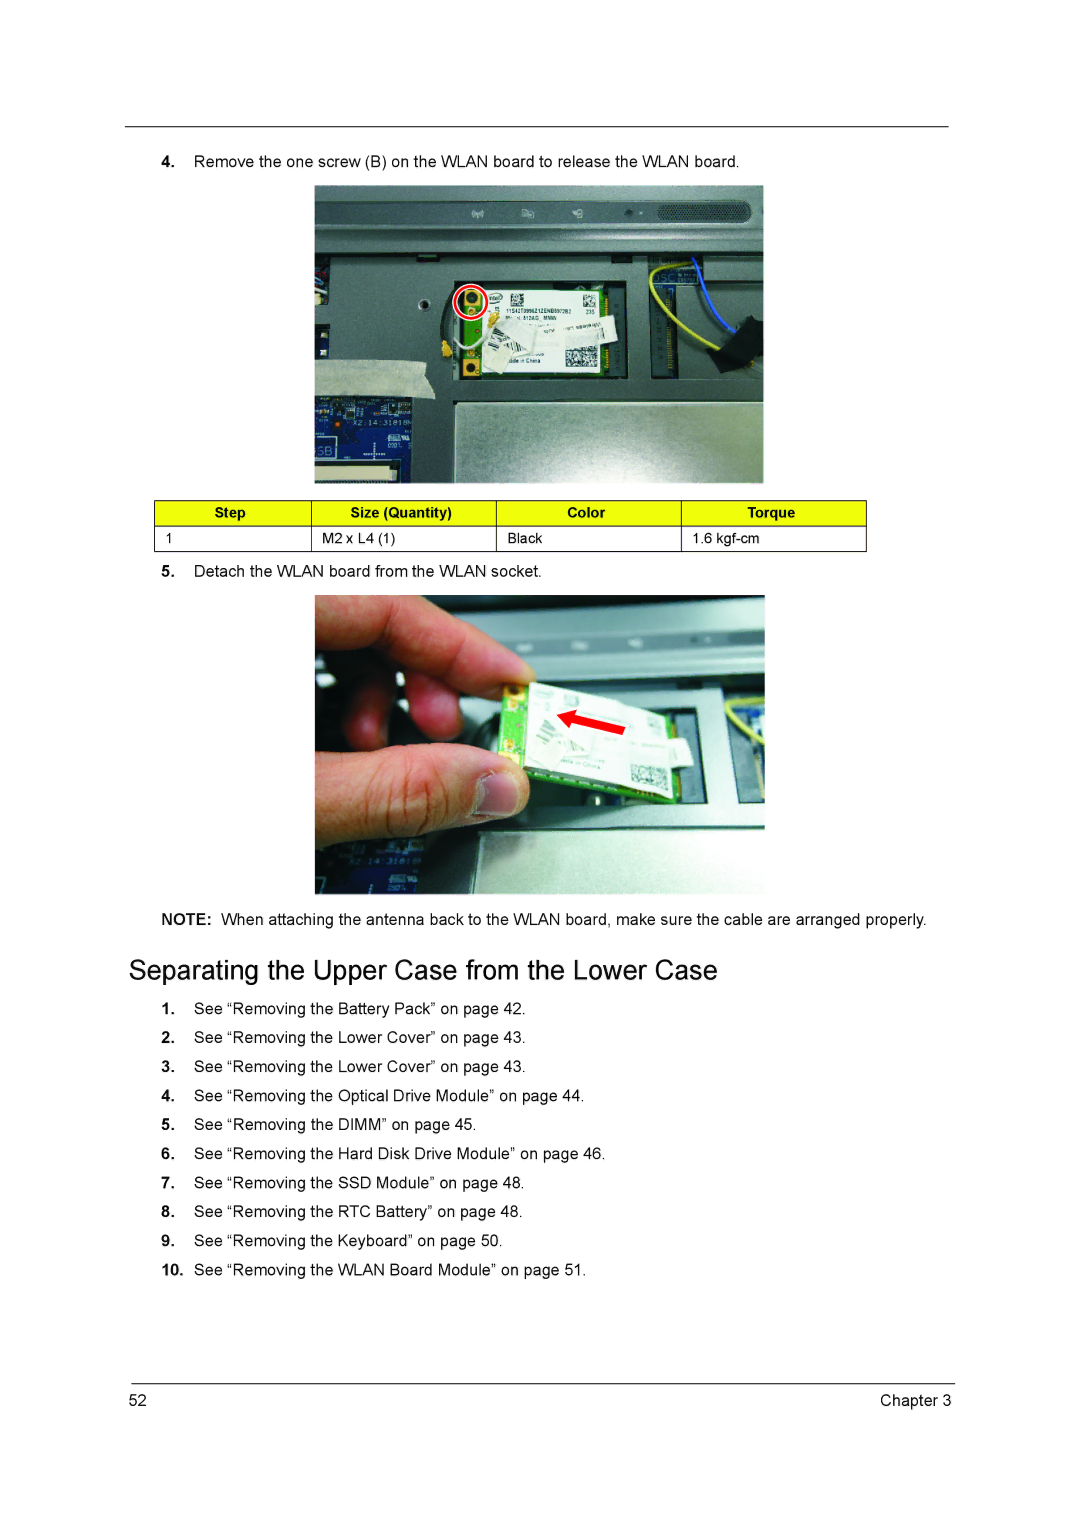
4.Remove the one screw (B) on the WLAN board to release the WLAN board.
Step | Size (Quantity) | Color | Torque |
1 | M2 x L4 (1) | Black | 1.6 |
|
|
|
|
5.Detach the WLAN board from the WLAN socket.
NOTE: When attaching the antenna back to the WLAN board, make sure the cable are arranged properly.
Separating the Upper Case from the Lower Case
1.See “Removing the Battery Pack” on page 42.
2.See “Removing the Lower Cover” on page 43.
3.See “Removing the Lower Cover” on page 43.
4.See “Removing the Optical Drive Module” on page 44.
5.See “Removing the DIMM” on page 45.
6.See “Removing the Hard Disk Drive Module” on page 46.
7.See “Removing the SSD Module” on page 48.
8.See “Removing the RTC Battery” on page 48.
9.See “Removing the Keyboard” on page 50.
10.See “Removing the WLAN Board Module” on page 51.
52 | Chapter 3 |
