Aspire System Boot Code Update Instructions
Use the following instructions to update the Aspire system’s boot code. This code provides basic
Compatibility
Though the Boot Code version 1.20 can be used with any system software, when used with software 1.21 or higher, the VRS feature will work with any version of the Aspire NTCPU. With Boot Code prior to 1.20, for the VRS feature, the NTCPU has to be either:
●The
OR
●The Enhanced NTCPU (P/N 0891038)
Note that the VRS feature requires a DSPDB be attached to the NTCPU with the optional VRS flash card installed. Although the DSPDB is recognized for this feature, it will not provide any additional tone resources (DTMF receivers, Caller ID receivers, or call progress tone detection).
Updating the System Boot Code | 3 |
8 | |
- | |
0 | |
| 0 |
| 0 |
| 1 |
| 3 |
| 9 |
| 8 |
1.Turn the system power off by pressing the power button on the power supply in the PS1 slot (this
controls power to both power supplies if there are two installed in the cabinet). If there are two cabi- nets connected, turn off the power to the expan- sion cabinet, then the power to the main cabinet.
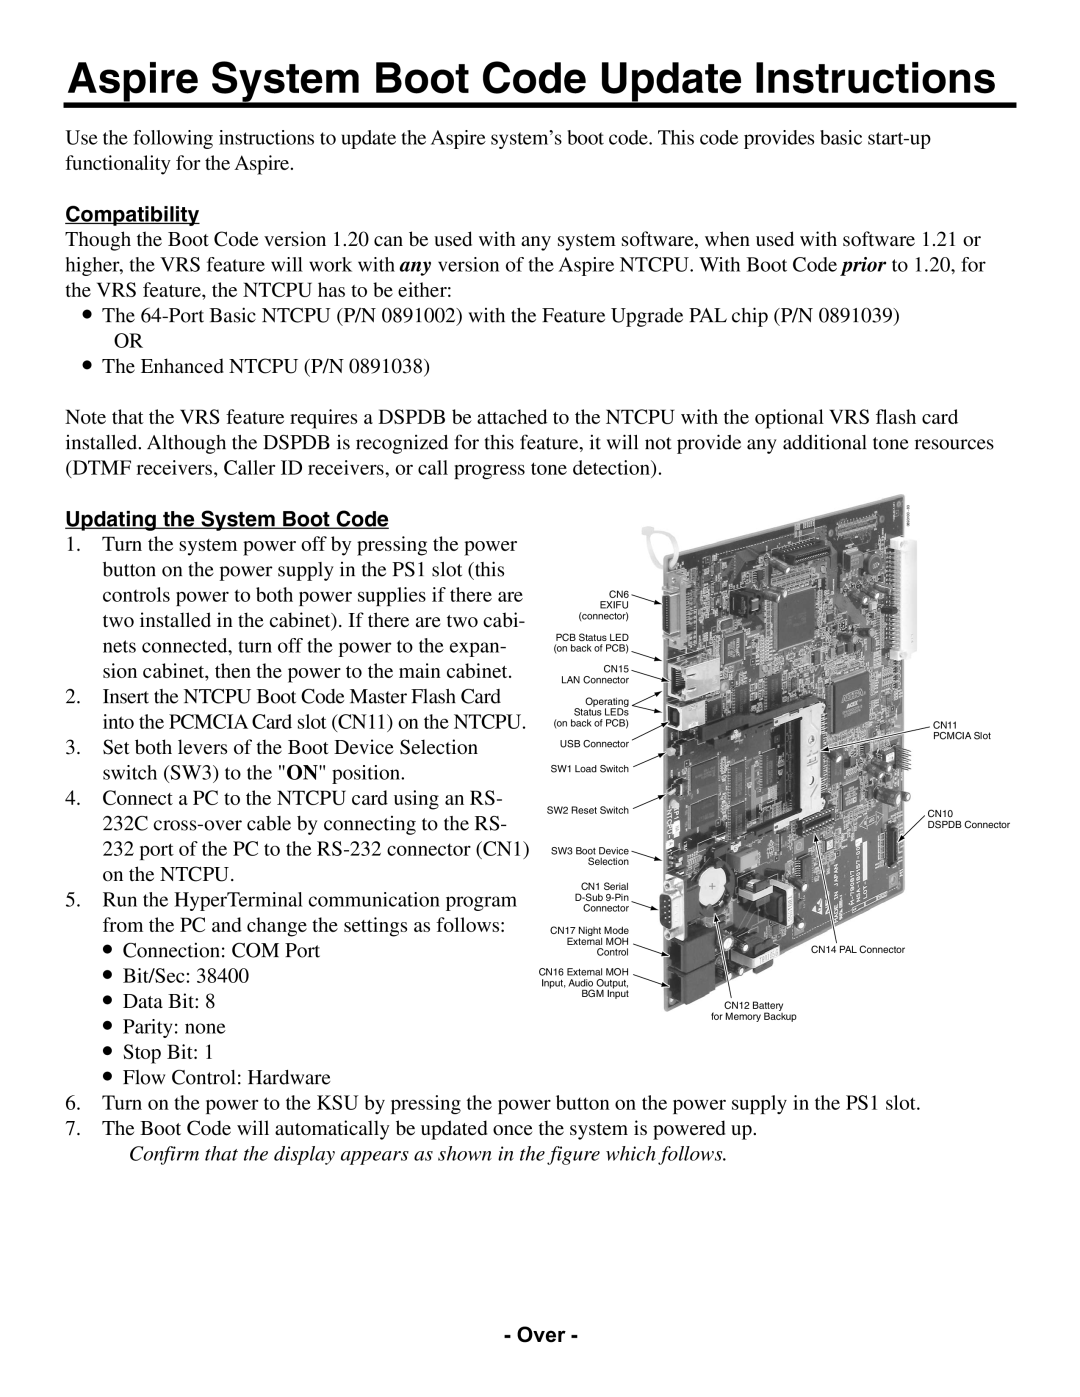
2. Insert the NTCPU Boot Code Master Flash Card into the PCMCIA Card slot (CN11) on the NTCPU.
3. Set both levers of the Boot Device Selection switch (SW3) to the "ON" position.
4. Connect a PC to the NTCPU card using an RS- 232C
+
5. Run the HyperTerminal communication program
from the PC and change the settings as follows:
● Connection: COM Port
● Bit/Sec: 38400
● Data Bit: 8
● Parity: none
● Stop Bit: 1
● Flow Control: Hardware
6. Turn on the power to the KSU by pressing the power button on the power supply in the PS1 slot.
7. The Boot Code will automatically be updated once the system is powered up. Confirm that the display appears as shown in the figure which follows.
CN11
PCMCIA Slot
CN10
DSPDB Connector