2.3 CPU Installation | | | | | | | | | | | |
For the installation of Intel 1155-Pin CPU, | | | | | | | | | | | |
please follow the steps below. | | | | | | | | | | | |
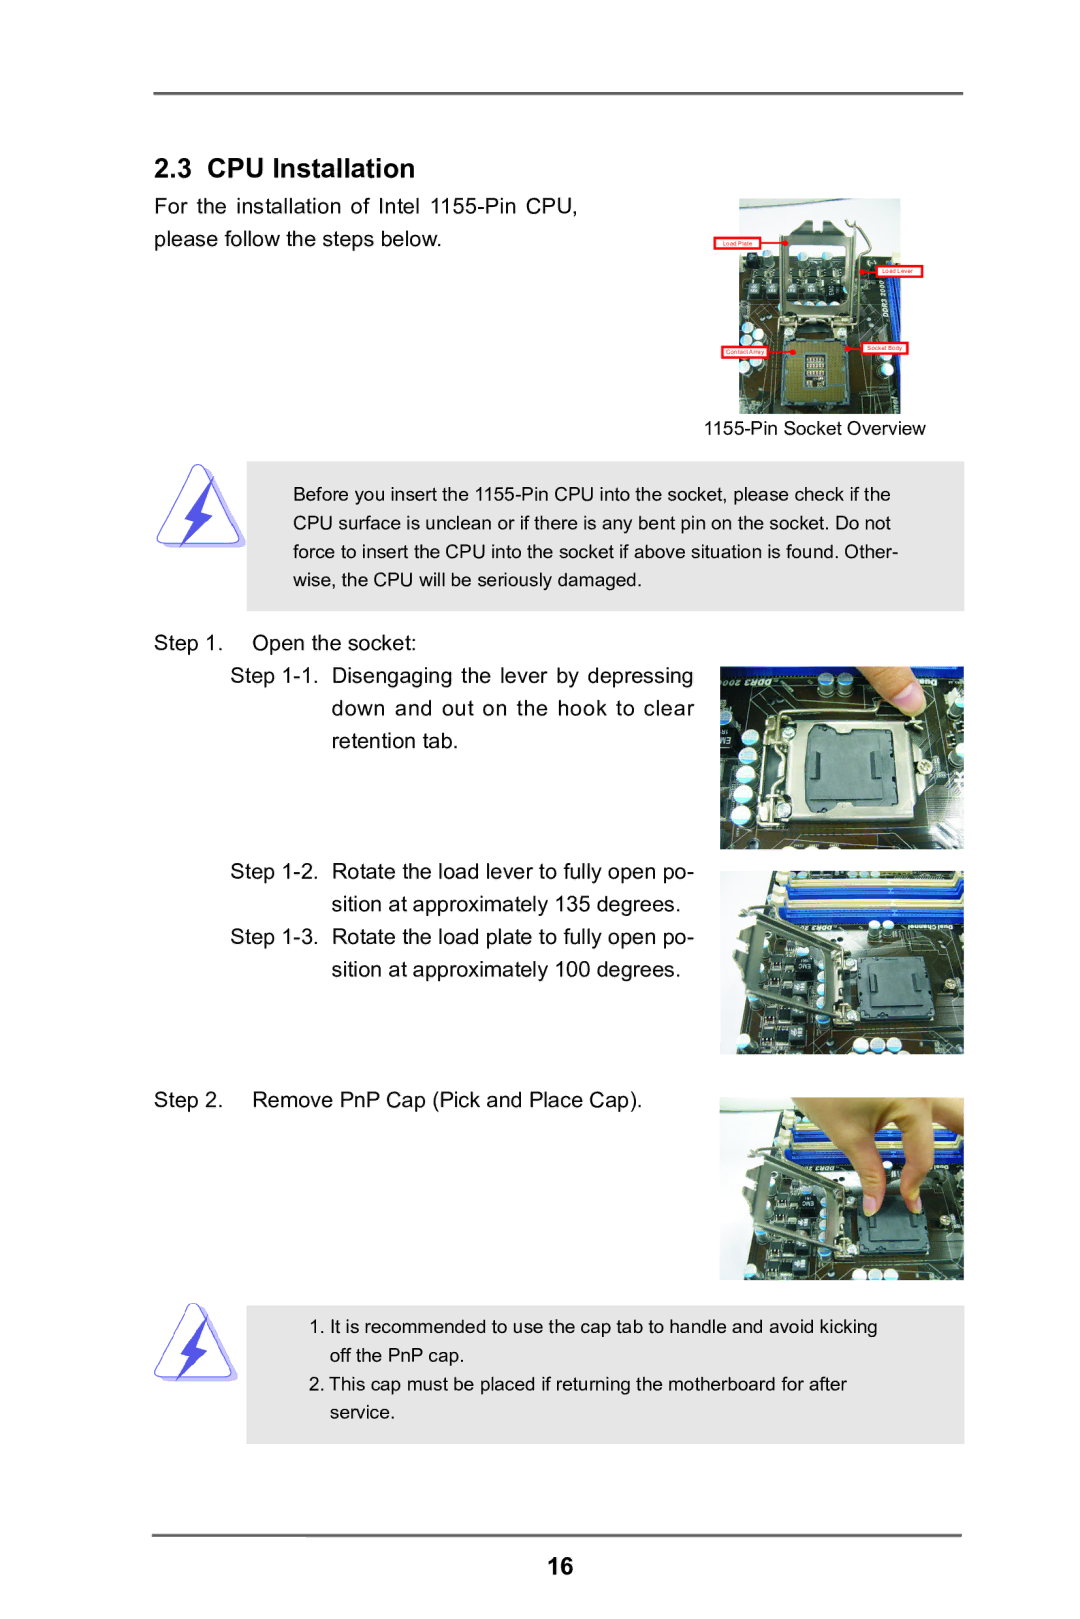
| | Load Plate | | | | | | | | |
| | | | |
| | | | | | | | | |
| | | | | | | | | | | |
| | | | | | | | | Load Lever | |
| | | | | | | | | | | |
| | | | | | | | Socket Body | | |
| | | Contact Array | | | | | | | |
| | | | | | | | | | | |
| 1155-Pin Socket Overview |
Before you insert the 1155-Pin CPU into the socket, please check if the CPU surface is unclean or if there is any bent pin on the socket. Do not force to insert the CPU into the socket if above situation is found. Other- wise, the CPU will be seriously damaged.
Step 1. Open the socket:
Step 1-1. Disengaging the lever by depressing down and out on the hook to clear retention tab.
Step 1-2. Rotate the load lever to fully open po- sition at approximately 135 degrees.
Step 1-3. Rotate the load plate to fully open po- sition at approximately 100 degrees.
Step 2. Remove PnP Cap (Pick and Place Cap).
1.It is recommended to use the cap tab to handle and avoid kicking off the PnP cap.
2.This cap must be placed if returning the motherboard for after service.

