DANGER. Before using adapter as illustrated, be certain that center screw of outlet plate is grounded. The
MOUNTING
The Battery Charger may be set on a table or a shelf. Do not set charger on floor. It should be mounted such that the air intake louvers are at least 18” from the floor. Regardless of how t is placed, the top and side louvers of the unit must not be blocked. This is a convection cooled charger and blocking the louvers will damage the unit. When locating the unit. take into account the number of batteries to be recharged and location of the recharg- ing racks~ Never place the charger such that battery acid or water may be spilled in the top of the unit. Never place the unit directly over the batteries to be charged Fumes caused by gassing batteries wilt be drawn through the charger by convection and cause damage to the unit. When connecting the charger to a charging rack, always be sure the connections are made in the correct polarity. The positive lead on the charger is marked with a red band.
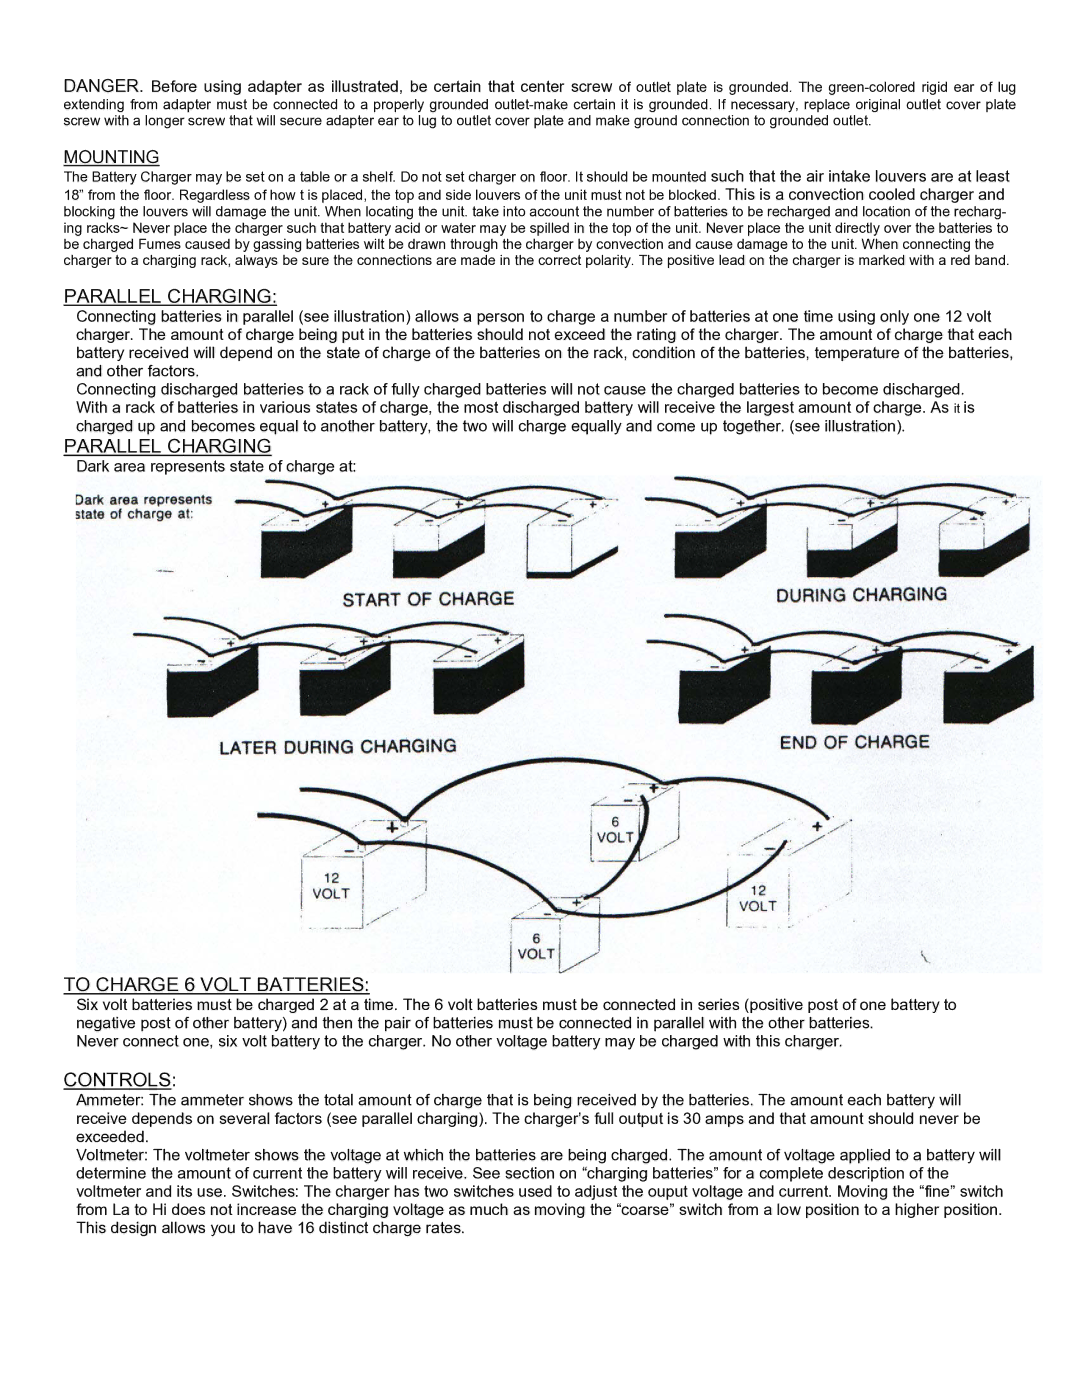
PARALLEL CHARGING:
Connecting batteries in parallel (see illustration) allows a person to charge a number of batteries at one time using only one 12 volt charger. The amount of charge being put in the batteries should not exceed the rating of the charger. The amount of charge that each battery received will depend on the state of charge of the batteries on the rack, condition of the batteries, temperature of the batteries, and other factors.
Connecting discharged batteries to a rack of fully charged batteries will not cause the charged batteries to become discharged. With a rack of batteries in various states of charge, the most discharged battery will receive the largest amount of charge. As it is charged up and becomes equal to another battery, the two will charge equally and come up together. (see illustration).
PARALLEL CHARGING
Dark area represents state of charge at:
TO CHARGE 6 VOLT BATTERIES:
Six volt batteries must be charged 2 at a time. The 6 volt batteries must be connected in series (positive post of one battery to negative post of other battery) and then the pair of batteries must be connected in parallel with the other batteries.
Never connect one, six volt battery to the charger. No other voltage battery may be charged with this charger.
CONTROLS:
Ammeter: The ammeter shows the total amount of charge that is being received by the batteries. The amount each battery will receive depends on several factors (see parallel charging). The charger’s full output is 30 amps and that amount should never be exceeded.
Voltmeter: The voltmeter shows the voltage at which the batteries are being charged. The amount of voltage applied to a battery will determine the amount of current the battery will receive. See section on “charging batteries” for a complete description of the voltmeter and its use. Switches: The charger has two switches used to adjust the ouput voltage and current. Moving the “fine” switch from La to Hi does not increase the charging voltage as much as moving the “coarse” switch from a low position to a higher position. This design allows you to have 16 distinct charge rates.