2.3Connecting the cables
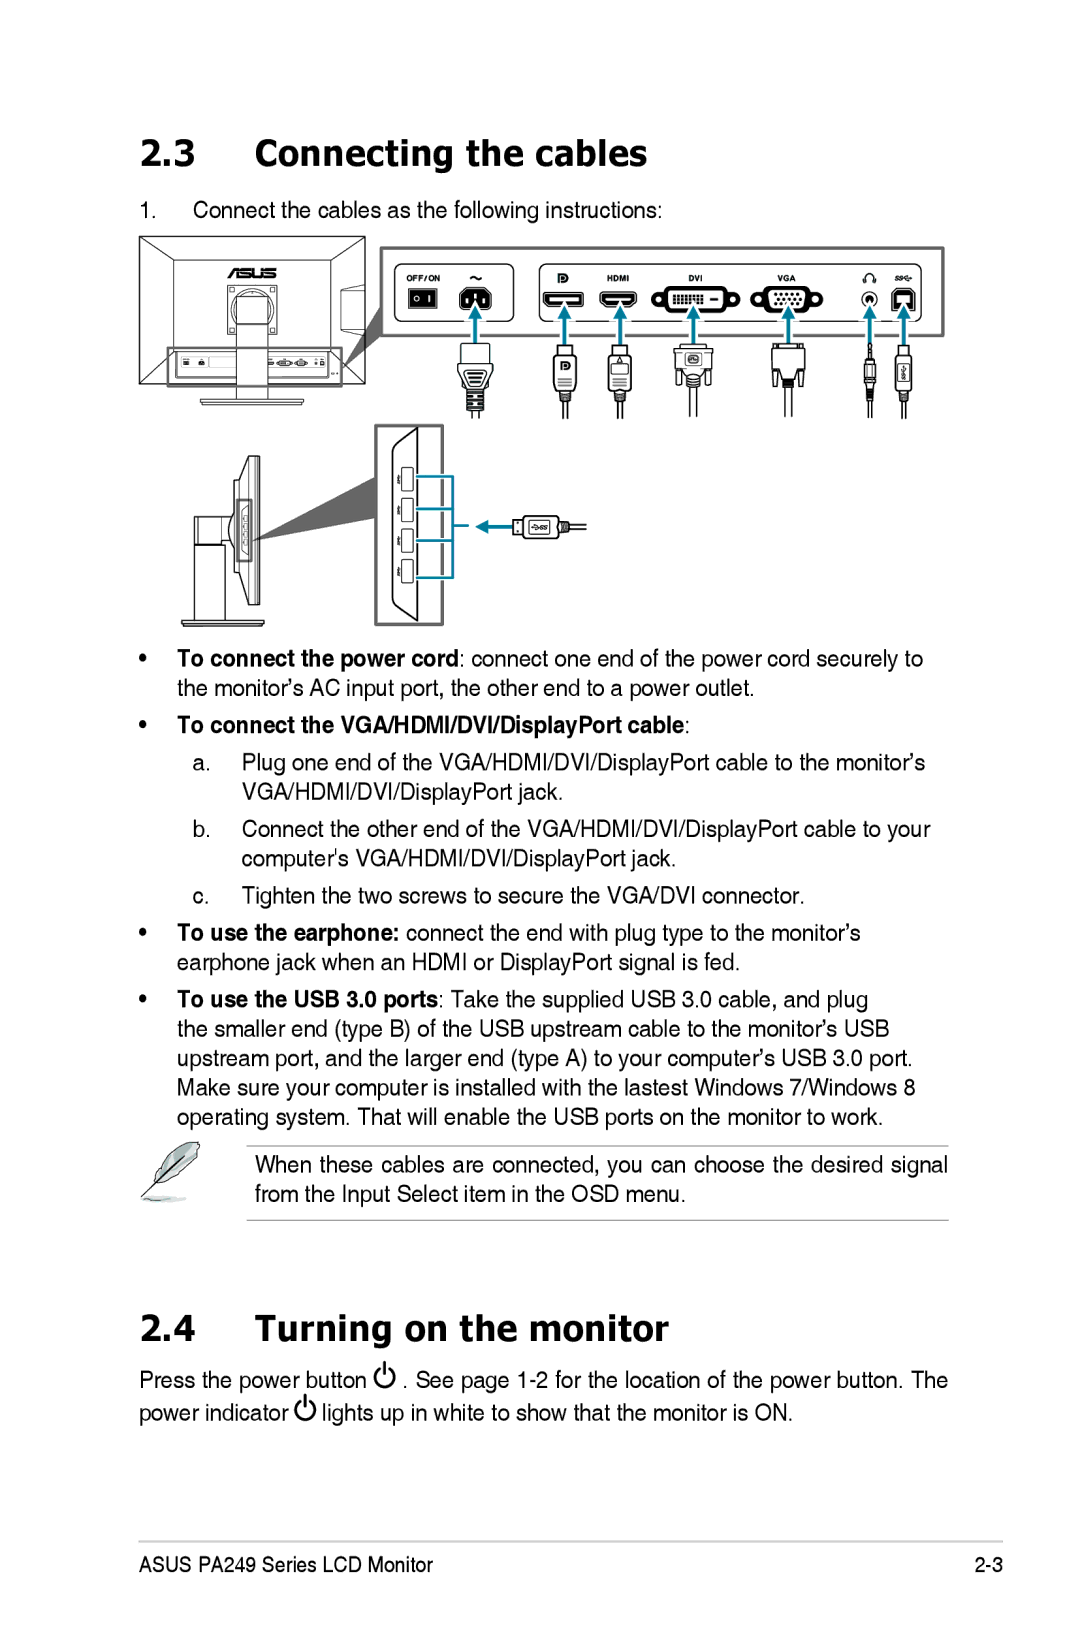
1.Connect the cables as the following instructions:
•To connect the power cord: connect one end of the power cord securely to the monitor’s AC input port, the other end to a power outlet.
•To connect the VGA/HDMI/DVI/DisplayPort cable:
a.Plug one end of the VGA/HDMI/DVI/DisplayPort cable to the monitor’s VGA/HDMI/DVI/DisplayPort jack.
b.Connect the other end of the VGA/HDMI/DVI/DisplayPort cable to your computer's VGA/HDMI/DVI/DisplayPort jack.
c.Tighten the two screws to secure the VGA/DVI connector.
•To use the earphone: connect the end with plug type to the monitor’s earphone jack when an HDMI or DisplayPort signal is fed.
•To use the USB 3.0 ports: Take the supplied USB 3.0 cable, and plug the smaller end (type B) of the USB upstream cable to the monitor’s USB upstream port, and the larger end (type A) to your computer’s USB 3.0 port. Make sure your computer is installed with the lastest Windows 7/Windows 8 operating system. That will enable the USB ports on the monitor to work.
When these cables are connected, you can choose the desired signal from the Input Select item in the OSD menu.
2.4Turning on the monitor
Press the power button ![]() . See page
. See page ![]() lights up in white to show that the monitor is ON.
lights up in white to show that the monitor is ON.
ASUS PA249 Series LCD Monitor |