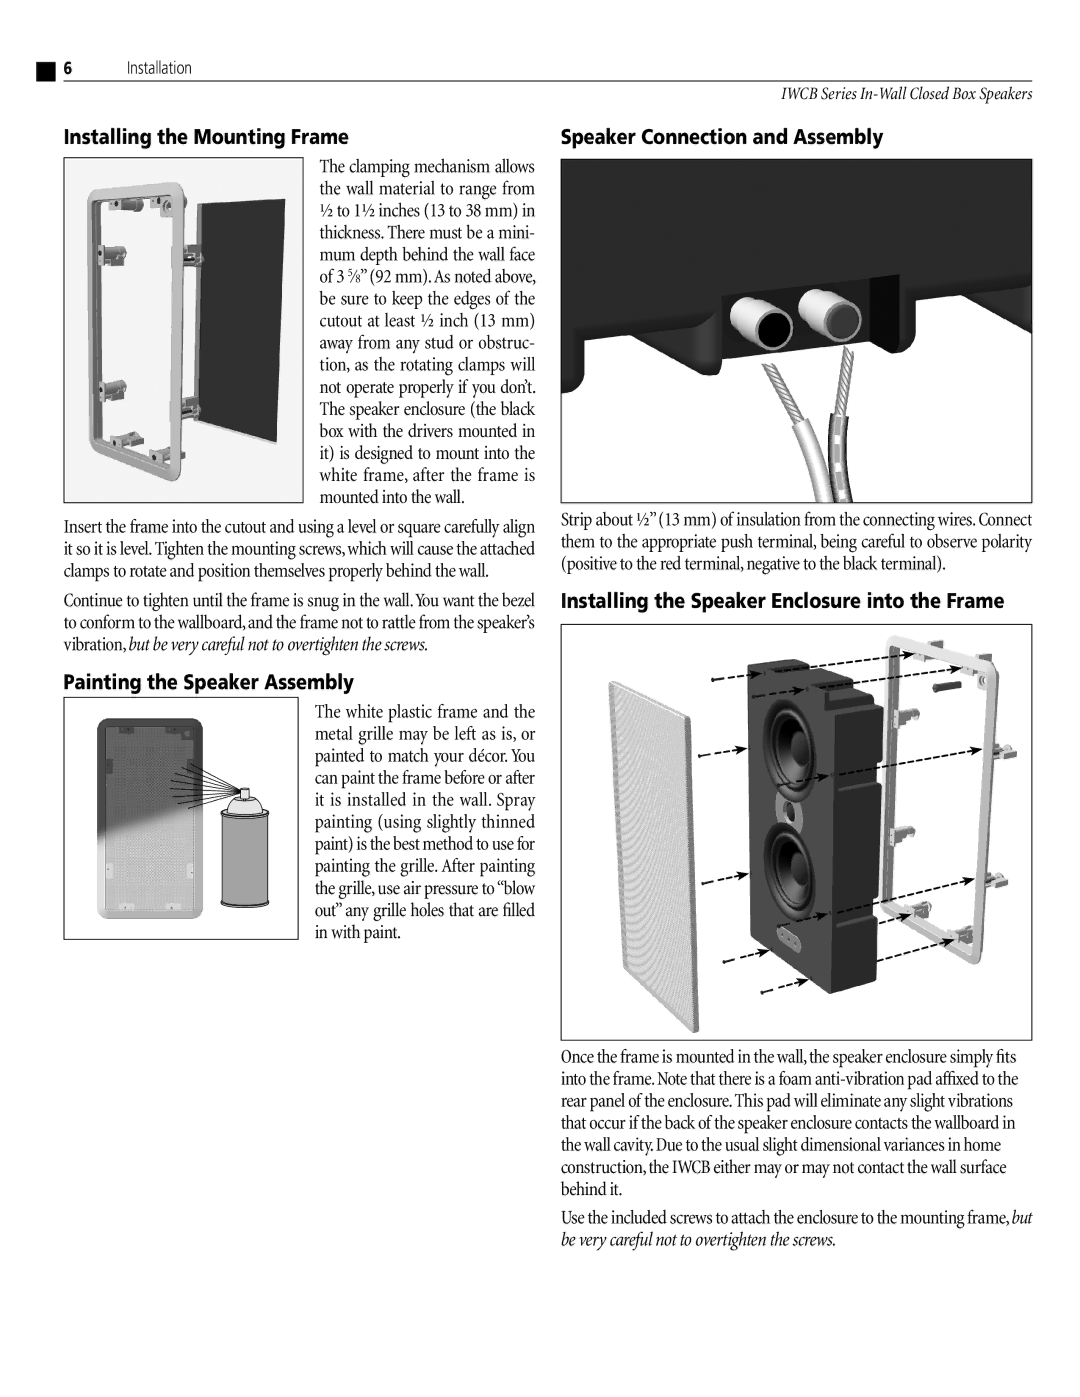
IWCB-626, IWCB-52, IWCB-525 specifications
Atlantic Technology has established itself as a leading name in the world of high-performance loudspeakers, particularly with its innovative in-wall and in-ceiling speaker models. Among these, the IWCB-525, IWCB-52, and IWCB-626 stand out for their blend of exceptional audio quality, advanced technology, and design flexibility.Starting with the IWCB-525, this in-wall speaker is designed to deliver unparalleled clarity and depth in sound. It features a 5.25-inch polypropylene woofer, which provides a rich bass response, while its 1-inch silk dome tweeter ensures pristine high frequencies. One of its notable characteristics is the use of Atlantic Technology's patented Waveguide technology, which optimizes the speaker's dispersion pattern, allowing for an immersive listening experience across a wide area. Additionally, the IWCB-525 is equipped with a built-in high-pass filter, which helps in enhancing the speaker's overall performance, particularly in passive home theater systems.
Next up is the IWCB-52. This model offers a smaller form factor without compromising audio quality. It boasts a 5.25-inch woofer paired with a 1-inch silk dome tweeter, similar to its counterpart, but with a design that makes it more suitable for smaller rooms or discreet installations. The IWCB-52 also incorporates Atlantic Technology's advanced ported enclosure design, which provides deeper bass extension and greater efficiency, making it a solid choice for both music and movie soundtracks. Its pre-construction brackets allow for easy installation in new constructions, ensuring it integrates seamlessly into any environment.
Lastly, the IWCB-626 brings a premium experience to the table. This model features a larger 6.5-inch woofer, known for producing robust low frequencies, complemented by a 1-inch tweeter for high-frequency clarity. The IWCB-626’s unique design includes a dual voice coil that improves power handling and dynamic range, making it perfect for high-energy audio environments. It also features a paintable grille that enables customization to match the décor of any room.
In conclusion, the Atlantic Technology IWCB-525, IWCB-52, and IWCB-626 are exemplary in-wall speaker options that cater to a variety of audio preferences and settings. With their cutting-edge technologies, quality materials, and flexible installation options, these models ensure that audiophiles can enjoy an exceptional listening experience without compromising on aesthetics. Whether for a home theater setup or a whole-house audio solution, Atlantic Technology's in-wall speakers deliver sound performance that truly impresses.