INSTALLATION
❒ Turn power off at circuit breaker. |
❒ On existing installations, remove the light |
from the top of the post. Keep the wire |
connectors to make the connections to |
the top of the sensor. |
CAUTION: When handling the sensor |
be careful not to pinch or distort the lens. |
You may break the seal and cause wind- |
blown rain to enter the sensor. |
❒ Remove the three screws around the |
bottom edge of the sensor. Save these |
screws for later use. |
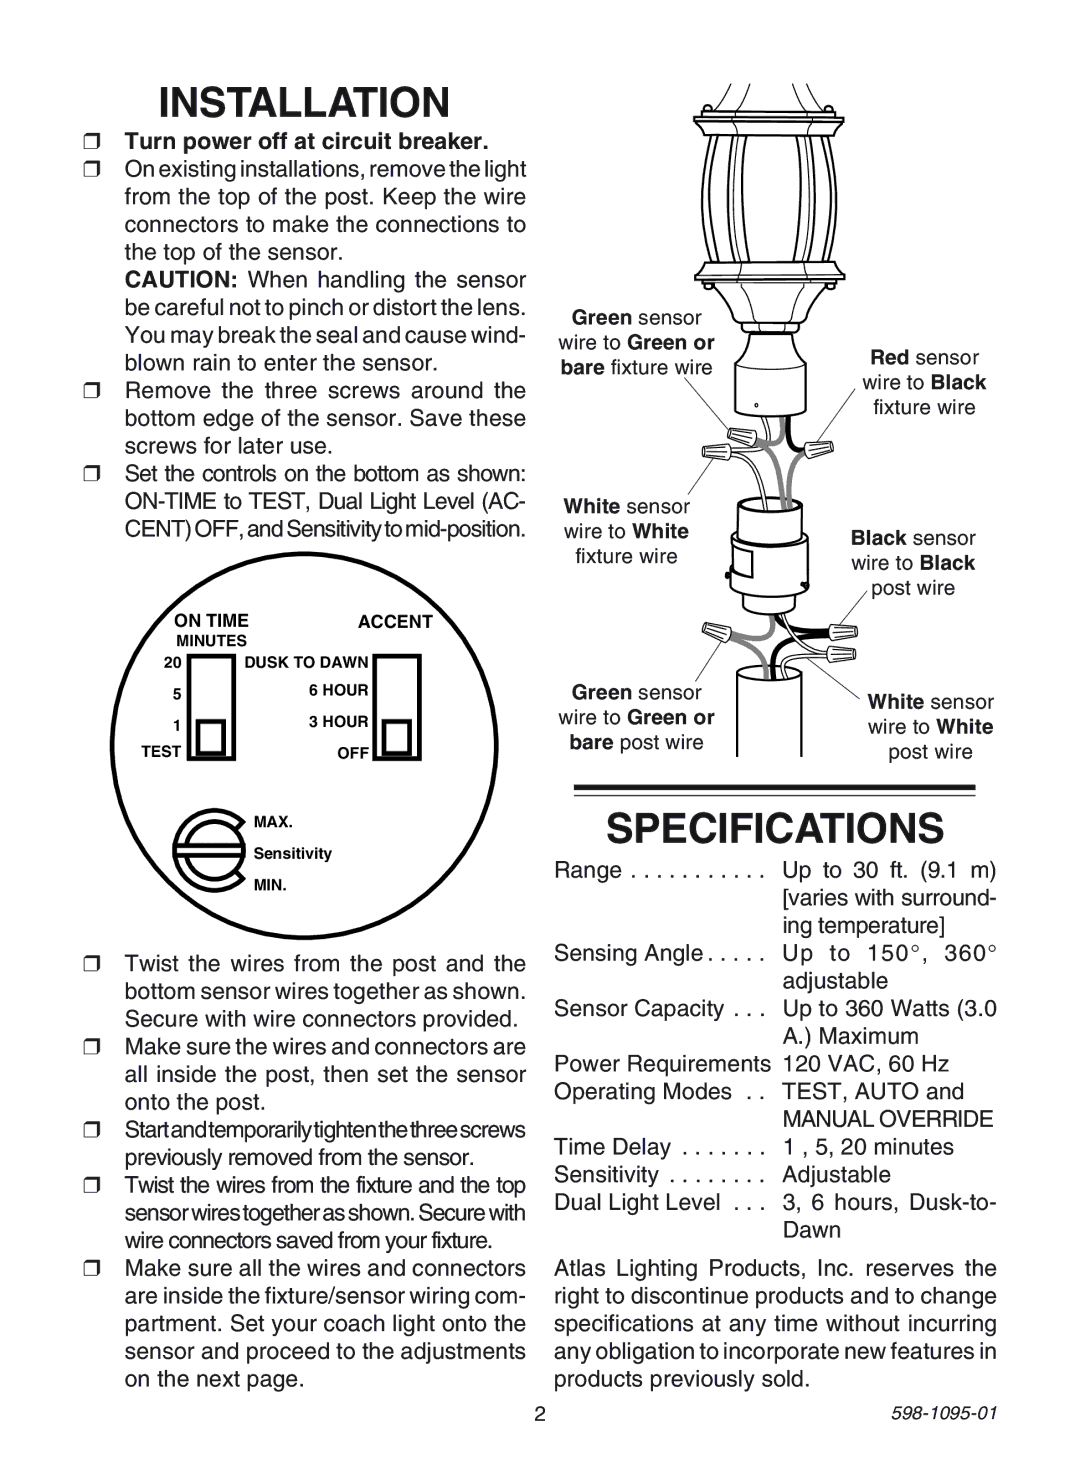
❒ Set the controls on the bottom as shown: |
|
Green sensor ![]() wire to Green or
wire to Green or
bare fixture wire | Red sensor | |
wire to Black | ||
| ||
| fixture wire | |
White sensor |
|
CENT) OFF, and Sensitivity to |
ON TIME | ACCENT | |
MINUTES |
| |
20 | DUSK TO DAWN | |
5 |
| 6 HOUR |
1 |
| 3 HOUR |
TEST |
| OFF |
wire to White
fixture wire
Green sensor
wire to Green or
bare post wire
Black sensor wire to Black post wire
White sensor wire to White post wire
MAX.
Sensitivity
MIN.
❒Twist the wires from the post and the bottom sensor wires together as shown. Secure with wire connectors provided.
❒Make sure the wires and connectors are all inside the post, then set the sensor onto the post.
❒Startandtemporarilytightenthethreescrews previously removed from the sensor.
❒Twist the wires from the fixture and the top sensorwirestogetherasshown.Securewith wire connectors saved from your fixture.
❒Make sure all the wires and connectors are inside the fixture/sensor wiring com- partment. Set your coach light onto the sensor and proceed to the adjustments on the next page.
SPECIFICATIONS
Range . . . . . . . . . . . Up to 30 ft. (9.1 m) [varies with surround- ing temperature]
Sensing Angle . . . . . Up to 150°, 360° adjustable
Sensor Capacity . . . Up to 360 Watts (3.0 A.) Maximum
Power Requirements 120 VAC, 60 Hz Operating Modes . . TEST, AUTO and
MANUAL OVERRIDE
Time Delay . . . . . . . 1 , 5, 20 minutes Sensitivity . . . . . . . . Adjustable
Dual Light Level . . . 3, 6 hours,
Atlas Lighting Products, Inc. reserves the right to discontinue products and to change specifications at any time without incurring any obligation to incorporate new features in products previously sold.
2 |
