
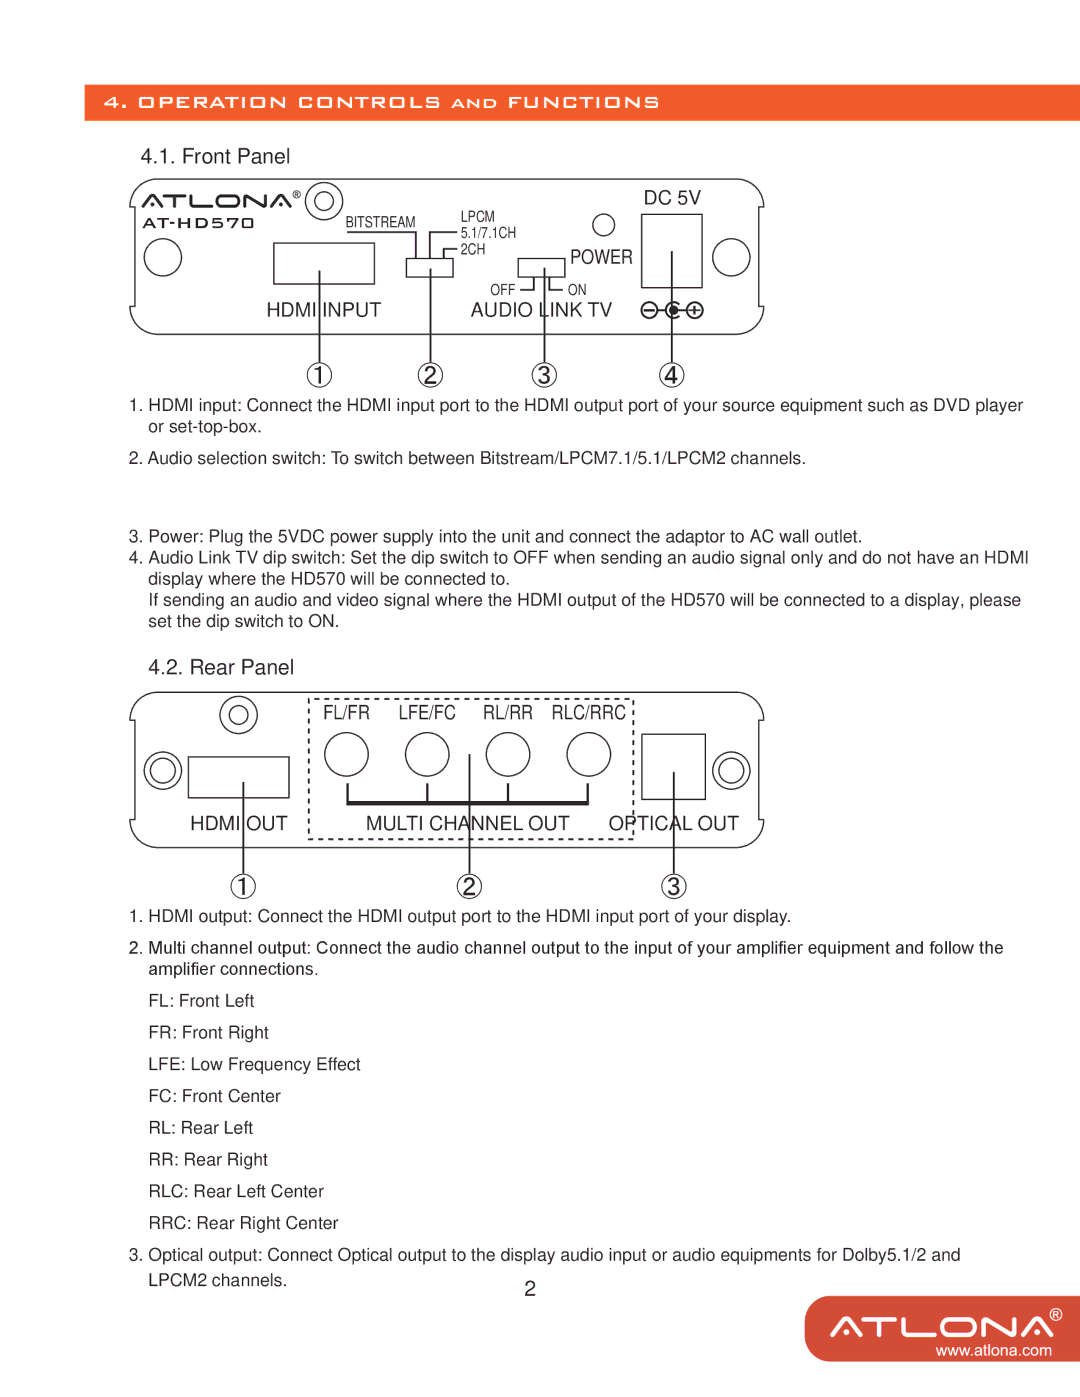
AT-HD570 specifications
The Atlona AT-HD570 is a versatile HDMI to HDBaseT receiver designed to facilitate high-quality video and audio transmission over extended distances. This innovative device is a key component in modern audiovisual installations, ideal for commercial environments, educational settings, and residential systems that require reliable connections from remote sources to display devices.One of the standout features of the AT-HD570 is its ability to transmit HDMI signals over long distances—up to 328 feet (100 meters) at 1080p resolution. This is achieved through the use of HDBaseT technology, which enables the extension of video, audio, control, and even power over a single Ethernet cable. This capability simplifies installation and reduces the need for multiple cables, making it a cost-effective solution for AV professionals.
The AT-HD570 supports a wide range of video resolutions, including 4K (3840x2160) at 30 Hz and 1080p at 60 Hz, ensuring that it can handle modern high-definition content. Additionally, it is compatible with various audio formats, including PCM, DTS-HD, and Dolby TrueHD, making it suitable for diverse audio requirements. The device features CEC (Consumer Electronics Control) support, allowing for simplified control of connected devices while streamlining the overall user experience.
Built with reliability in mind, the AT-HD570 features robust steel housing that ensures durability and reduces the risk of damage in busy environments. The device also comes with an intuitive and easy-to-use interface, simplifying setup and configuration. Its compact design allows for flexible placement, while the rear panel connectivity options provide versatility for various installation scenarios.
The Atlona AT-HD570 is engineered to integrate seamlessly with other Atlona products, providing an extensive solution for any AV system. As a part of Atlona's comprehensive line of products, it enhances system design flexibility, making it an essential choice for integrators and installers looking for efficient and effective HDMI extension solutions. Overall, the AT-HD570 stands out as an essential tool for delivering high-quality AV performance in any setting.