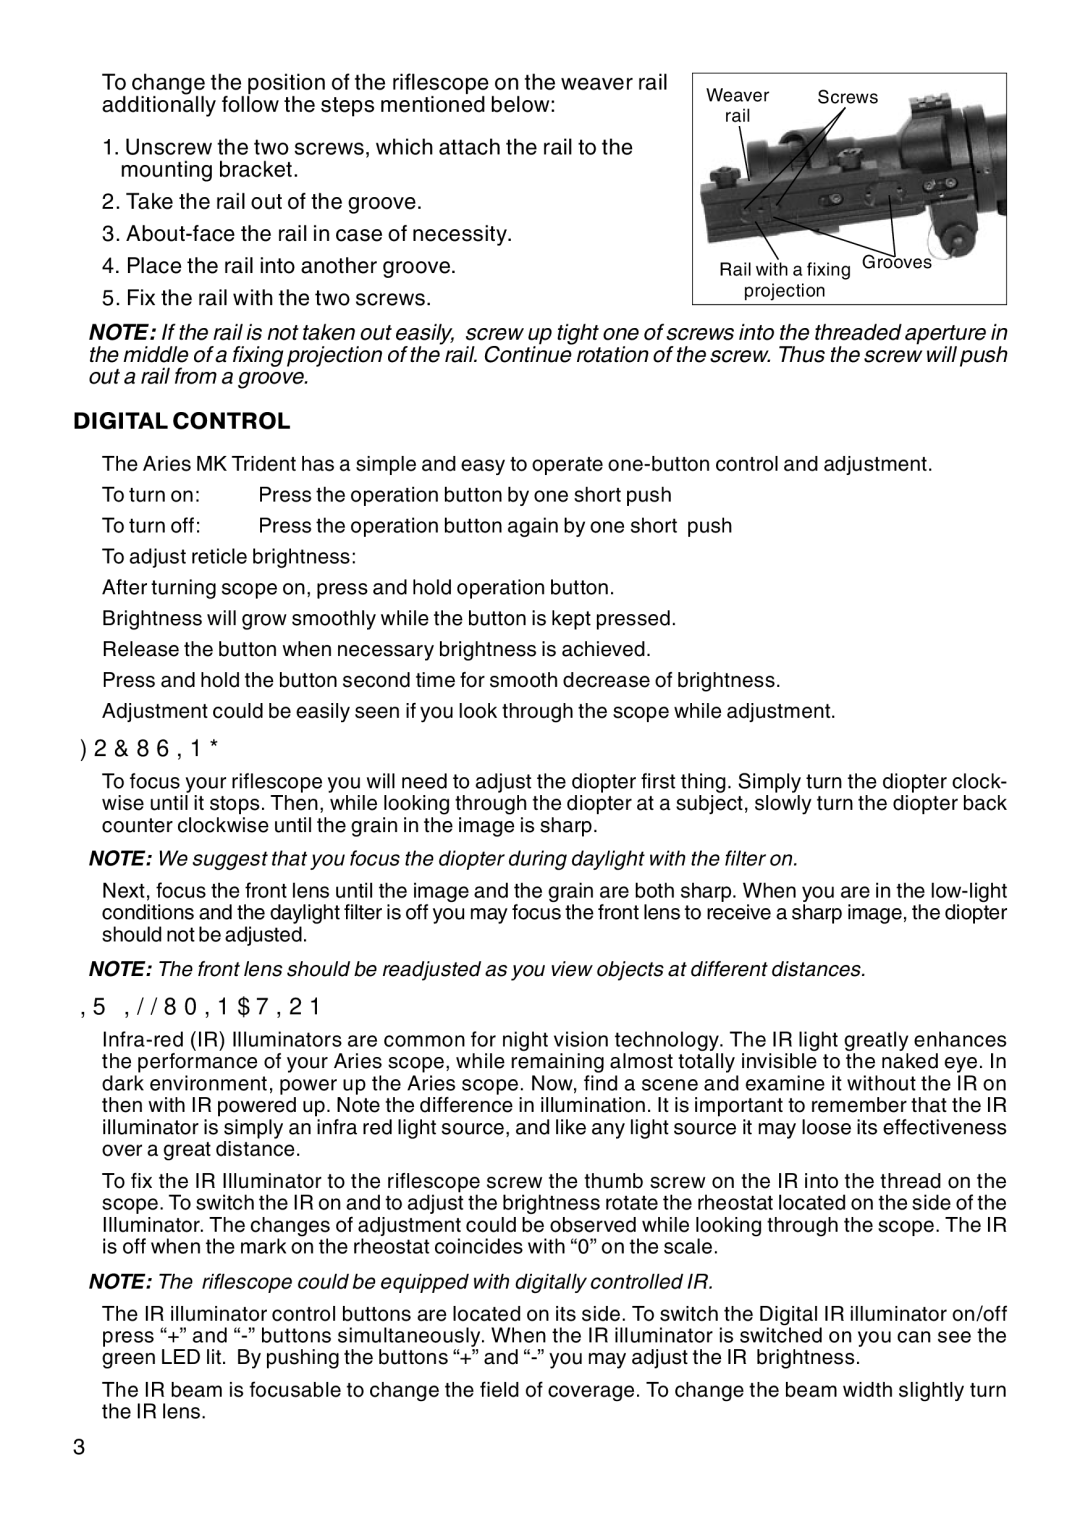
To change the position of the riflescope on the weaver rail additionally follow the steps mentioned below:
1.Unscrew the two screws, which attach the rail to the mounting bracket.
2.Take the rail out of the groove.
3.
4.Place the rail into another groove.
5.Fix the rail with the two screws.
Weaver Screws rail
Rail with a fixing Grooves projection
NOTE: If the rail is not taken out easily, screw up tight one of screws into the threaded aperture in the middle of a fixing projection of the rail. Continue rotation of the screw. Thus the screw will push out a rail from a groove.
DIGITAL CONTROL
The Aries MK Trident has a simple and easy to operate
To turn on: | Press the operation button by one short push |
To turn off: | Press the operation button again by one short push |
To adjust reticle brightness:
After turning scope on, press and hold operation button. Brightness will grow smoothly while the button is kept pressed. Release the button when necessary brightness is achieved.
Press and hold the button second time for smooth decrease of brightness. Adjustment could be easily seen if you look through the scope while adjustment.
FOCUSING
To focus your riflescope you will need to adjust the diopter first thing. Simply turn the diopter clock- wise until it stops. Then, while looking through the diopter at a subject, slowly turn the diopter back counter clockwise until the grain in the image is sharp.
NOTE: We suggest that you focus the diopter during daylight with the filter on.
Next, focus the front lens until the image and the grain are both sharp. When you are in the
NOTE: The front lens should be readjusted as you view objects at different distances.
IR ILLUMINATION
To fix the IR Illuminator to the riflescope screw the thumb screw on the IR into the thread on the scope. To switch the IR on and to adjust the brightness rotate the rheostat located on the side of the Illuminator. The changes of adjustment could be observed while looking through the scope. The IR is off when the mark on the rheostat coincides with “0” on the scale.
NOTE: The riflescope could be equipped with digitally controlled IR.
The IR illuminator control buttons are located on its side. To switch the Digital IR illuminator on/off press “+” and
The IR beam is focusable to change the field of coverage. To change the beam width slightly turn the IR lens.
3