TH106-A-347S4 specifications
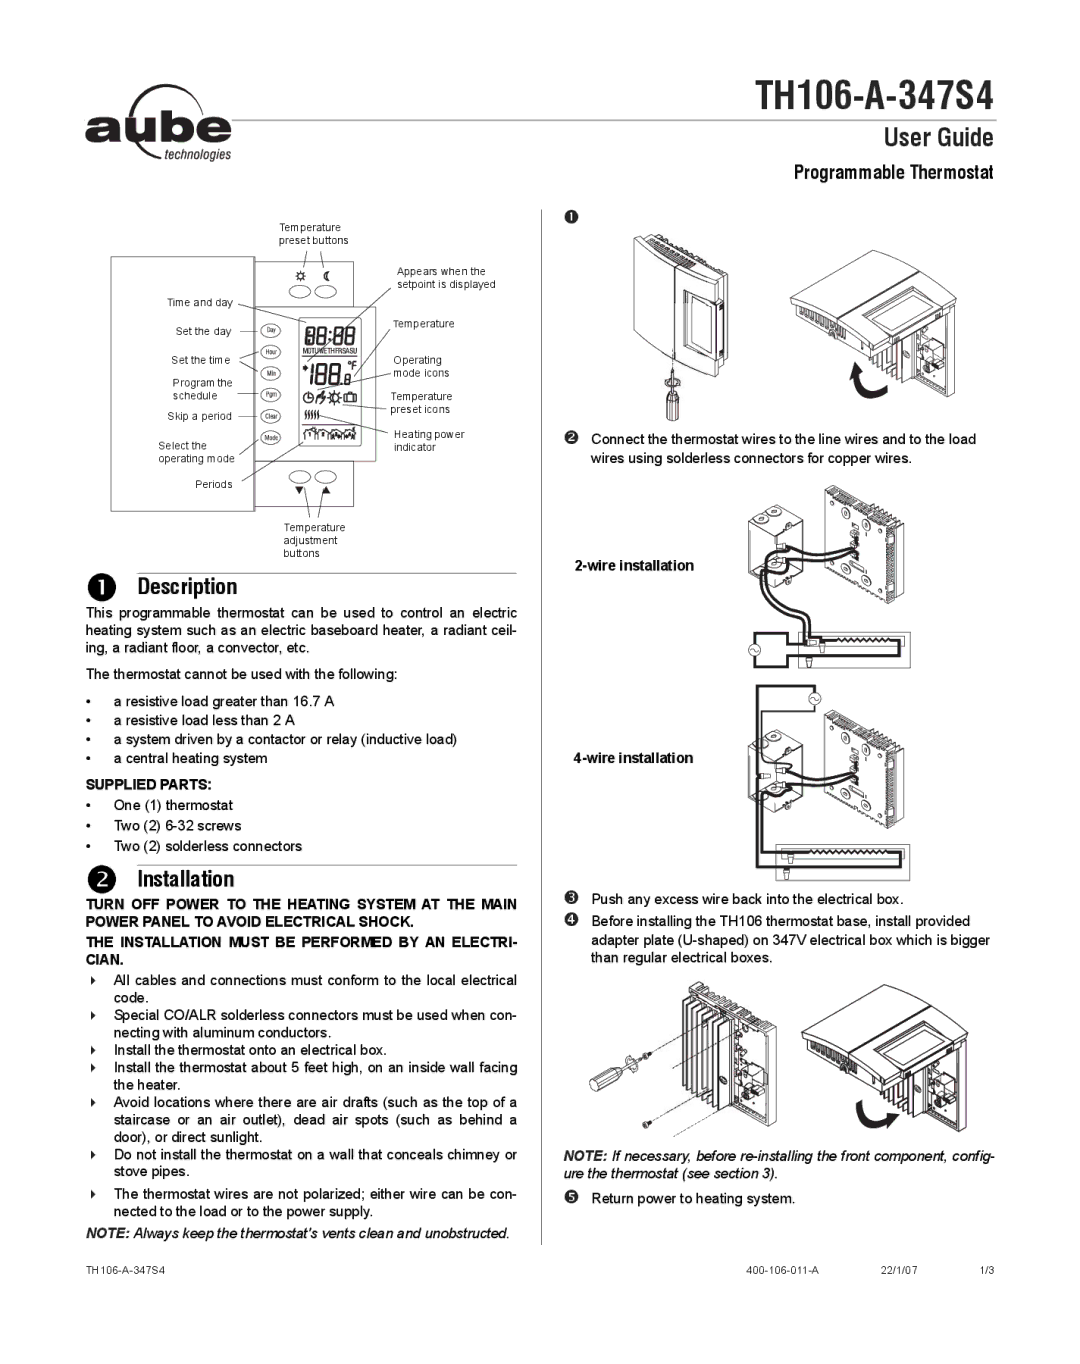
Aube Technologies has made a significant mark in the field of intelligent heating control systems with its TH106-A-347S4 thermostat. This model is designed specifically for high-performance temperature management, ensuring both comfort and efficiency in residential settings.One of the main features of the TH106-A-347S4 is its user-friendly interface. The sleek, modern design features a large digital display that provides clear visual feedback regarding current temperature settings and modes. Users can easily navigate through the options with simple buttons, making it accessible even for those less technologically inclined.
The thermostat is equipped with advanced programming capabilities, allowing users to tailor heating schedules to fit their specific needs. With a 7-day programmable feature, homeowners can set different temperature profiles for each day of the week, maximizing comfort when they are home while conserving energy when they are away. This flexibility is crucial for optimizing energy use and minimizing utility costs.
In terms of technology, the TH106-A-347S4 employs precise temperature regulation. Integrated with a sophisticated sensor, it ensures that the temperature is maintained accurately, with minimal fluctuations. This level of precision not only enhances comfort but also extends the lifespan of heating systems by preventing unnecessary cycling.
Another notable characteristic of this model is its compatibility with various heating systems, including electric baseboard heaters and other types of resistance heating. It operates on a voltage of 347 volts, making it an excellent choice for both residential and commercial applications where higher voltage systems are present.
The TH106-A-347S4 promotes energy efficiency, particularly with its eco-conscious programming options. This feature enables users to reduce energy consumption during periods of inactivity, aligning with modern sustainability goals and potentially lowering carbon footprints.
In addition, the unit is designed for easy installation, with straightforward wiring instructions allowing users to set it up without professional assistance in many cases. Its robust construction ensures durability, making it a long-term investment in home comfort.
Overall, Aube Technologies' TH106-A-347S4 thermometer stands out with its combination of user-friendly features, advanced programming, precise temperature control, and energy efficiency, making it an ideal choice for modern heating needs.