
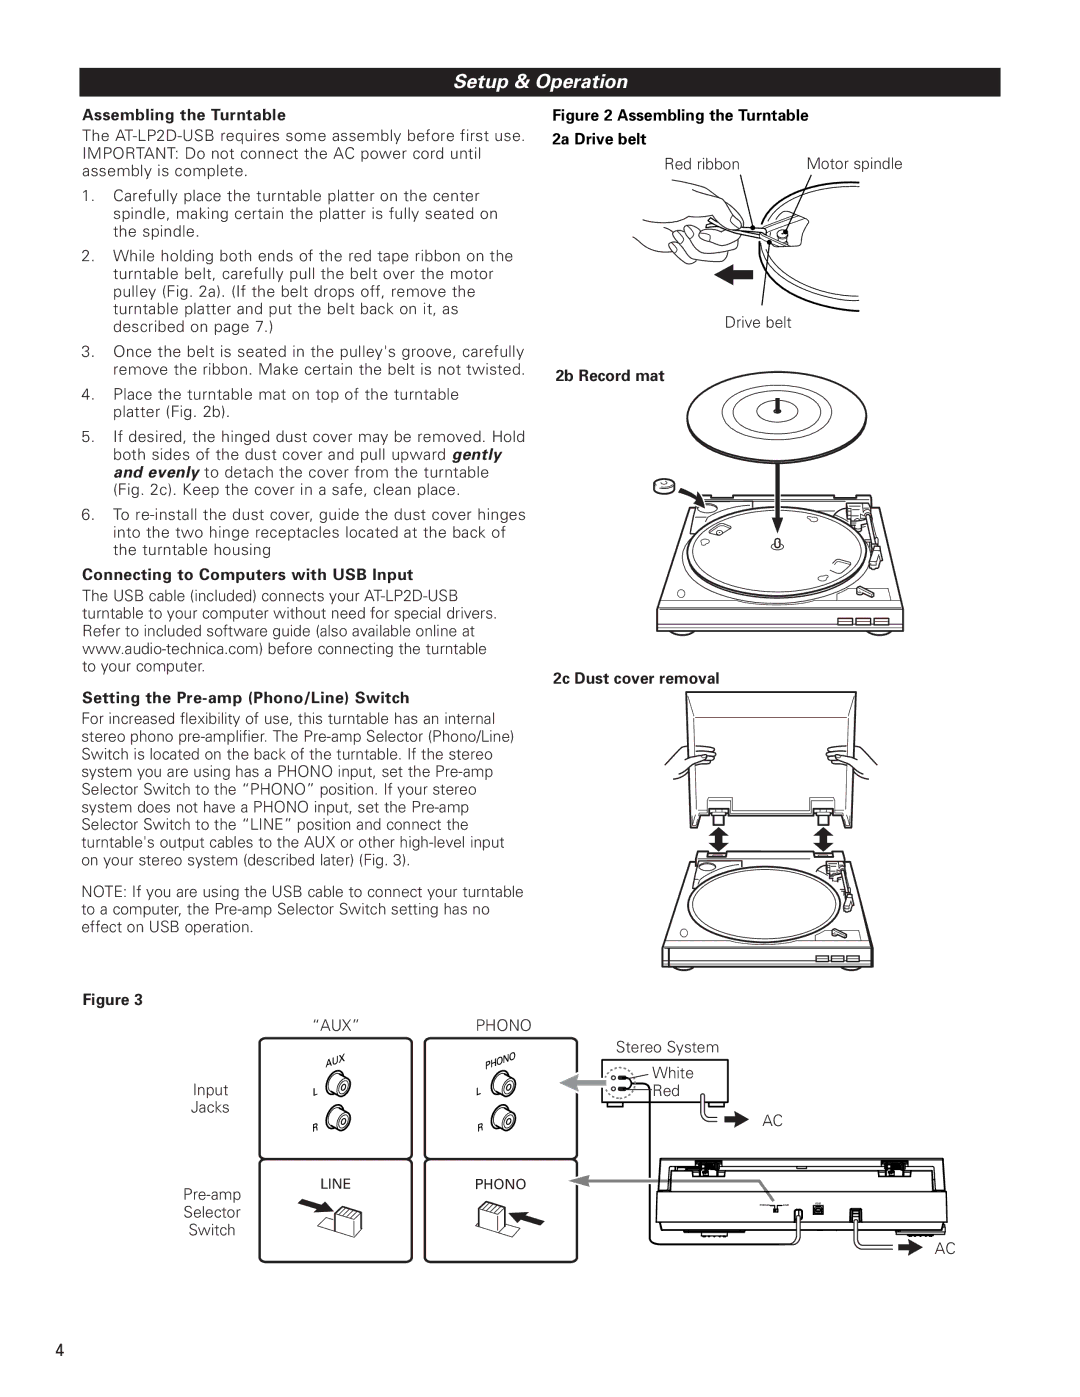
AT-LP2D-USB specifications
The Audio-Technica AT-LP2D-USB is a versatile and reliable turntable designed for vinyl enthusiasts who appreciate both classic vinyl playback and modern digital convenience. As part of Audio-Technica’s renowned lineup of audio products, the AT-LP2D-USB brings together quality craftsmanship, innovative technology, and user-friendly features to enhance the listening experience.At its core, the AT-LP2D-USB boasts a high-fidelity, belt-driven mechanism that minimizes vibration, ensuring optimum sound quality. This direct drive system provides a stable platform for playback, which is essential for maintaining the integrity of the audio signal. The turntable features a durable and solid plinth, effectively reducing unwanted resonance that can affect sound clarity.
One of the standout features of the AT-LP2D-USB is its USB output. This digital connectivity port allows users to easily convert their vinyl records into digital audio files, which can be stored on a computer or other devices. The inclusion of an Audacity software package simplifies the digitization process, making it accessible even for those new to recording and editing audio.
Another notable characteristic is the AT-VM95E Dual Moving Magnet cartridge that comes with the turntable. This cartridge is designed to deliver excellent tracking and playback accuracy, ensuring that the rich details of your vinyl records are preserved. The elliptical stylus offers superior tracing capability compared to traditional spherical stylus designs, providing more depth and a fuller sound.
The AT-LP2D-USB is also equipped with a built-in switchable phono preamp. This feature allows users to connect the turntable directly to standard audio systems that lack a dedicated phono input, broadening its compatibility with various audio setups. Furthermore, the turntable provides a selectable speed option between 33 1/3 and 45 RPM, accommodating a wide variety of vinyl formats.
Constructed with a heavy-duty base to minimize skip and vibration, the AT-LP2D-USB comes with adjustable feet that ensure proper leveling on any surface, contributing to the overall fidelity of the playback. This combination of features and technology makes the Audio-Technica AT-LP2D-USB an appealing choice for both traditional vinyl collectors and modern music lovers seeking to seamlessly blend analog and digital formats.