AT-LP60 specifications
The Audio-Technica AT-LP60 is an acclaimed automatic belt-drive turntable designed to deliver high-quality audio performance while making vinyl playback accessible to all users. Whether you're a seasoned audiophile or a casual listener, the AT-LP60 offers a blend of user-friendly features and sophisticated technology.One of the standout characteristics of the AT-LP60 is its fully automatic operation. With the simple push of a button, the tonearm engages and automatically lowers onto your vinyl record, enabling a seamless listening experience. This convenience makes it particularly appealing to those new to vinyl, as it simplifies the process compared to manual turntables.
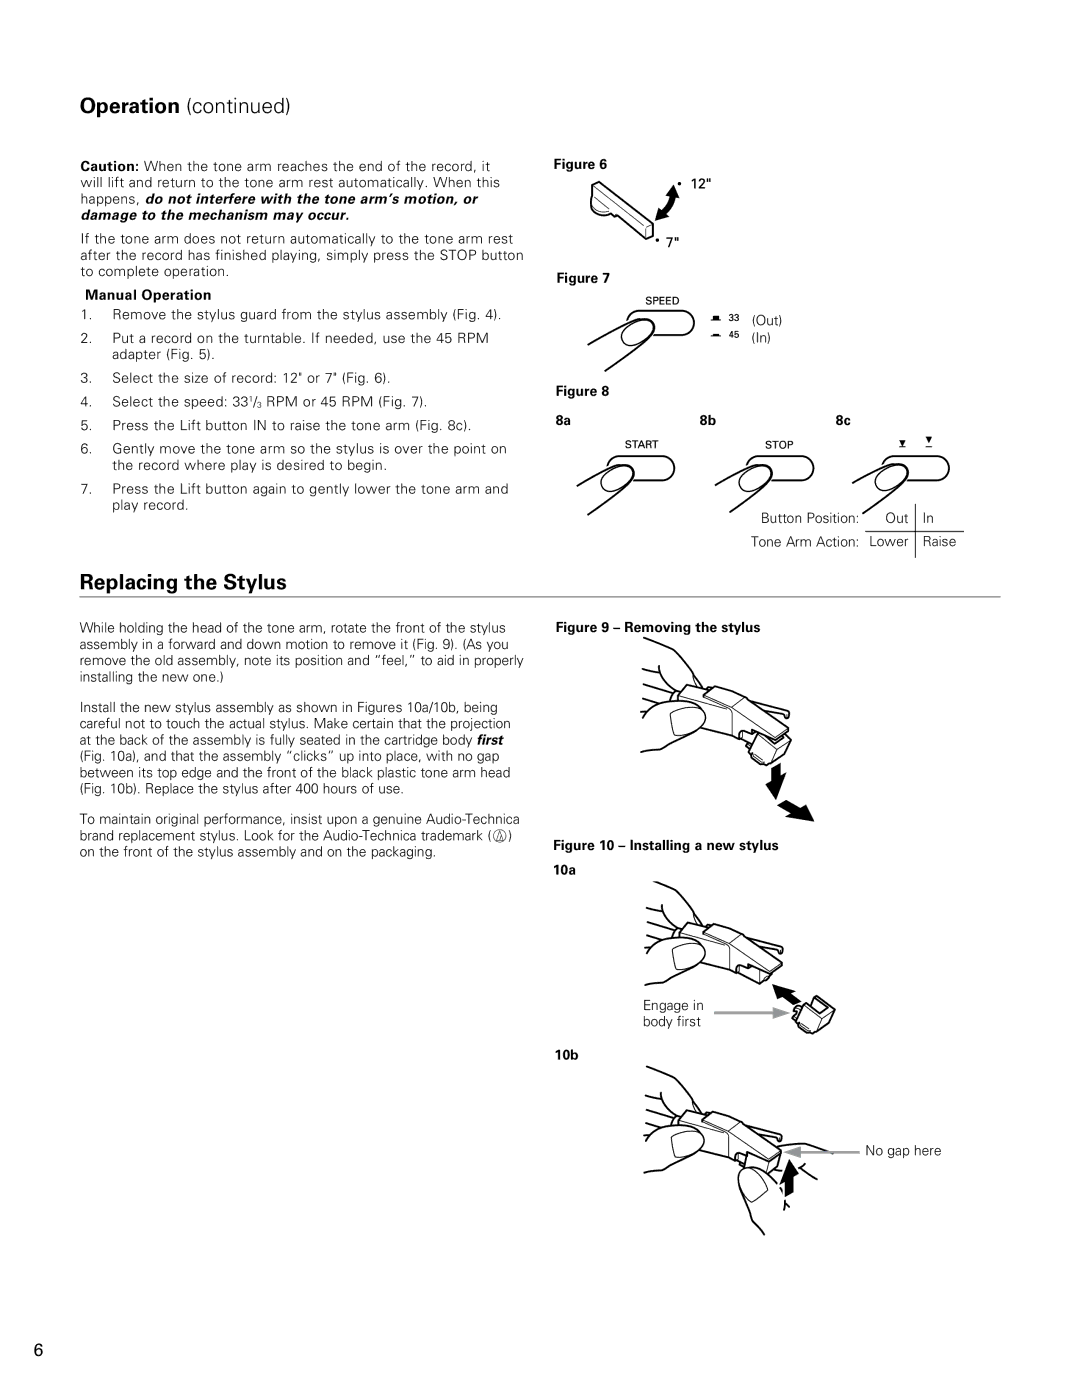
The turntable features a precision-engineered belt-drive system, which plays records at both 33 1/3 and 45 RPM speeds. The belt-drive configuration helps reduce vibrations, ensuring that your records sound crisp and clear. The AT-LP60 is equipped with an integrated Dual Magnet cartridge and a replaceable stylus, which provides excellent sound reproduction while allowing users to easily upgrade or replace the stylus when necessary.
Incorporating cutting-edge technology, the AT-LP60 also comes with a built-in phono pre-amplifier. This allows users to connect the turntable directly to powered speakers or a standard audio system that lacks a dedicated phono input, offering versatility and ease of use. By eliminating the need for an external pre-amp, Audio-Technica ensures that any listener can enjoy high-fidelity sound without complicated setups.
The construction of the AT-LP60 includes a robust plinth designed to minimize resonance and external noise interference. This attention to build quality not only enhances the aesthetics of the unit but also contributes to its overall performance, giving users a reliable platform for their vinyl collections.
Moreover, the AT-LP60 comes with a detachable hinged dust cover, which protects the turntable and records from dust and debris. This thoughtful inclusion highlights Audio-Technica’s commitment to durability and maintenance ease.
In summary, the Audio-Technica AT-LP60 turntable combines style, user-friendliness, and excellent sound quality, making it a perfect entry point for anyone looking to dive into the world of vinyl records. With its automatic operation, built-in preamp, and versatile speed capabilities, it’s a fantastic choice for both casual listeners and more serious collectors.