WARNING: Do not attempt to recharge Alkaline batteries.
2.Audiovox Rechargeable
NOTE: To extend battery life, avoid overcharging the batteries
3.Various Brands of Rechargeable Batteries - Use of the Audiovox charger with other brands of rechargeable batteries is not recommended, as battery charging times will vary with different brands of batteries. Refer to the manufacturer’s instructions for charging other brands of batteries.
Installing the batteries:
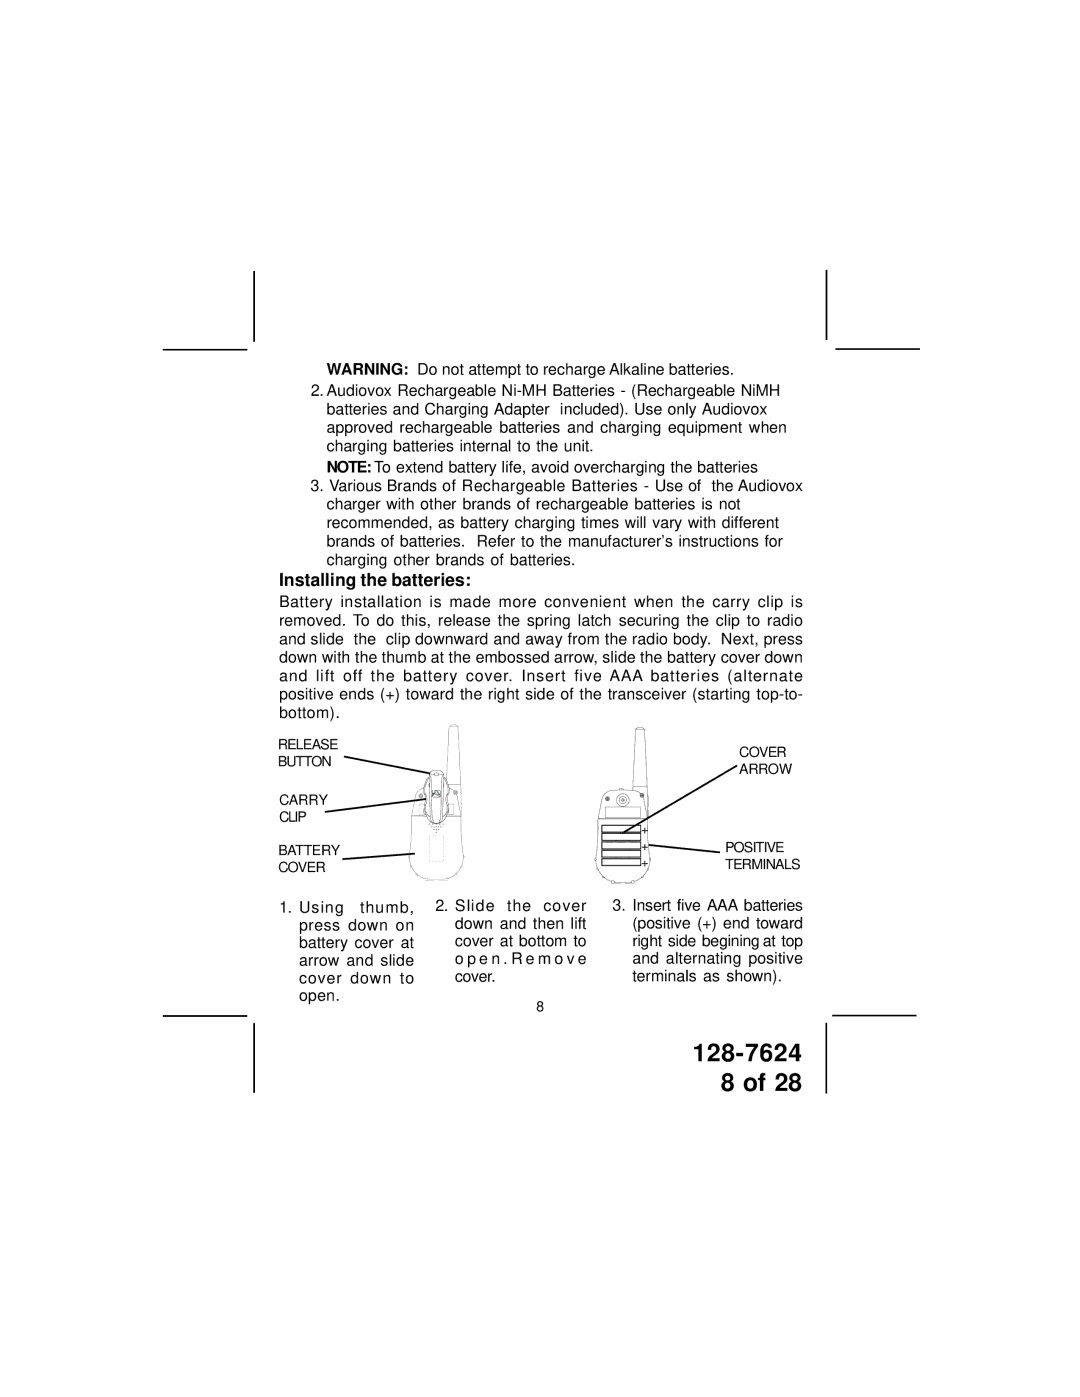
Battery installation is made more convenient when the carry clip is removed. To do this, release the spring latch securing the clip to radio and slide the clip downward and away from the radio body. Next, press down with the thumb at the embossed arrow, slide the battery cover down and lift off the battery cover. Insert five AAA batteries (alternate positive ends (+) toward the right side of the transceiver (starting
RELEASE BUTTON
CARRY CLIP
BATTERY COVER
COVER
ARROW
+
![]() +POSITIVE
+POSITIVE
![]()
![]() +TERMINALS
+TERMINALS
1.Using thumb, press down on battery cover at arrow and slide cover down to open.
2.Slide the cover down and then lift cover at bottom to o p e n . R e m o v e cover.
8
3.Insert five AAA batteries (positive (+) end toward right side begining at top and alternating positive terminals as shown).
8 of 28
