Step #3 INSTALL CONSOLE TO FLOOR OF VEHICLE
ÞBEFORE DRILLING ANY HOLES VERIFY THAT DRILL BIT WILL NOT ENTER INTO FRAME RAIL(S) OF VEHICLE, ELECTRICAL WIRES, FUEL LINES, BRAKE LINES, HOSES, EXHAUST SYSTEMS OR ANY OTHER ITEMS THAT WILL IMPAIR OPERATION OF VEHICLE. THE BOLTS OF THE FLOOR CONSOLE MUST SECURE TO FLOOR PANEL OF VEHICLE. CLIMB UNDER VEHICLE AND LOOK TO VERIFY THAT HOLES WILL BE IN PROPER LOCATIONS.
ÞSet console on floor of vehicle and mark where holes are to be drilled. Drill small 1/8” pilot holes to verify that drill holes are in proper locations.
ÞAfter verifying that 1/8” pilot holes are in proper locations, use ¼” drill bit to enlarge 1/8” pilot holes.
ÞSet console on floor over holes.
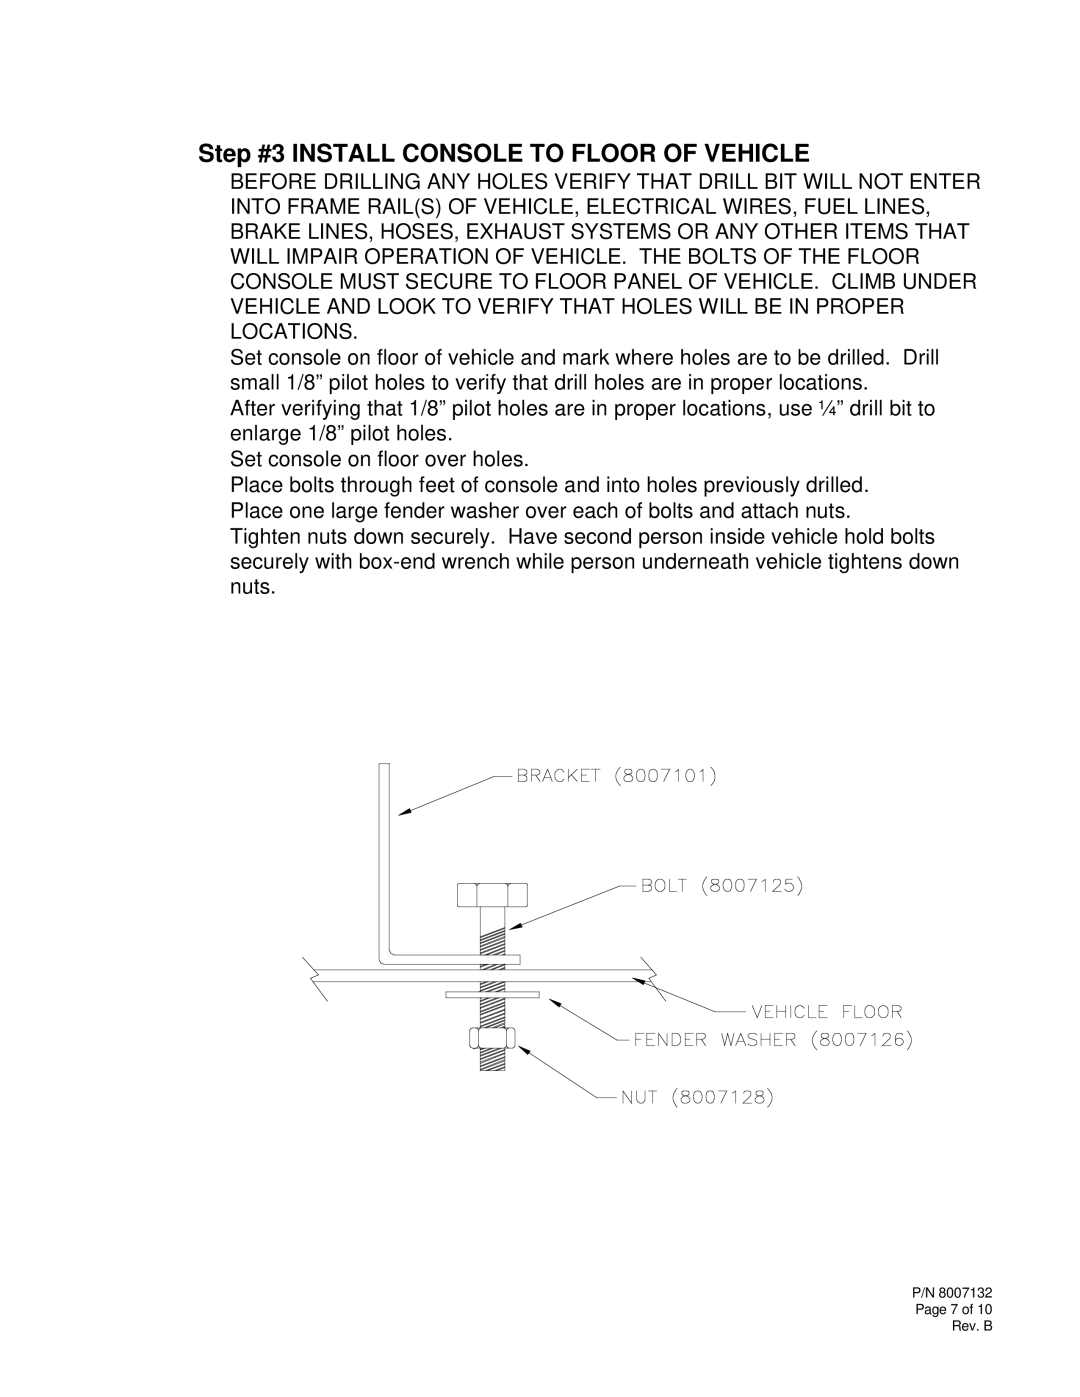
ÞPlace bolts through feet of console and into holes previously drilled.
ÞPlace one large fender washer over each of bolts and attach nuts.
ÞTighten nuts down securely. Have second person inside vehicle hold bolts securely with
P/N 8007132
Page 7 of 10