
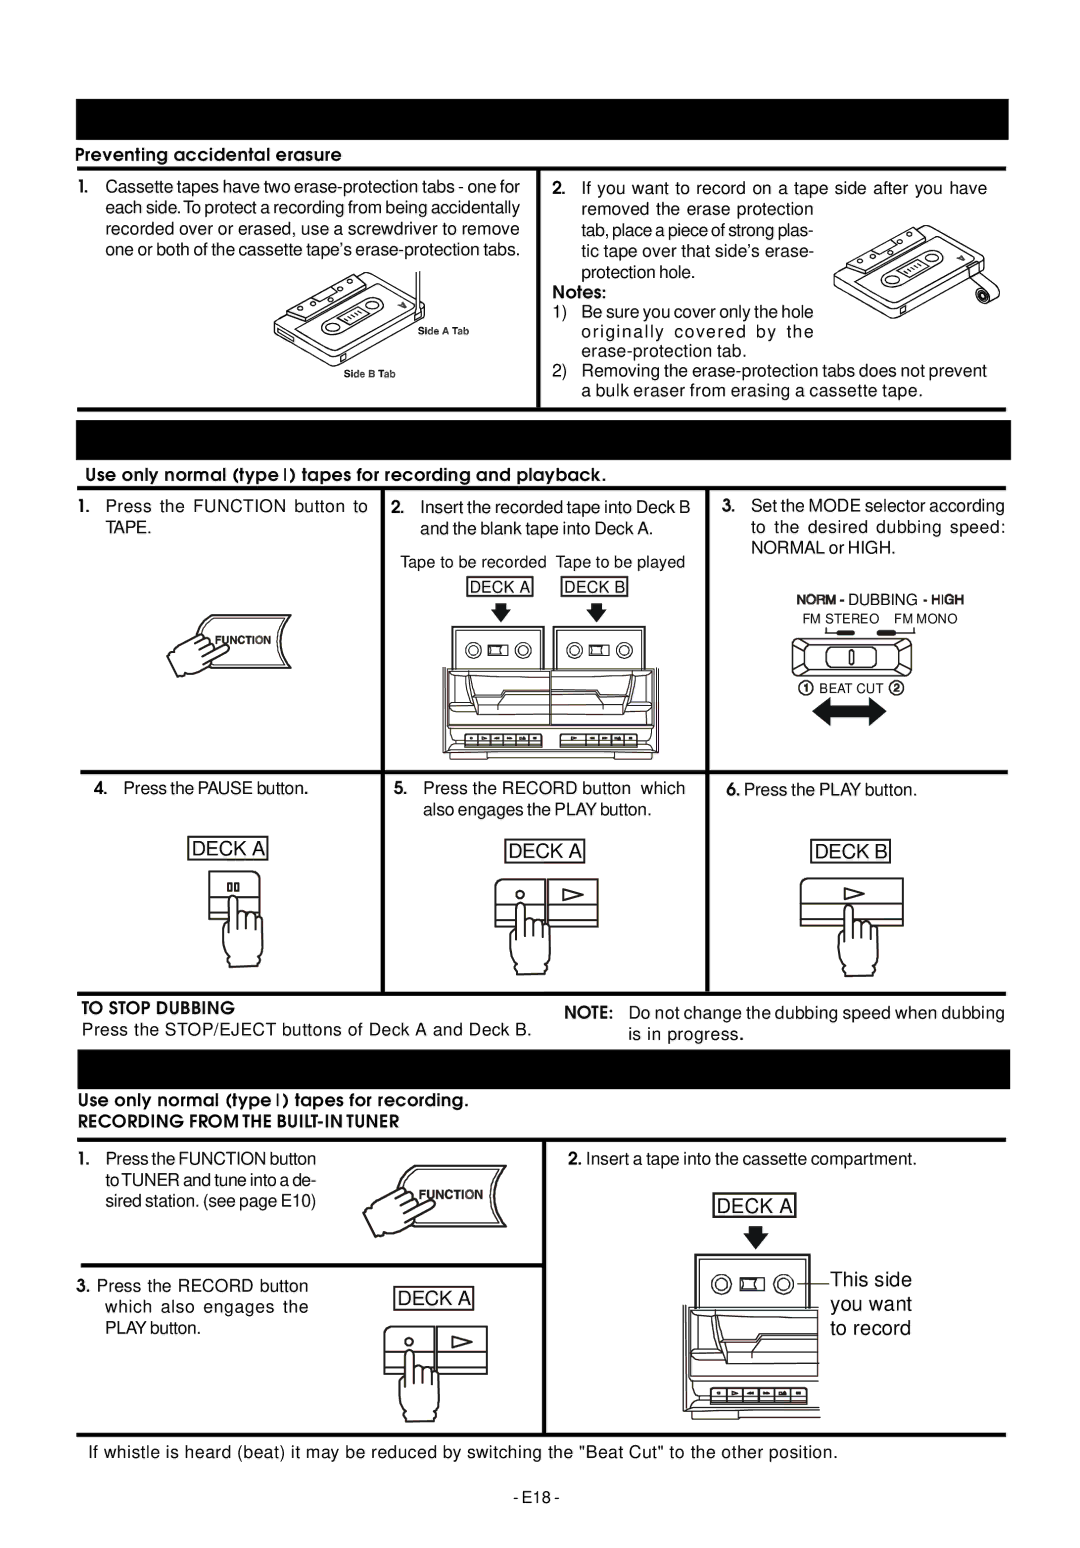
Mini Hi-Fi System specifications
The Audiovox Mini Hi-Fi System is a compact and versatile audio solution designed for music enthusiasts who want quality sound without taking up too much space. This elegant home audio system combines advanced features with a sleek design, making it an excellent addition to any modern living space.One of the standout features of the Audiovox Mini Hi-Fi System is its impressive sound quality. The system is equipped with high-performance speakers that deliver rich, clear audio, allowing users to enjoy their favorite music in full fidelity. Whether you're listening to classical, rock, or hip-hop, the audio output remains balanced across various genres.
The system boasts multiple connectivity options, including Bluetooth, USB, and auxiliary inputs. The built-in Bluetooth technology enables users to stream music wirelessly from their smartphones, tablets, or laptops, providing convenience and flexibility for music playback. The USB port allows for easy playback of digital music files stored on USB drives, while the auxiliary input caters to those who prefer to connect their devices directly.
In addition to its impressive connectivity, the Audiovox Mini Hi-Fi System comes with an integrated CD player. This feature appeals to audiophiles who still cherish their physical music collections, providing a nostalgic touch in an increasingly digital world. The system supports various disc formats, ensuring compatibility with a wide range of audio media.
Another notable characteristic is the user-friendly interface, which includes a remote control for easy navigation. The LCD display provides clear information about the current track, volume level, and more, making it easy to manage playback settings. Additionally, the compact design allows the system to fit in small spaces, whether on a shelf, desk, or entertainment center.
The Audiovox Mini Hi-Fi System also emphasizes durability and efficient power usage, making it an environmentally friendly choice for audio consumption. It offers features like an energy-saving standby mode, which reduces power consumption when the system is not in active use.
In summary, the Audiovox Mini Hi-Fi System stands out for its combination of sound quality, connectivity features, and user-friendly design. It's a perfect solution for those seeking a reliable audio system that offers both performance and style in a compact package, suitable for any home setting. Whether hosting a gathering or enjoying a quiet evening alone, this system enhances the listening experience, making it an ideal choice for music lovers.