Audiovox P-150, AUDIOVOX COMPACT DISC CHANGER SYSTEM Procedure For Horizontal Installation

Models: AUDIOVOX COMPACT DISC CHANGER SYSTEM

1 8
Download 8 pages 44 Kb
Page 4
Image 4
INSTALLATION

INSTALLATION

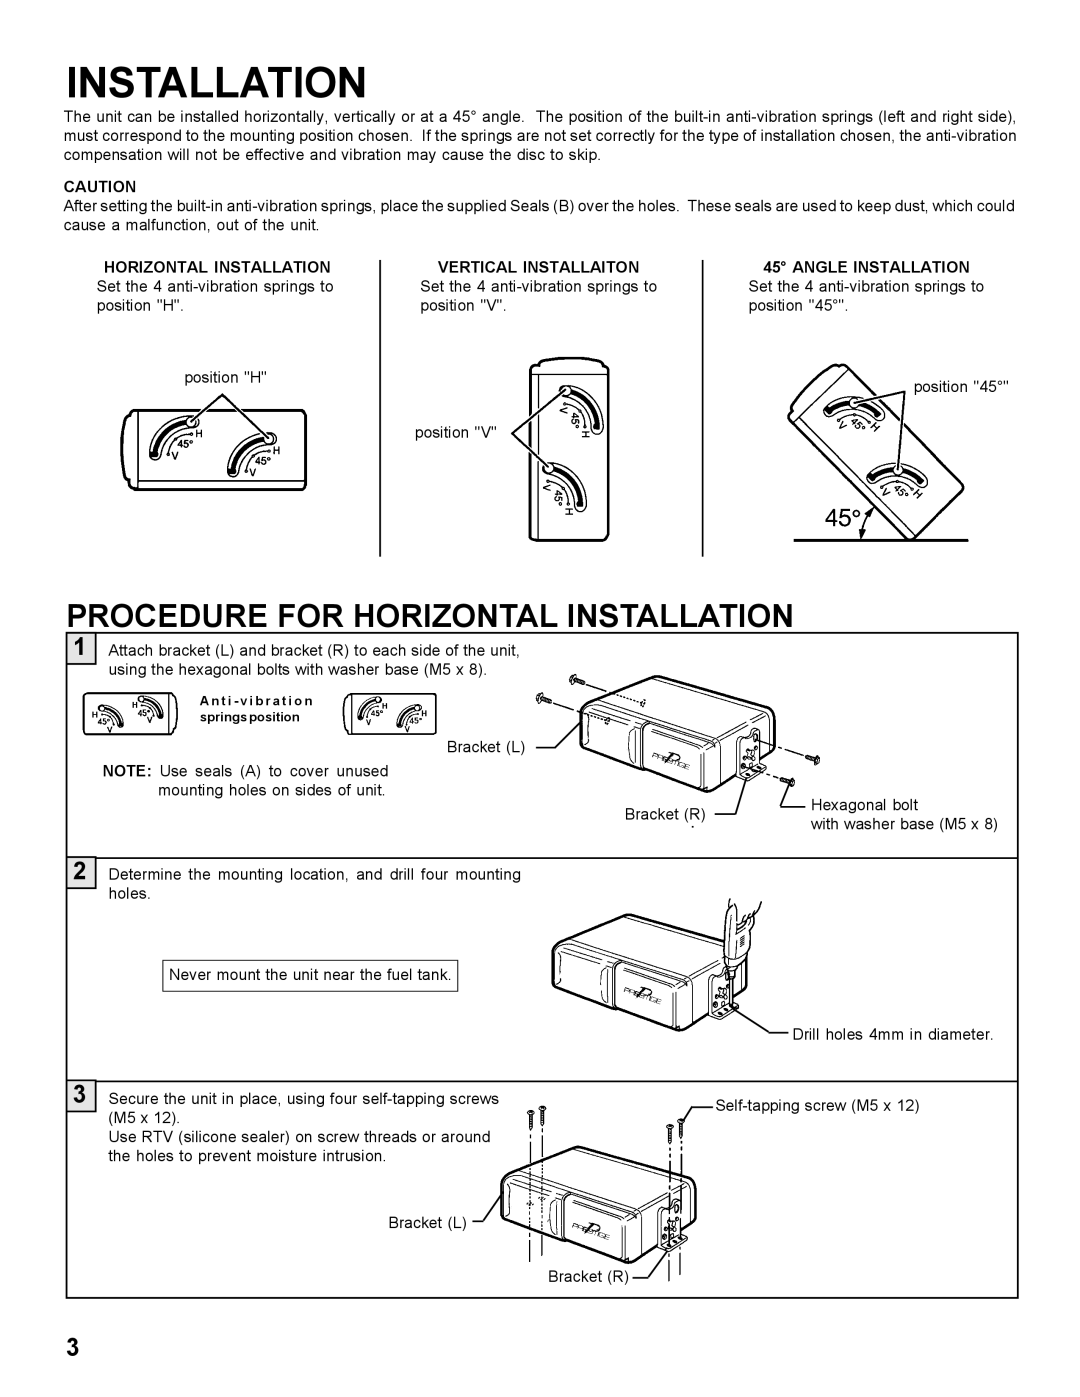
The unit can be installed horizontally, vertically or at a 45° angle. The position of the built-in anti-vibration springs (left and right side), must correspond to the mounting position chosen. If the springs are not set correctly for the type of installation chosen, the anti-vibration compensation will not be effective and vibration may cause the disc to skip.

CAUTION

After setting the built-in anti-vibration springs, place the supplied Seals (B) over the holes. These seals are used to keep dust, which could cause a malfunction, out of the unit.

HORIZONTAL INSTALLATION Set the 4 anti-vibration springs to position "H".

VERTICAL INSTALLAITON

Set the 4 anti-vibration springs to position "V".

45° ANGLE INSTALLATION

Set the 4 anti-vibration springs to position "45°".

position "H"

position "45°"


position "V"

PROCEDURE FOR HORIZONTAL INSTALLATION

1

2

Attach bracket (L) and bracket (R) to each side of the unit, using the hexagonal bolts with washer base (M5 x 8).

A n t i - v i b r a t i o n springs position

Bracket (L)

NOTE: Use seals (A) to cover unused mounting holes on sides of unit.

Bracket (R)

Determine the mounting location, and drill four mounting holes.

Hexagonal bolt

with washer base (M5 x 8)

Never mount the unit near the fuel tank.

Drill holes 4mm in diameter.

3

Secure the unit in place, using four self-tapping screws (M5 x 12).

Use RTV (silicone sealer) on screw threads or around the holes to prevent moisture intrusion.

Bracket (L) PROCEDURE FOR HORIZONTAL INSTALLATION

Manual backgroundSelf-tapping screw (M5 x 12)

Bracket (R)Manual background

3

Page 4
Image 4
Audiovox P-150, AUDIOVOX COMPACT DISC CHANGER SYSTEM installation manual Procedure For Horizontal Installation