RMP-97-CRM
INSTALLATION GUIDE FOR:
1997 FULL SIZE PICK-UP, TAHOE and SUBURBAN
Printed in U.S.A. | Form No. |
PARTS LIST:
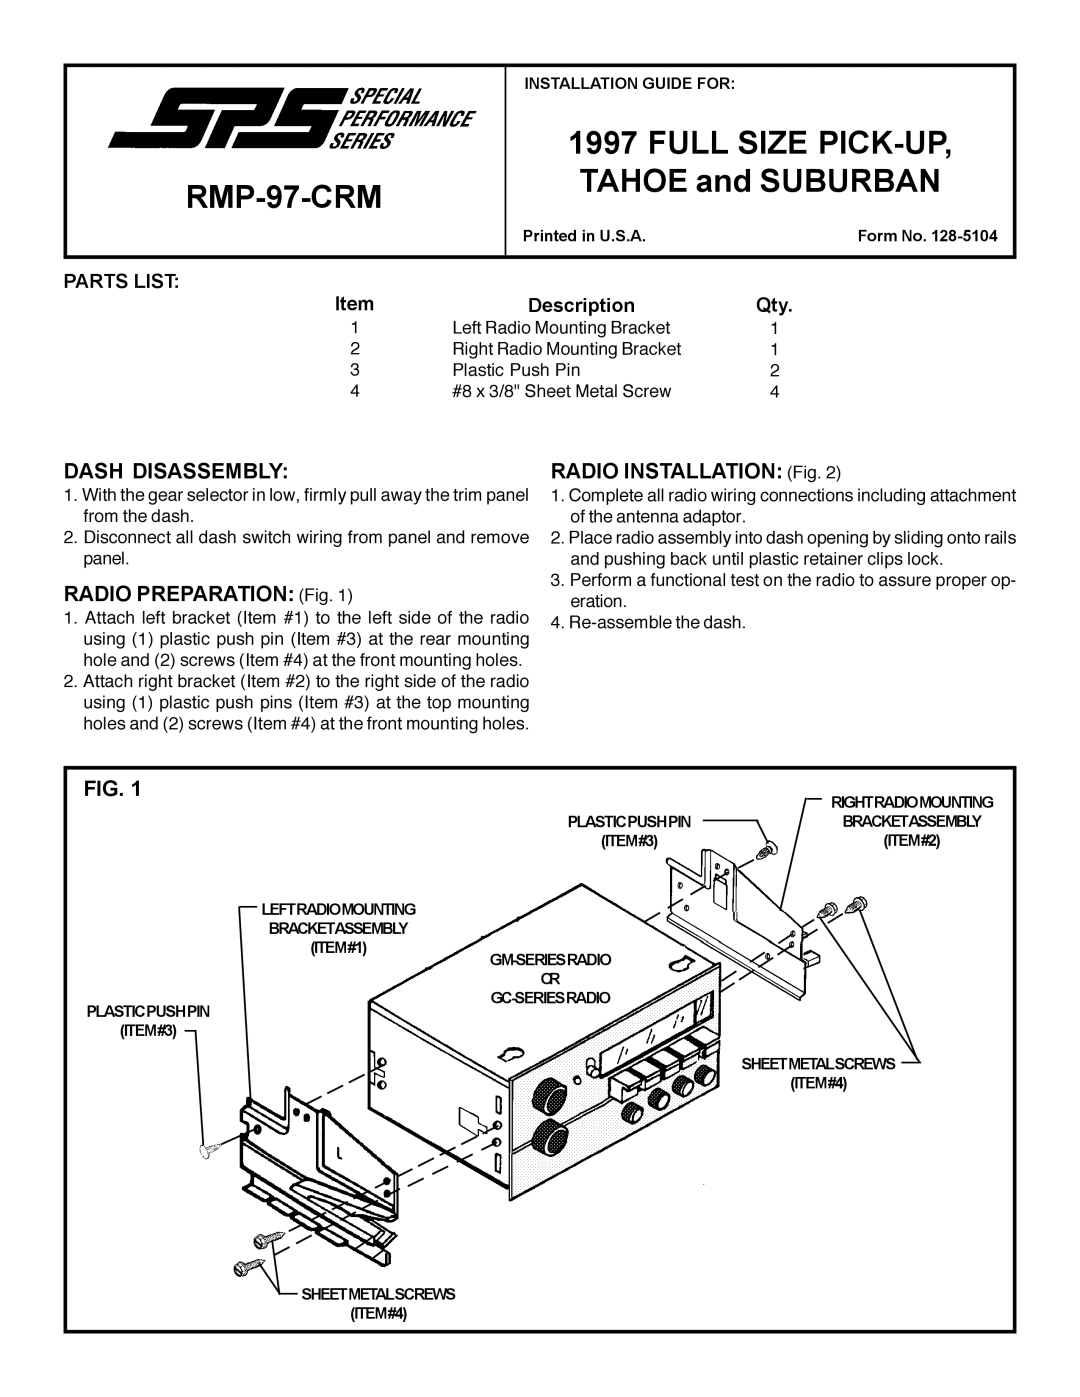
Item | Description | Qty. |
1 | Left Radio Mounting Bracket | 1 |
2 | Right Radio Mounting Bracket | 1 |
3 | Plastic Push Pin | 2 |
4 | #8 x 3/8" Sheet Metal Screw | 4 |
DASH DISASSEMBLY:
1.With the gear selector in low, firmly pull away the trim panel from the dash.
2.Disconnect all dash switch wiring from panel and remove panel.
RADIO PREPARATION: (Fig. 1)
1.Attach left bracket (Item #1) to the left side of the radio using (1) plastic push pin (Item #3) at the rear mounting hole and (2) screws (Item #4) at the front mounting holes.
2.Attach right bracket (Item #2) to the right side of the radio using (1) plastic push pins (Item #3) at the top mounting holes and (2) screws (Item #4) at the front mounting holes.
RADIO INSTALLATION: (Fig. 2)
1.Complete all radio wiring connections including attachment of the antenna adaptor.
2.Place radio assembly into dash opening by sliding onto rails and pushing back until plastic retainer clips lock.
3.Perform a functional test on the radio to assure proper op- eration.
4.
FIG. 1 | RIGHTRADIOMOUNTING |
| |
PLASTICPUSHPIN | BRACKETASSEMBLY |
(ITEM#3) | (ITEM#2) |
LEFTRADIOMOUNTING |
|
BRACKETASSEMBLY |
|
(ITEM#1) |
|
| |
OR |
|
| |
PLASTICPUSHPIN |
|
(ITEM#3) |
|
| SHEETMETALSCREWS |
| (ITEM#4) |
![]() SHEETMETALSCREWS (ITEM#4)
SHEETMETALSCREWS (ITEM#4)