CAUTION: 1. DO NOT CUT OR FILE THE OPENING TO THE OUTER EDGES OF THE TEMPLATE!
2.FOR PROPER OPERATION OF THE CD PLAYER, THE CHASSIS MUST BE WITHIN 20° OF HORIZONTAL. MAKE SURE THE UNIT IS MOUNTED WITHIN THIS LIMITATION.
1.RemoveExistingRadio:
A.Remove existing radio dash trim panel surrounding the radio opening. This panel is usually secured by screws and/or
B.Remove the screws used to secure radio to the
Helpful Hint: If you do not have an existing radio, you will find the radio opening is covered by a disposable cover plate.
C.Pull the radio forward to access the wiring and antenna cables plugged into the rear of the chassis.
D.
2.InstalltheNewRadio:
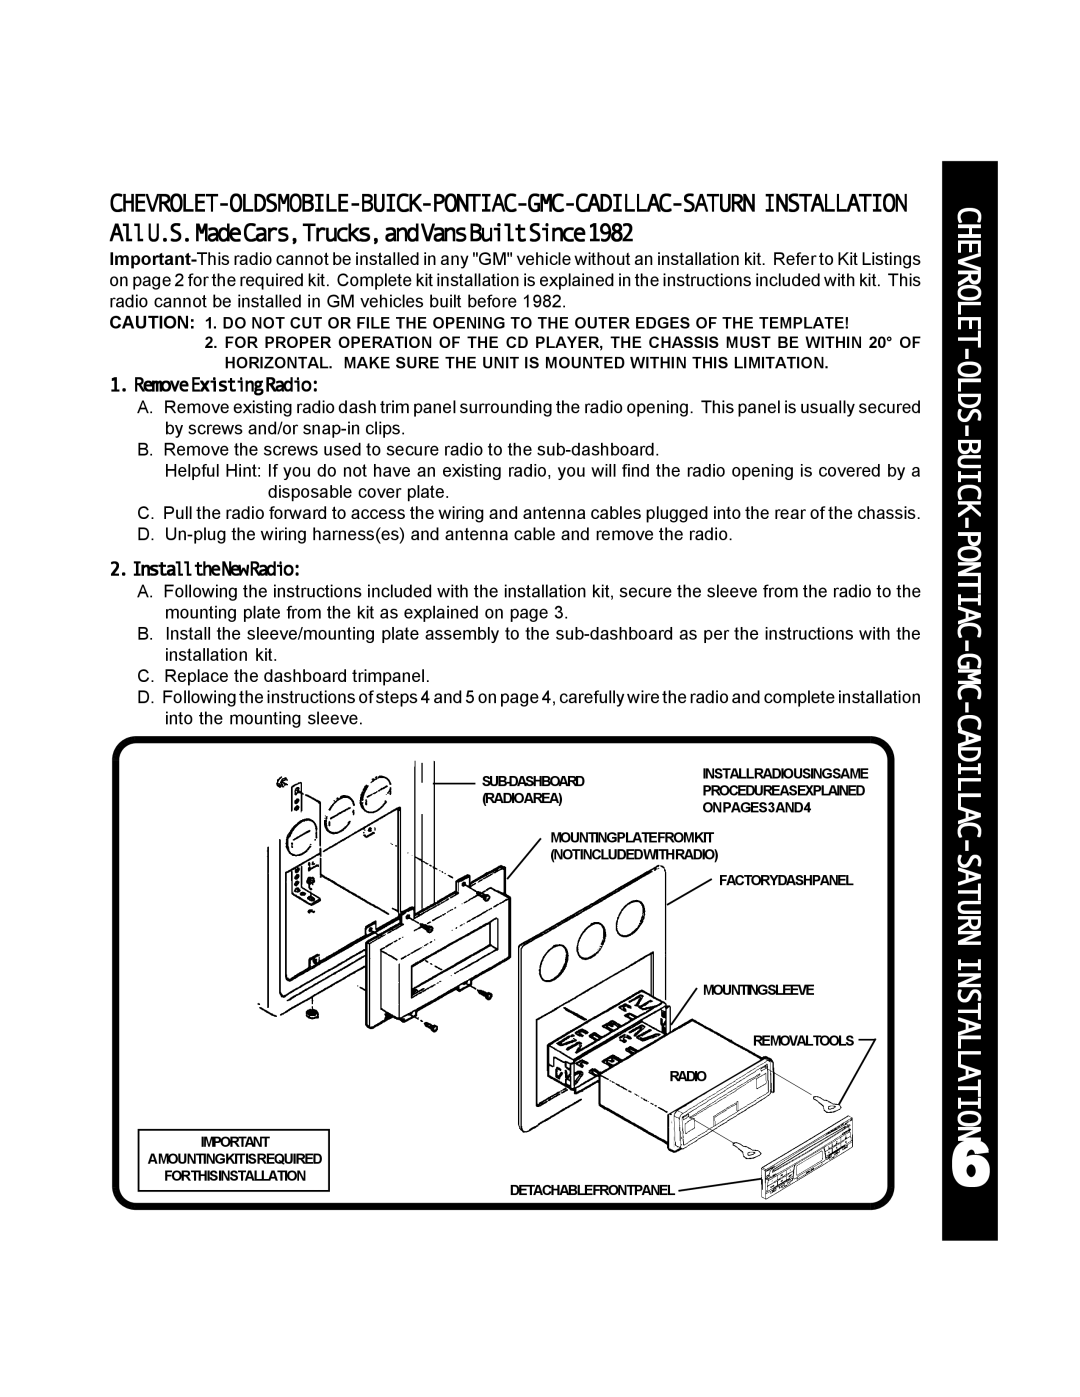
A.Following the instructions included with the installation kit, secure the sleeve from the radio to the mounting plate from the kit as explained on page 3.
B.Install the sleeve/mounting plate assembly to the
C.Replace the dashboard trimpanel.
D.Following the instructions of steps 4 and 5 on page 4, carefully wire the radio and complete installation into the mounting sleeve.
CHEVROLET-OLDS-BUICK-PONTIAC-GMC-
IMPORTANT
AMOUNTINGKITISREQUIRED
FORTHISINSTALLATION
(RADIOAREA)PROCEDUREASEXPLAINED ONPAGES3AND4
MOUNTINGPLATEFROMKIT (NOTINCLUDEDWITHRADIO)
![]() FACTORYDASHPANEL
FACTORYDASHPANEL
MOUNTINGSLEEVE
REMOVALTOOLS
RADIO
DETACHABLEFRONTPANEL ![]()
