UNDER CABINET INSTALLATION
Cabinet or
Shelf
Spacers | 3/4” or less |
Spacers |
Bottom
Edge
Molding
FRONT VIEW | SIDE VIEW |
1)Choose an appropriate mounting location underneath a cabinet or shelf. Close proximity to an electrical outlet and a TV antenna or cable connection will facilitate a neat, easy installation. Do not mount the
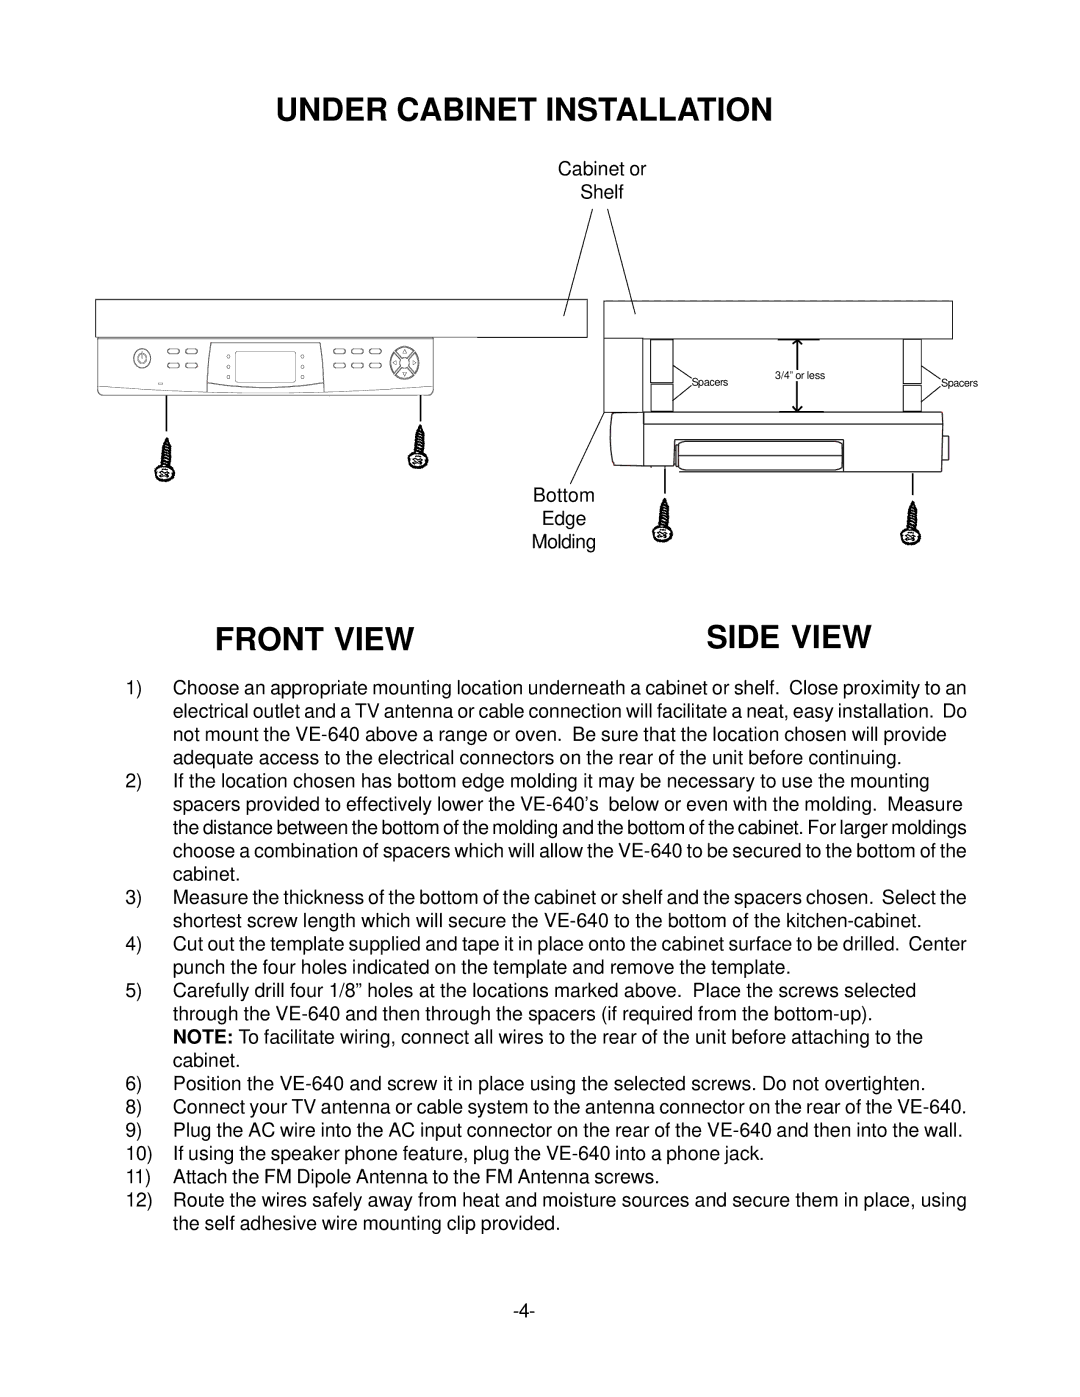
2)If the location chosen has bottom edge molding it may be necessary to use the mounting spacers provided to effectively lower the
3)Measure the thickness of the bottom of the cabinet or shelf and the spacers chosen. Select the shortest screw length which will secure the
4)Cut out the template supplied and tape it in place onto the cabinet surface to be drilled. Center punch the four holes indicated on the template and remove the template.
5)Carefully drill four 1/8” holes at the locations marked above. Place the screws selected through the
6)Position the
8)Connect your TV antenna or cable system to the antenna connector on the rear of the
9)Plug the AC wire into the AC input connector on the rear of the
10)If using the speaker phone feature, plug the
11)Attach the FM Dipole Antenna to the FM Antenna screws.
12)Route the wires safely away from heat and moisture sources and secure them in place, using the self adhesive wire mounting clip provided.
