EPS-168T specifications
Auralex Acoustics is a prominent name in the field of acoustic treatment, and their EPS-168T product exemplifies the company's commitment to quality and performance. The EPS-168T is an innovative acoustic panel designed to enhance sound quality in various environments, from professional studios to home theaters.One of the main features of the EPS-168T is its superior sound absorption capability. Made from high-density expanded polystyrene, the panel effectively absorbs mid to high frequencies, helping to reduce undesirable echoes and reverb in any space. This quality makes it ideal for music recording studios, rehearsal spaces, and listening environments where sound clarity is paramount. By managing sound reflections, the EPS-168T contributes to a more controlled acoustic environment.
The design of the EPS-168T is another standout feature. Its aesthetically pleasing profile allows it to blend seamlessly with various décor styles, ensuring that acoustic treatment does not come at the expense of visual appeal. Available in several colors and finishes, users have the flexibility to choose a look that best suits their space, providing both functionality and style.
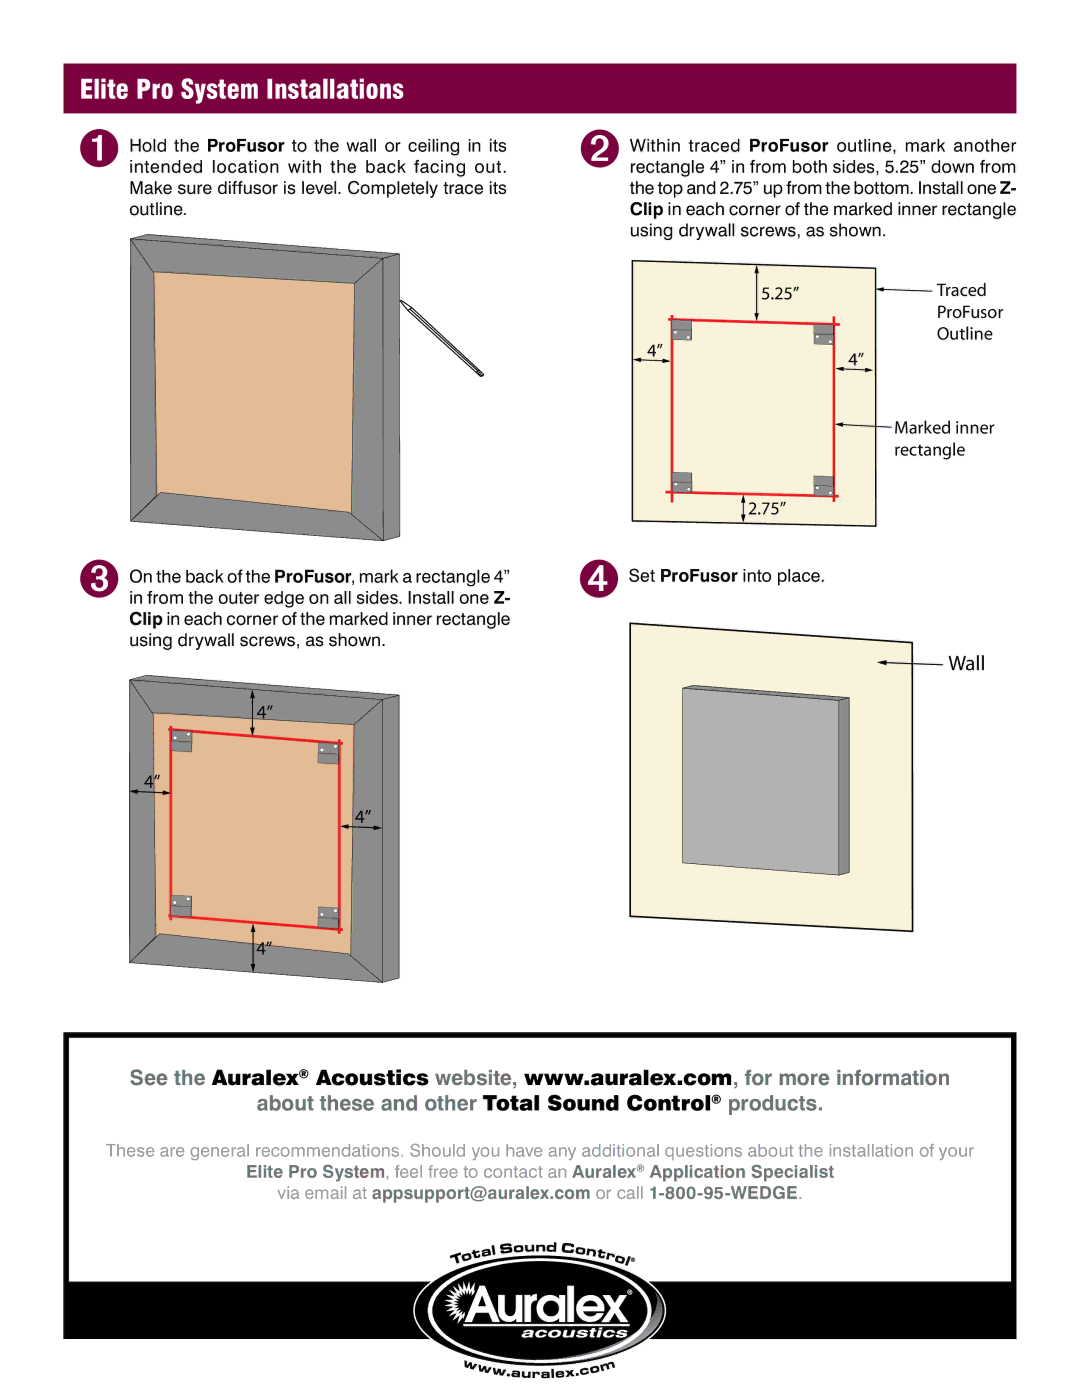
In terms of technologies, the EPS-168T incorporates proprietary foam formulations that enhance its acoustic performance. These materials are specifically engineered to provide optimal sound diffusion and absorption, leading to an improved auditory experience. The lightweight nature of the panel makes installation a breeze, as it can be easily mounted on walls or ceilings using a variety of adhesive options.
The EPS-168T is also characterized by its versatility. Whether used in commercial recording studios, theaters, or home entertainment rooms, it adapts to various sound environments and requirements. Its fire-retardant properties ensure safety and compliance with industry standards, making it a reliable choice for any acoustic treatment project.
Moreover, the EPS-168T panels are environmentally friendly, aligning with Auralex’s commitment to sustainability. They are manufactured using eco-conscious processes, ensuring minimal environmental impact.
In summary, the Auralex Acoustics EPS-168T is a powerful acoustic treatment solution that combines effective sound absorption, aesthetic flexibility, and innovative technology. Its ability to enhance auditory clarity while maintaining a stylish appearance makes it a favored choice for anyone seeking to optimize their acoustic space. Whether in a professional setting or a home studio, the EPS-168T is an investment in sound quality and comfort.

