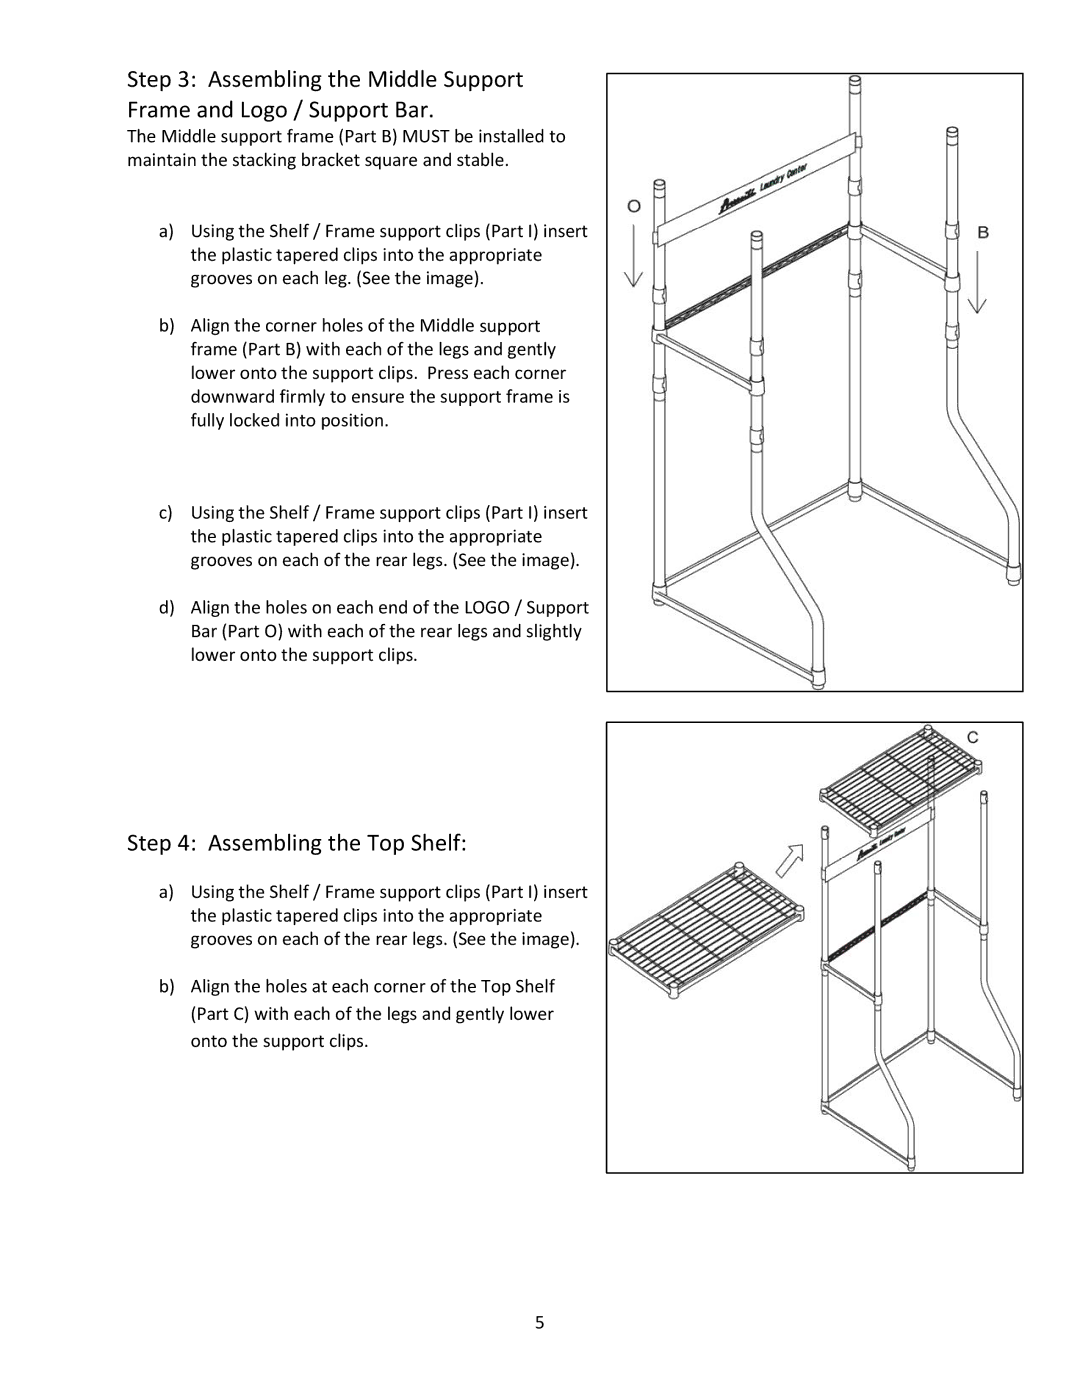
Step 3: Assembling the Middle Support Frame and Logo / Support Bar.
The Middle support frame (Part B) MUST be installed to maintain the stacking bracket square and stable.
a)Using the Shelf / Frame support clips (Part I) insert the plastic tapered clips into the appropriate grooves on each leg. (See the image).
b)Align the corner holes of the Middle support frame (Part B) with each of the legs and gently lower onto the support clips. Press each corner downward firmly to ensure the support frame is fully locked into position.
c)Using the Shelf / Frame support clips (Part I) insert the plastic tapered clips into the appropriate grooves on each of the rear legs. (See the image).
d)Align the holes on each end of the LOGO / Support Bar (Part O) with each of the rear legs and slightly lower onto the support clips.
Step 4: Assembling the Top Shelf:
a)Using the Shelf / Frame support clips (Part I) insert the plastic tapered clips into the appropriate grooves on each of the rear legs. (See the image).
b)Align the holes at each corner of the Top Shelf (Part C) with each of the legs and gently lower onto the support clips.
5
