WATER BOTTLE PLACEMENT / REPLACEMENT
When a new bottle is installed you must open the hot water faucet and remove no less than 4 full cups of water to insure the water flows properly and the water reservoir is at the proper level.
Steps To Replace Water Bottles
Remove cap.
Use a clean cloth to wipe off neck of bottle.
Carefully lift bottle (approx. 40 lbs.) using your legs and not your back. Do not place hands on opening of bottle while placing in reservoir.
Insert the water bottle on the water intake over reservoir opening so it settles properly on it.
Wipe off any water which may have splashed on dispenser top.
When a new bottle is installed you must open the hot water faucet and remove no less than 4 full cups of water to insure the water flows properly and the water reservoir is at the proper level.
OPERATING YOUR WATER DISPENSER
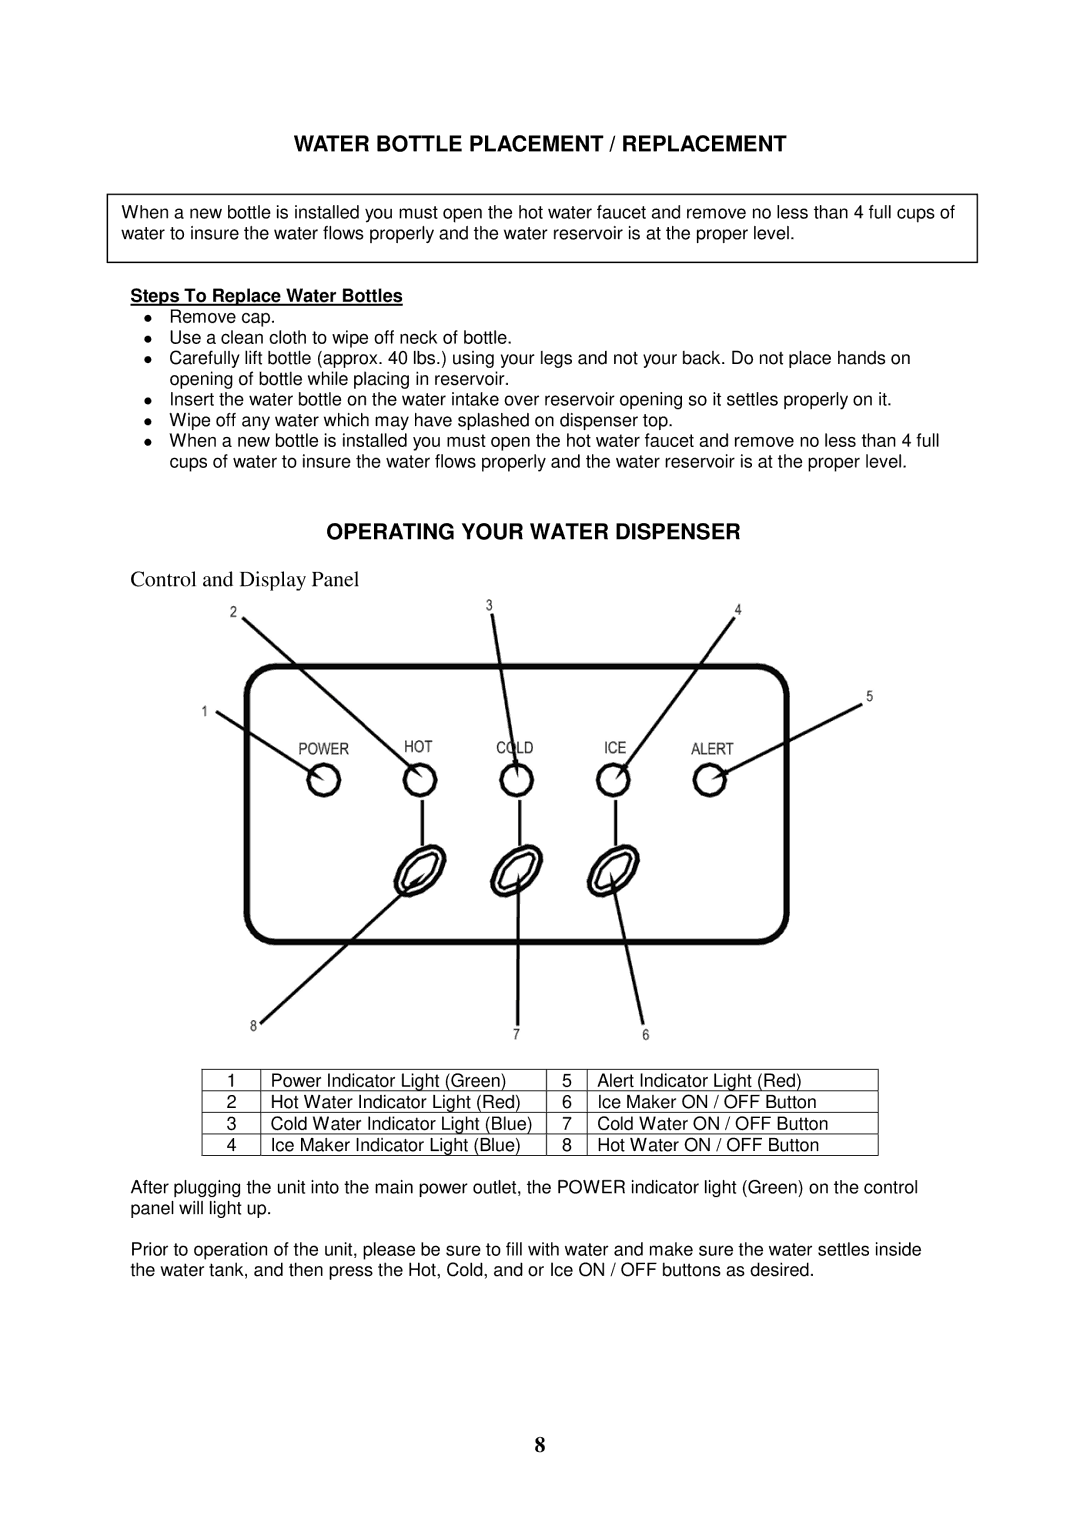
Control and Display Panel
1 | Power Indicator Light (Green) | 5 | Alert Indicator Light (Red) |
2 | Hot Water Indicator Light (Red) | 6 | Ice Maker ON / OFF Button |
3 | Cold Water Indicator Light (Blue) | 7 | Cold Water ON / OFF Button |
4 | Ice Maker Indicator Light (Blue) | 8 | Hot Water ON / OFF Button |
After plugging the unit into the main power outlet, the POWER indicator light (Green) on the control panel will light up.
Prior to operation of the unit, please be sure to fill with water and make sure the water settles inside the water tank, and then press the Hot, Cold, and or Ice ON / OFF buttons as desired.
8