
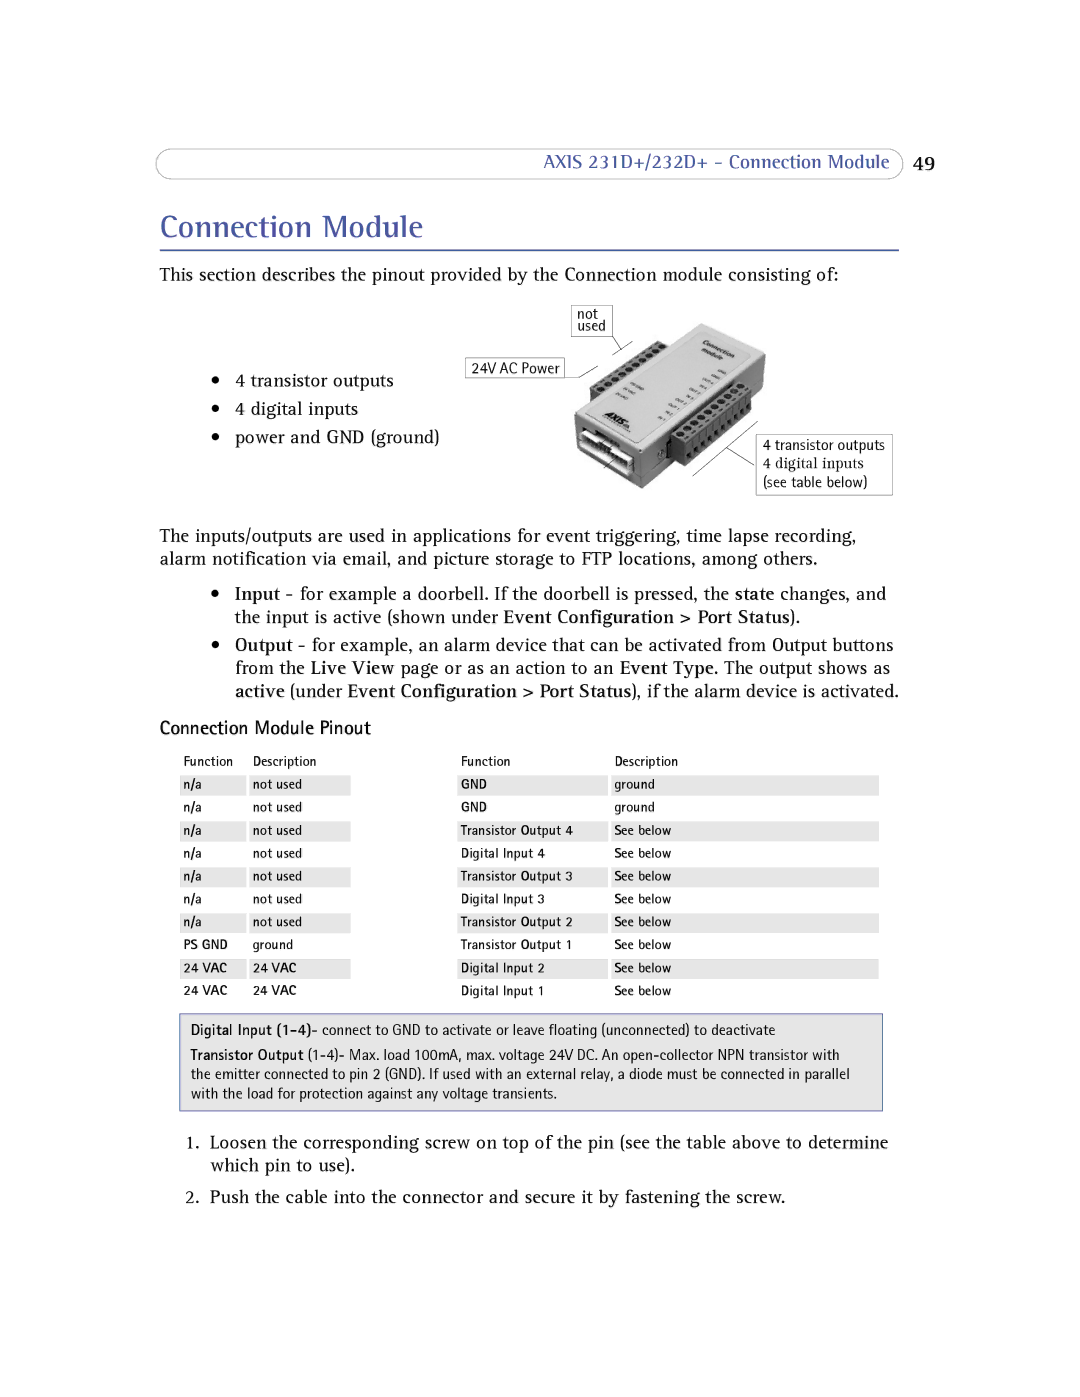
232d+ specifications
Axis Communications, a leading provider of IP security solutions, offers a range of high-performance cameras designed for various surveillance applications. Among their products, the Axis 232D+ and Axis 231D+ stand out for their robust features and advanced technologies, making them suitable for both indoor and outdoor environments.The Axis 232D+ is a high-speed dome camera that delivers exceptional video quality, thanks to its 1/4-inch progressive scan CCD sensor. It offers a resolution of 704x480 pixels and can capture incredibly detailed images at up to 30 frames per second. With its pan/tilt functionality, the 232D+ can cover a wide field of view, allowing for extensive monitoring areas while maintaining high precision and responsiveness.
In addition to its impressive image quality, the Axis 232D+ features advanced digital zoom capabilities, enabling users to zoom into specific areas without significant loss of detail. The camera is equipped with a powerful infrared capability, allowing it to capture images in low-light conditions effectively. This makes it an ideal choice for 24/7 surveillance in all lighting scenarios.
On the other hand, the Axis 231D+ offers similar high-quality video performance but introduces some distinctive features. It also utilizes a 1/4-inch progressive scan CCD sensor and supports a wide dynamic range (WDR) for improved image quality in challenging lighting conditions. The 231D+ is designed for easy installation and integration into existing systems, making it a versatile option for various surveillance needs.
Both models leverage Axis' digital PTZ technology, providing users with the flexibility to pan, tilt, and zoom remotely via an intuitive web interface. This user-friendly aspect simplifies monitoring and allows quicker responses to incidents when they arise.
Furthermore, both the Axis 232D+ and 231D+ support Power over Ethernet (PoE), eliminating the need for separate power cables and simplifying installation, especially in hard-to-reach locations.
In conclusion, the Axis 232D+ and 231D+ represent Axis Communications’ commitment to delivering high-quality, versatile surveillance solutions that meet the demands of modern security challenges. Their advanced imaging technologies, robust features, and user-friendly design make them noteworthy additions to any security setup. Whether it's for large outdoor areas or indoor environments requiring vigilant monitoring, these cameras provide the performance and reliability critical for comprehensive security.