ASSEMBLY INSTRUCTIONS
Adult Assembly Required
Save these instructions for future use
BEFORE YOU BEGIN ASSEMBLY:
Ensure that all the parts and hardware listed are included. If anything is missing or not satisfactory
contact Badger Basket for assistance. Read all instructions before beginning so you’ll be
familiar with the parts and their final positions.
MODEL #09500 ~ Cedar Sandbox (4’ x 6’)
(Leaps and Bounds® #12956)
TOOLS NEEDED:
Phillips Screwdriver
(power driver is helpful but be careful not to damage the product)
PARTS INCLUDED:
(A)2 - 4’ Side Panels
(B)2 - 6’ Side Panels
(C)12 - Long Screws
(D)4 - Triangular Corner Seats
(E)16 - Short Screws
NOTE: Sand is not included. You can purchase it separately from most home improvement and hardware stores. You will need approximately 600 pounds of sand to fill the sandbox 6” deep. If you want the sandbox to be deeper, assemble the sandbox and then mark the ground following the interior edges of the box. Move the sandbox aside and excavate within the marked area to the depth that you desire. Place the sandbox frame around the excavated area, and fill with the amount of sand desired.
Remember, children should always wash their hands thoroughly with soap and water after playing in the sandbox, especially before handling snacks or meals.
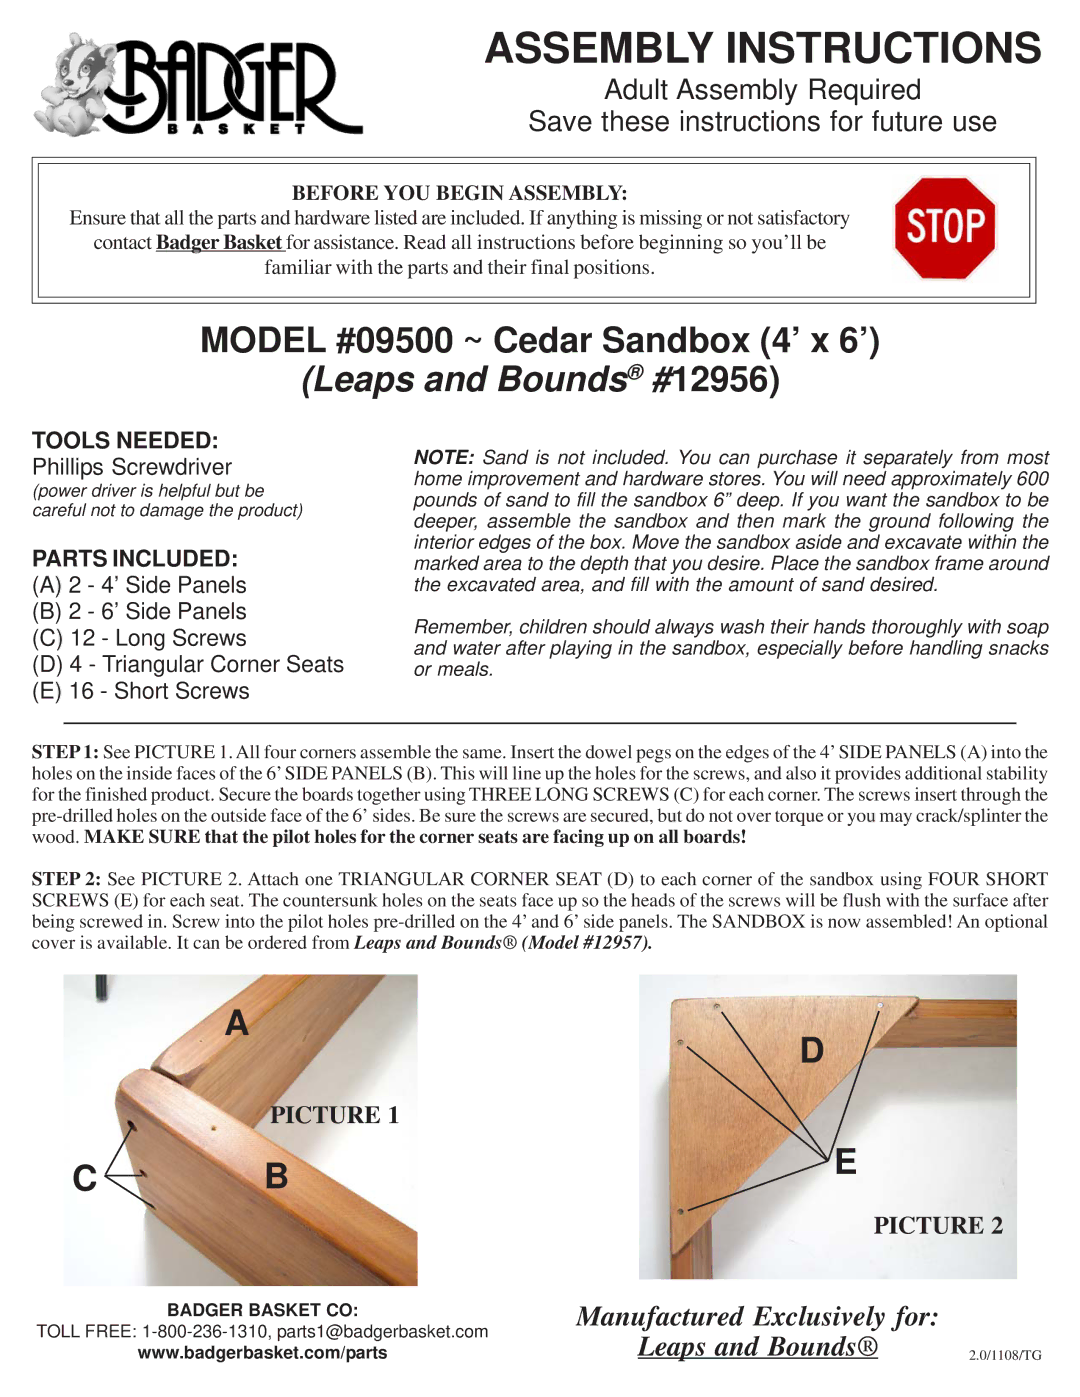
STEP 1: See PICTURE 1. All four corners assemble the same. Insert the dowel pegs on the edges of the 4’ SIDE PANELS (A) into the holes on the inside faces of the 6’ SIDE PANELS (B). This will line up the holes for the screws, and also it provides additional stability for the finished product. Secure the boards together using THREE LONG SCREWS (C) for each corner. The screws insert through the
STEP 2: See PICTURE 2. Attach one TRIANGULAR CORNER SEAT (D) to each corner of the sandbox using FOUR SHORT SCREWS (E) for each seat. The countersunk holes on the seats face up so the heads of the screws will be flush with the surface after being screwed in. Screw into the pilot holes
A
D
PICTURE 1
C ![]() B
B![]() E
E
BADGER BASKET CO:
TOLL FREE:
www.badgerbasket.com/parts
PICTURE 2
Manufactured Exclusively for: |
|
Leaps and Bounds® | 2.0/1108/TG |