Side Rack Installation:
!Side racks have to be installed on both sides of the 60" stand and on the right side of the 30" stand if your unit came with 20 lb LP cylinders. Optional 40 lb horizontal cylinders come with single or double tank caddy.
!Attach the tank rack to the side of the stand with two
!Clamp mounting bracket to the legs with the clamps and fasten with (2) thumb screws.
!Hang the 20lb cylinder on the rack with service valve outlet facing the front of the unit (see fig.
!Fasten the tank with tank brace and wingnut.
!Make sure the tanks are secure in their racks and can not move
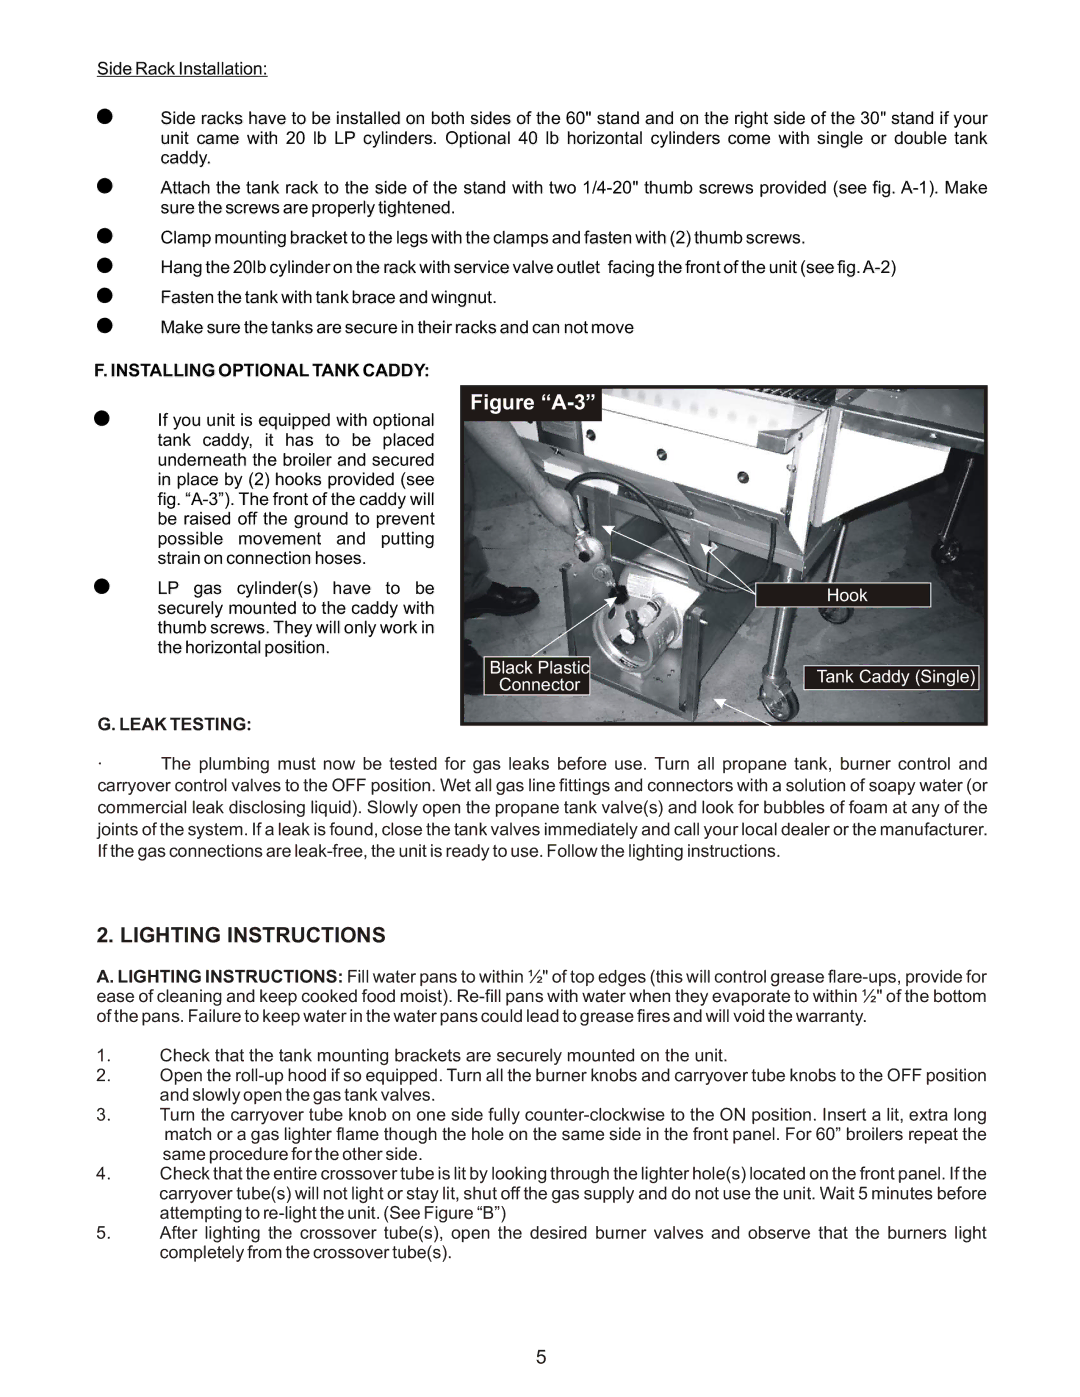
F. INSTALLING OPTIONAL TANK CADDY:
!If you unit is equipped with optional tank caddy, it has to be placed underneath the broiler and secured in place by (2) hooks provided (see fig.
!LP gas cylinder(s) have to be securely mounted to the caddy with thumb screws. They will only work in the horizontal position.
G.LEAK TESTING:
Figure “A-3”
Black Plastic
Connector
Hook
Tank Caddy (Single)
·The plumbing must now be tested for gas leaks before use. Turn all propane tank, burner control and carryover control valves to the OFF position. Wet all gas line fittings and connectors with a solution of soapy water (or commercial leak disclosing liquid). Slowly open the propane tank valve(s) and look for bubbles of foam at any of the joints of the system. If a leak is found, close the tank valves immediately and call your local dealer or the manufacturer. If the gas connections are
2. LIGHTING INSTRUCTIONS
A. LIGHTING INSTRUCTIONS: Fill water pans to within ½" of top edges (this will control grease
1.Check that the tank mounting brackets are securely mounted on the unit.
2.Open the
3.Turn the carryover tube knob on one side fully
4.Check that the entire crossover tube is lit by looking through the lighter hole(s) located on the front panel. If the carryover tube(s) will not light or stay lit, shut off the gas supply and do not use the unit. Wait 5 minutes before attempting to
5.After lighting the crossover tube(s), open the desired burner valves and observe that the burners light completely from the crossover tube(s).
5
