Amplifier Control and Adjustments
The sensitivity adjustment is designed to provide proper level matching with various brands of head units. It allows input signal to vary between 240 millivolts to 6 volts from the head unit or any other signal processor. Begin by setting the sensitivity adjustment to the "MIN" (6 volts).
Using a compact disc that you are familiar with ,turn on head unit to the 3/4 volume setting. Slowly turn up sensitivity adjustment towards the "MAX" (240 millivolts) using a flat head screw driver. Stop turning on the onset of distortion and turn back just a slight. The 3/4 volume setting is now the "maximum" volume for the head unit. The goal is to keep the level control to the lowest setting yet still have enough signal to drive the amplifier. This is done to prevent over- driving the amplifier and to keep system noise to a minimum. It is important not over drive speakers (at point of distortion) this will cause permanent damage to the speakers. Also, if the amplifier itself is over driven, it could be damaged.
1 | 2 | 3 | 4 | 5 | 6 | 7 | 8 | 9 |
|
| SUBSONIC |
|
|
|
|
| SLAVE |
LINE INPUT | GAIN | FILTER | BASS | L.P.F | PHASE | REMOCON | MASTER SLAVER |
L
6V 0.24V | 15Hz | 50Hz | 0dB | 12dB 50Hz 250Hz | 0° | 180° |
R
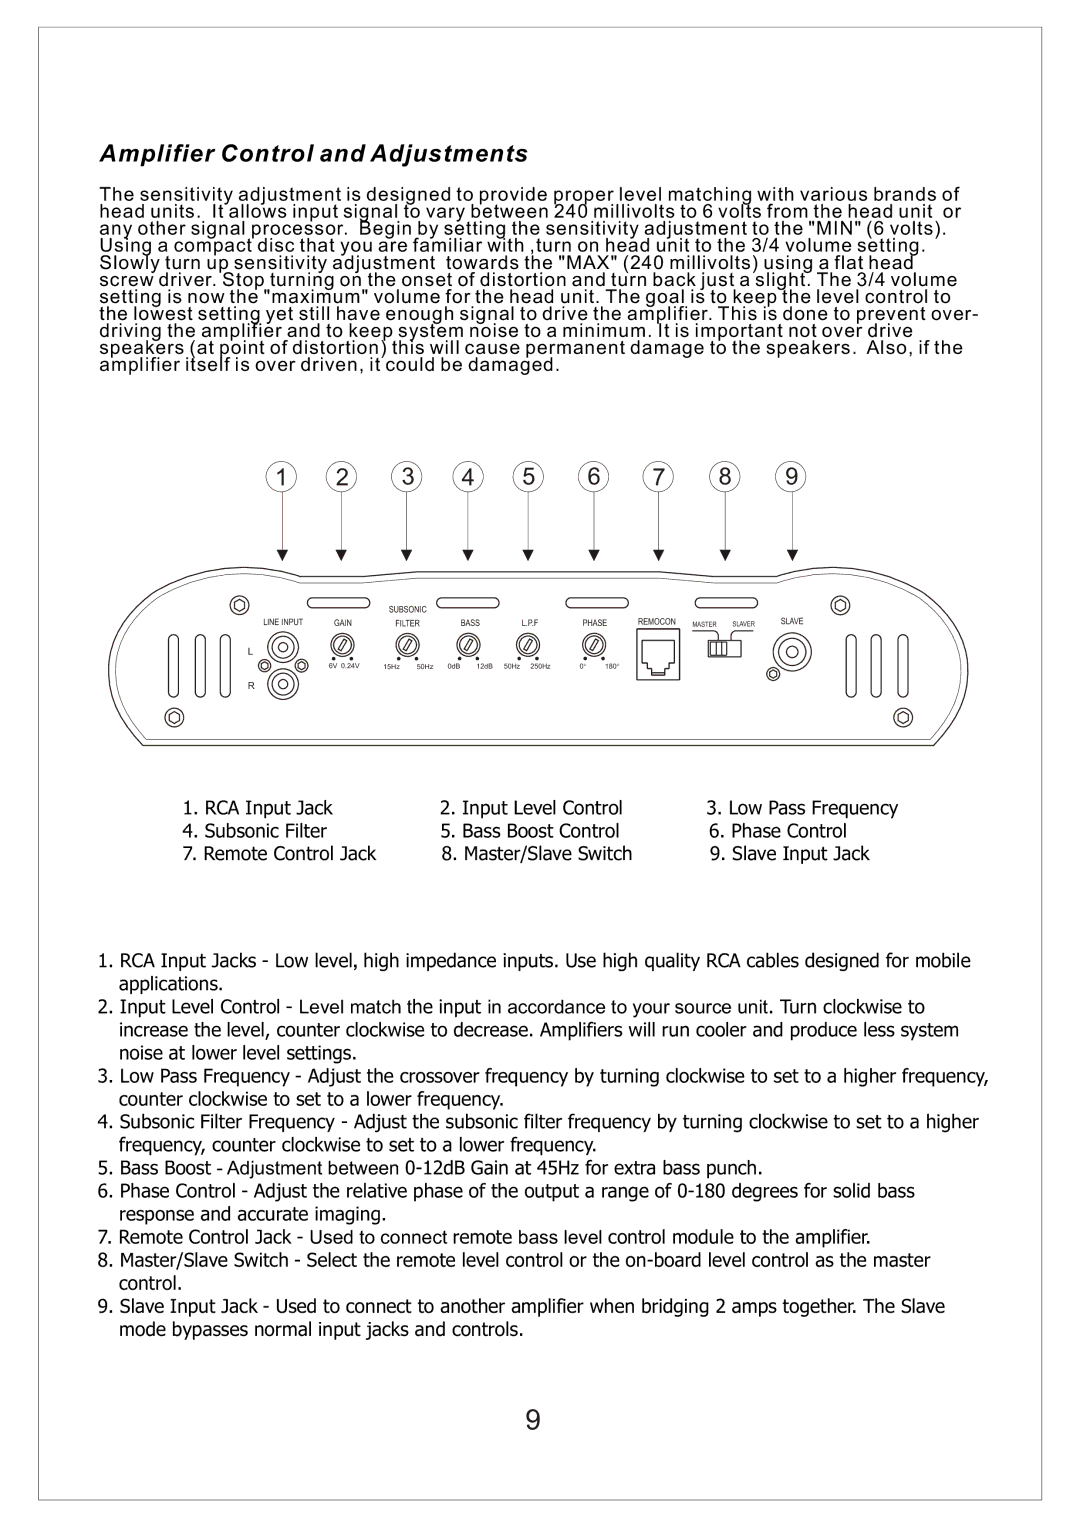
1. RCA Input Jack | 2. Input Level Control | 3. Low Pass Frequency |
4. Subsonic Filter | 5. Bass Boost Control | 6. Phase Control |
7. Remote Control Jack | 8. Master/Slave Switch | 9. Slave Input Jack |
1.RCA Input Jacks - Low level, high impedance inputs. Use high quality RCA cables designed for mobile applications.
2.Input Level Control - Level match the input in accordance to your source unit. Turn clockwise to increase the level, counter clockwise to decrease. Amplifiers will run cooler and produce less system noise at lower level settings.
3.Low Pass Frequency - Adjust the crossover frequency by turning clockwise to set to a higher frequency, counter clockwise to set to a lower frequency.
4.Subsonic Filter Frequency - Adjust the subsonic filter frequency by turning clockwise to set to a higher frequency, counter clockwise to set to a lower frequency.
5.Bass Boost - Adjustment between
6.Phase Control - Adjust the relative phase of the output a range of
7.Remote Control Jack - Used to connect remote bass level control module to the amplifier.
8.Master/Slave Switch - Select the remote level control or the
9.Slave Input Jack - Used to connect to another amplifier when bridging 2 amps together. The Slave mode bypasses normal input jacks and controls.
9
