
MINIAMP AMP800 specifications
The Behringer MINIAMP AMP800 is a compact yet powerful headphone amplifier designed to cater to a variety of audio needs, making it an essential tool for musicians, sound engineers, and audiophiles alike. This versatile unit offers superior audio performance, flexibility, and remarkable portability, making it an ideal choice for both studio and live applications.One of the standout features of the AMP800 is its ability to drive up to four pairs of headphones simultaneously. With independent volume controls for each output, users can easily adjust the sound level to suit their individual preferences, ensuring everyone has an optimal listening experience. This makes the AMP800 particularly useful during recording sessions or rehearsals, where multiple musicians may need to monitor live sound without interfering with one another.
The AMP800 employs advanced high-performance amplification technology, which ensures clean and powerful sound reproduction while minimizing distortion. This is particularly important for critical listening environments, where every nuance in the audio must be captured accurately. The frequency response is wide, maintaining clarity and detail across the entire audio spectrum, making it suitable for a range of audio applications, from tracking instruments to mixing and mastering.
Another significant aspect of the MINIAMP AMP800 is its compact and rugged design. The unit is built with high-quality components, ensuring durability and reliability even in challenging environments. Its lightweight form factor allows for easy transport, making it a preferred choice for traveling musicians and audio engineers.
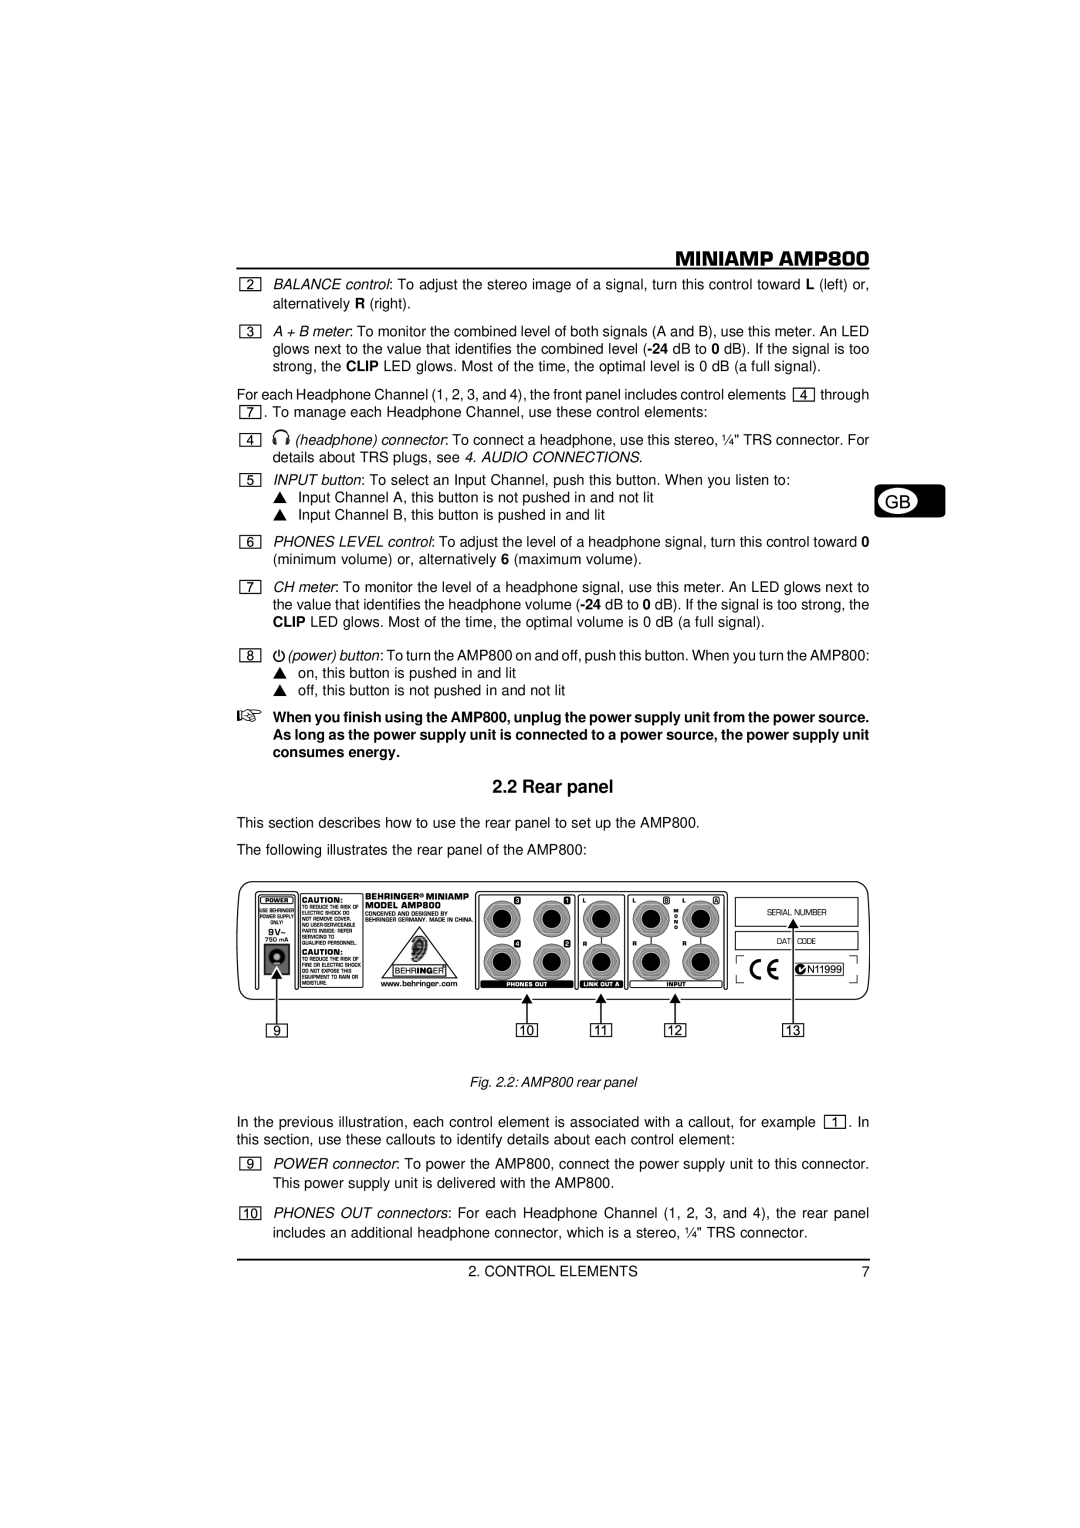
Additionally, the AMP800 features a stereo input with a 1/4" TRS connector as well as a separate RCA input. This connectivity diversity allows users to connect a variety of audio sources, from instruments and mixers to smartphones and other playback devices, enhancing its usability in different settings. Furthermore, the front-panel headphone outputs are designed to accommodate standard TRS 1/4" connectors, providing seamless compatibility with most headphones available on the market.
In conclusion, the Behringer MINIAMP AMP800 stands out as a reliable and efficient headphone amplifier that meets the demands of both professionals and enthusiasts. Its ability to deliver crystal-clear audio, combined with versatile connectivity options and portability, makes it an indispensable tool for anyone looking to enhance their listening experience on the go or in studio environments. Whether for music production, live performance, or casual listening, the AMP800 is designed to excel in all scenarios, showcasing Behringer's commitment to quality and innovation in audio technology.