3.Do not place the appliance near cookers, radiators or in direct sunlight as this will cause your appliance to use more electricity If installed next to a source of heat or freezer, maintain the following minimum side clearances:
From Cookers 50 mm (2”) From Radiators 300 mm (12”) From Freezers 25 mm (1”)
4.Make sure that sufficient room is provided around the appliance to ensure free air circulation.
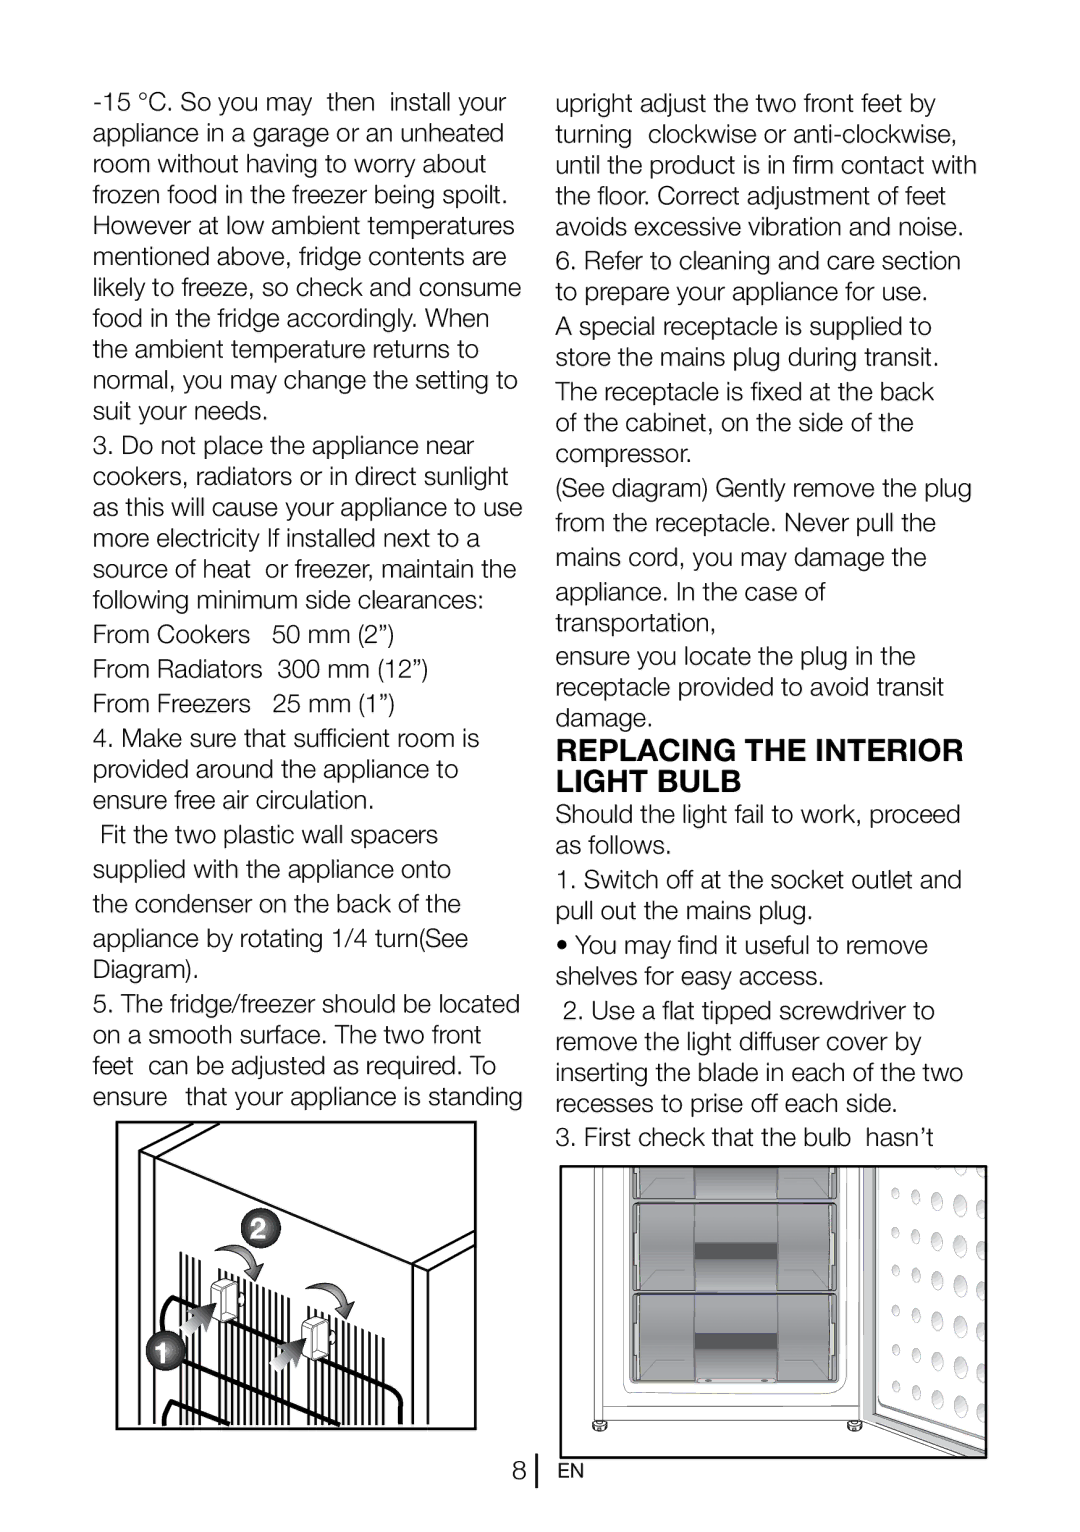
Fit the two plastic wall spacers supplied with the appliance onto the condenser on the back of the
appliance by rotating 1/4 turn(See Diagram).
5.The fridge/freezer should be located on a smooth surface. The two front feet can be adjusted as required. To ensure that your appliance is standing
upright adjust the two front feet by turning clockwise or
6.Refer to cleaning and care section to prepare your appliance for use.
A special receptacle is supplied to store the mains plug during transit.
The receptacle is fixed at the back of the cabinet, on the side of the compressor.
(See diagram) Gently remove the plug from the receptacle. Never pull the mains cord, you may damage the
appliance. In the case of transportation,
ensure you locate the plug in the receptacle provided to avoid transit damage.
REPLACING THE INTERIOR LIGHT BULB
Should the light fail to work, proceed as follows.
1.Switch off at the socket outlet and pull out the mains plug.
• You may find it useful to remove shelves for easy access.
2.Use a flat tipped screwdriver to remove the light diffuser cover by inserting the blade in each of the two recesses to prise off each side.
3. First check that the bulb hasn’t
8 | EN |
