INSTALLATION
CONNECT THE COMPUTER:
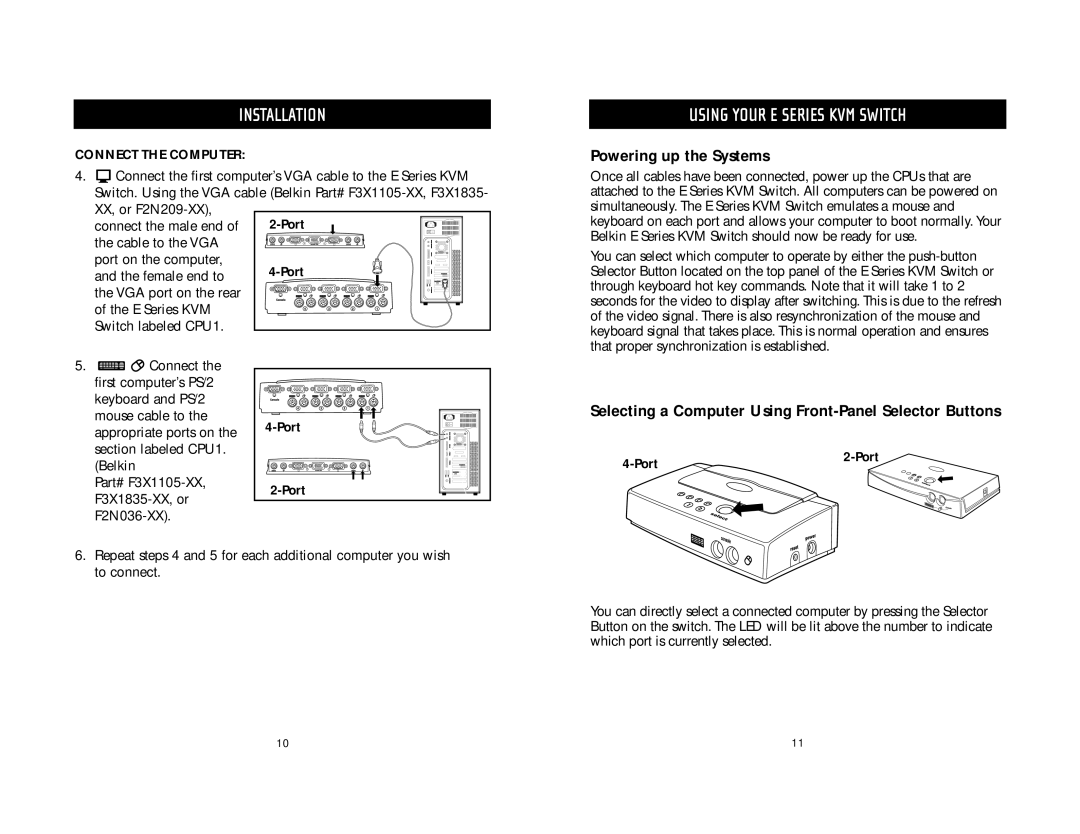
4.![]() Connect the first computer’s VGA cable to the E Series KVM Switch. Using the VGA cable (Belkin Part#
Connect the first computer’s VGA cable to the E Series KVM Switch. Using the VGA cable (Belkin Part#
connect the male end of the cable to the VGA port on the computer, and the female end to the VGA port on the rear of the E Series KVM Switch labeled CPU1.
USING YOUR E SERIES KVM SWITCH
Powering up the Systems
Once all cables have been connected, power up the CPUs that are attached to the E Series KVM Switch. All computers can be powered on simultaneously. The E Series KVM Switch emulates a mouse and keyboard on each port and allows your computer to boot normally. Your Belkin E Series KVM Switch should now be ready for use.
You can select which computer to operate by either the
5.![]()
![]() Connect the first computer’s PS/2 keyboard and PS/2 mouse cable to the appropriate ports on the section labeled CPU1. (Belkin
Connect the first computer’s PS/2 keyboard and PS/2 mouse cable to the appropriate ports on the section labeled CPU1. (Belkin
Part#
|
Selecting a Computer Using Front-Panel Selector Buttons
| |
|
6.Repeat steps 4 and 5 for each additional computer you wish to connect.
You can directly select a connected computer by pressing the Selector Button on the switch. The LED will be lit above the number to indicate which port is currently selected.
10 | 11 |