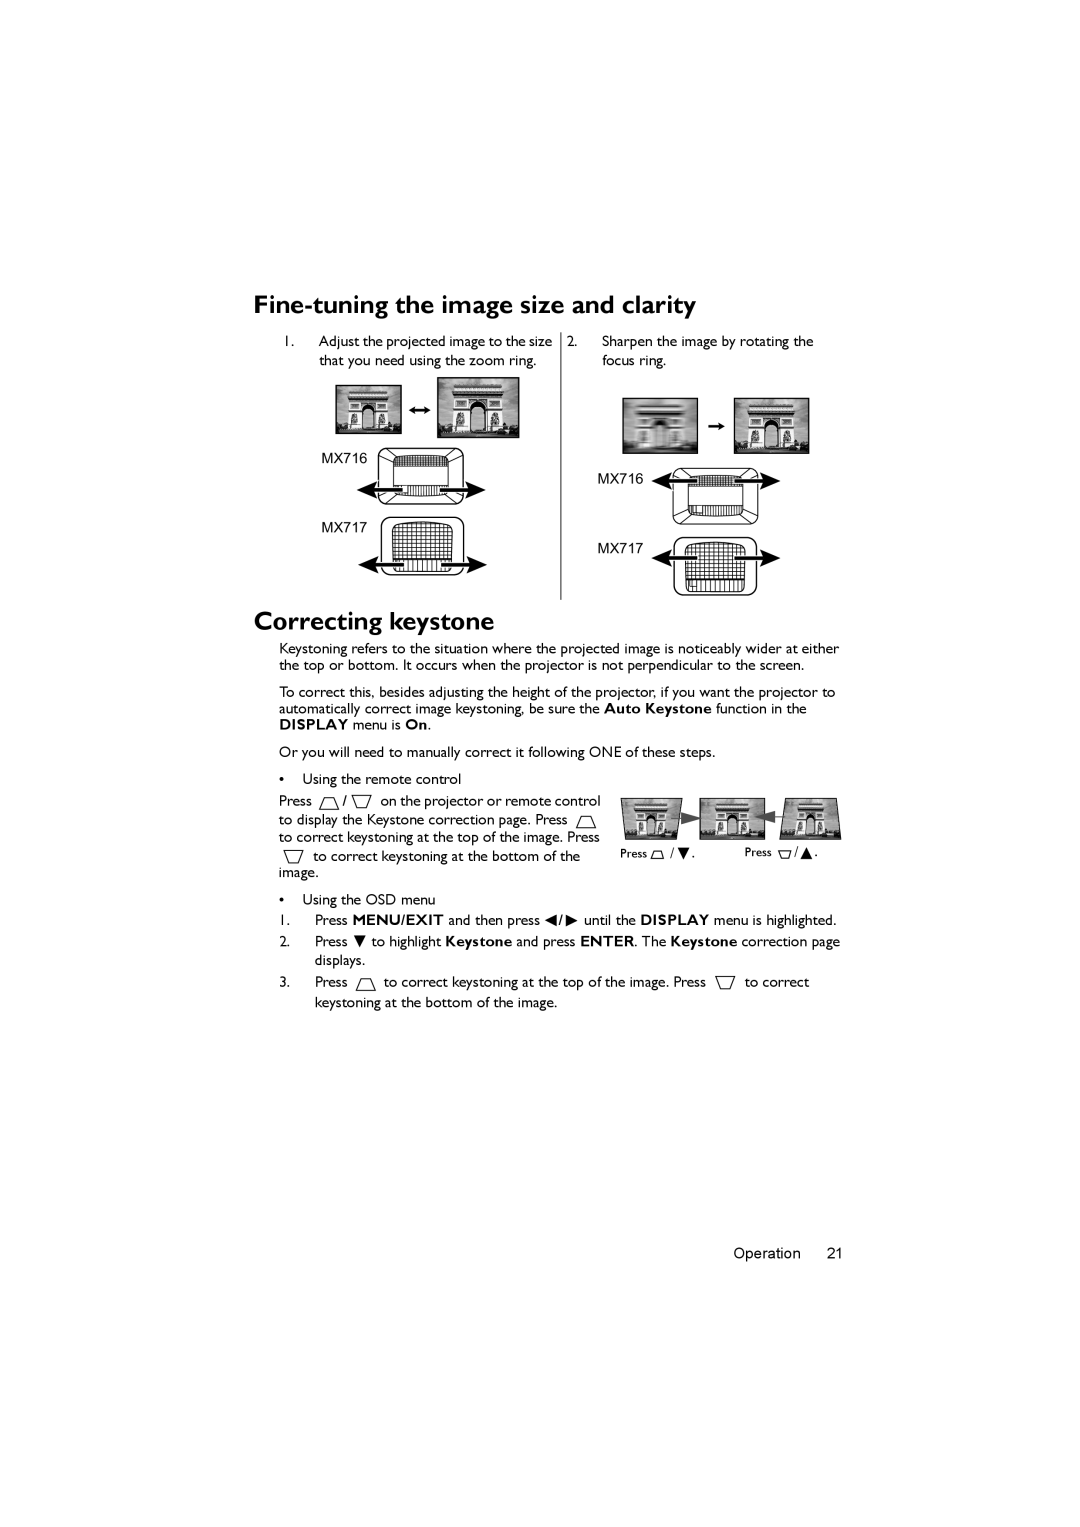
MX717, MX716 specifications
The BenQ MX716 and MX717 are versatile projectors designed for educational and professional environments, offering a blend of performance, reliability, and user-friendly features. Both models are equipped with DLP technology, ensuring vibrant colors and sharp images, making them ideal for classrooms, conference rooms, and other presentation settings.One of the standout features of the BenQ MX716 and MX717 is their brightness. With a brightness level of up to 4000 ANSI lumens, these projectors are capable of delivering clear visuals even in well-lit rooms. This high lumens output makes it easier for viewers to see detailed graphics and text, ensuring that presentations remain engaging and effective.
Both models offer a native XGA resolution of 1024 x 768 pixels, providing a solid foundation for detailed visual displays. The projectors support a variety of resolutions, including 1080p, ensuring compatibility with various multimedia sources. This flexibility allows users to connect laptops, DVDs, and other devices without compromising on image quality.
The contrast ratio is another key feature, with both projectors offering a high contrast ratio of 13,000:1. This impressive ratio enhances image depth and clarity, resulting in more lifelike colors and sharper text. As a result, presentations appear more professional and easy to follow, improving overall communication.
In terms of connectivity, the BenQ MX716 and MX717 come equipped with multiple inputs, including HDMI, VGA, and USB ports. This variety facilitates seamless connections with diverse devices, essential for modern multimedia environments. Additionally, the built-in speakers deliver decent sound quality, enhancing the overall presentation experience without requiring external audio equipment.
BenQ has also integrated eco-friendly technologies into these models, achieving low power consumption and extended lamp life. The SmartEco technology intelligently adjusts lamp power based on the content being displayed, which not only reduces energy usage but also extends the life of the lamp up to 10,000 hours.
Portability is another consideration, as both projectors are designed to be lightweight and compact, making them easy to transport between different locations. The user-friendly interface, along with quick setup and installation processes, confirms BenQ’s commitment to providing hassle-free solutions for its users.
In summary, the BenQ MX716 and MX717 projectors combine high brightness, excellent image quality, and user-friendly features, making them ideal choices for educational and corporate environments. Whether for lectures, meetings, or presentations, these projectors ensure optimal performance and reliability.