opposite making with the same orientation that has been disassembled, remembering that the smooth part both in vista and the remains inside the screen‐printed glass oven door. Once you have reassembled the glass block with the engagements and unlocking hinges.
Caution: do not loosen the hinges if the inner glass is not mounted on the door.
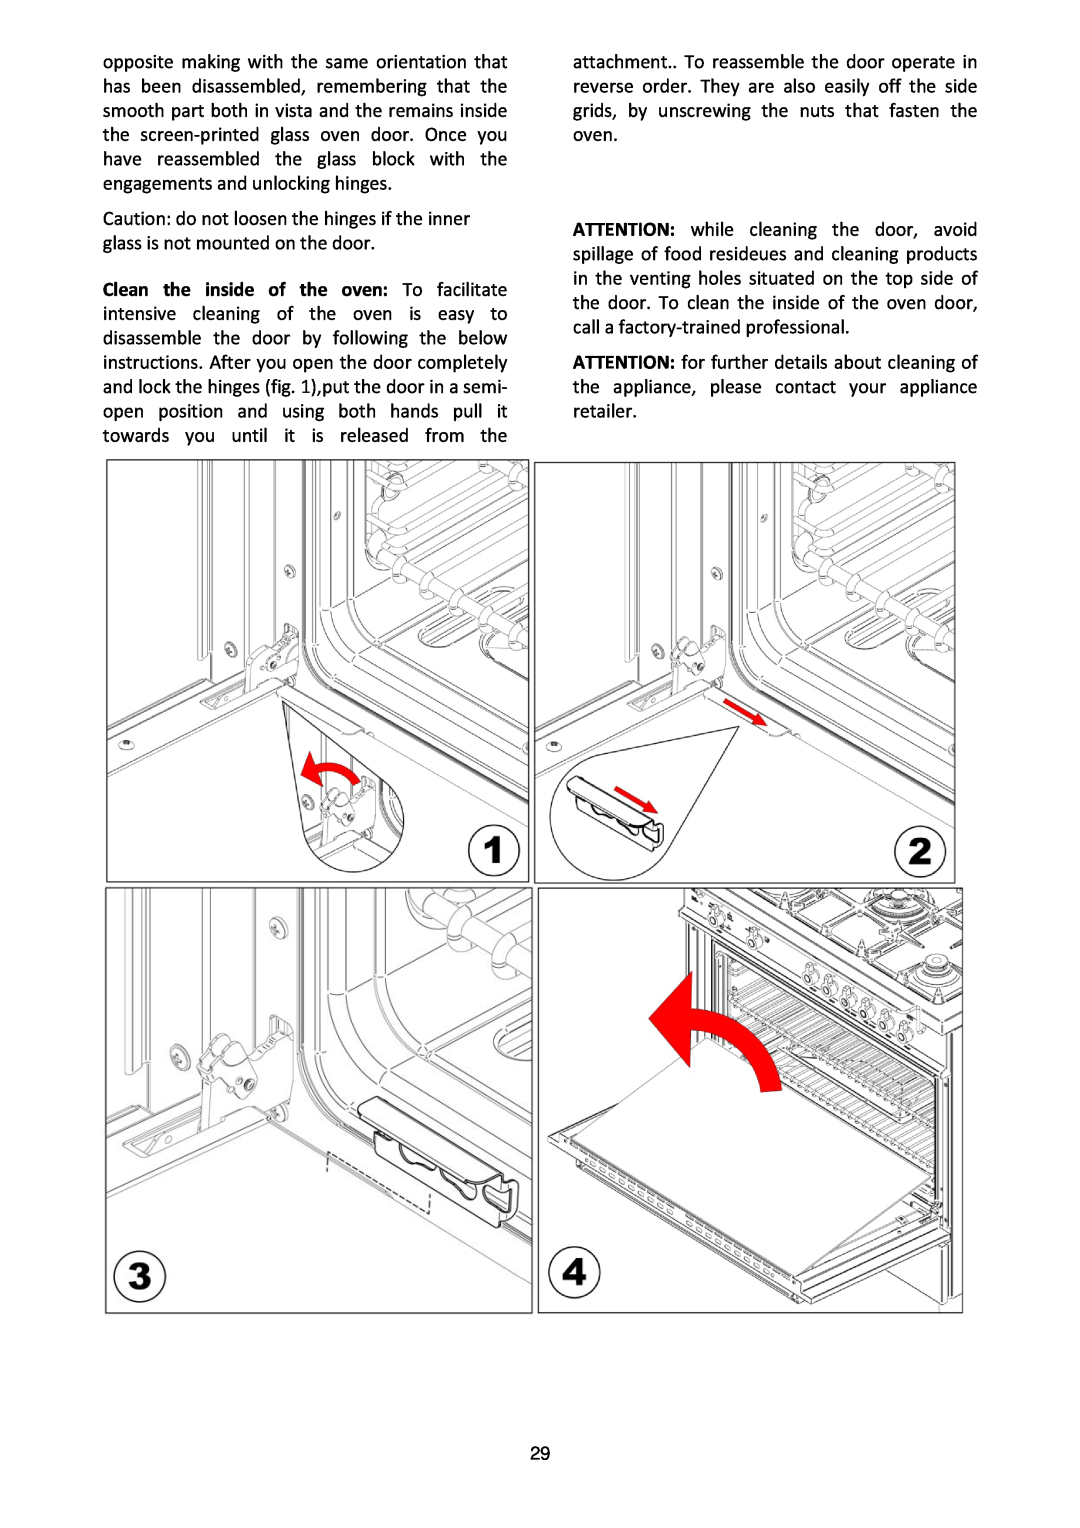
Clean the inside of the oven: To facilitate intensive cleaning of the oven is easy to disassemble the door by following the below instructions. After you open the door completely and lock the hinges (fig. 1),put the door in a semi‐ open position and using both hands pull it towards you until it is released from the
attachment.. To reassemble the door operate in reverse order. They are also easily off the side grids, by unscrewing the nuts that fasten the oven.
ATTENTION: while cleaning the door, avoid spillage of food resideues and cleaning products in the venting holes situated on the top side of the door. To clean the inside of the oven door, call a factory‐trained professional.
ATTENTION: for further details about cleaning of the appliance, please contact your appliance retailer.
29