STEP 5: VISUAL CHECKS
Before reinstalling the bottom panel, the following visual check must be performed to ensure that the conversion has been carried out properly and without damage to other components of the range.
A)CONNECTION OF THERMOCOUPLES TO
THERMOSTAT
The thermocouples for both broiler and main oven burner are connected to the same magnet. Tight gently the two connections alternating action on the two nuts. Do not fully tighten one thermocouple before having started to tighten the second one.
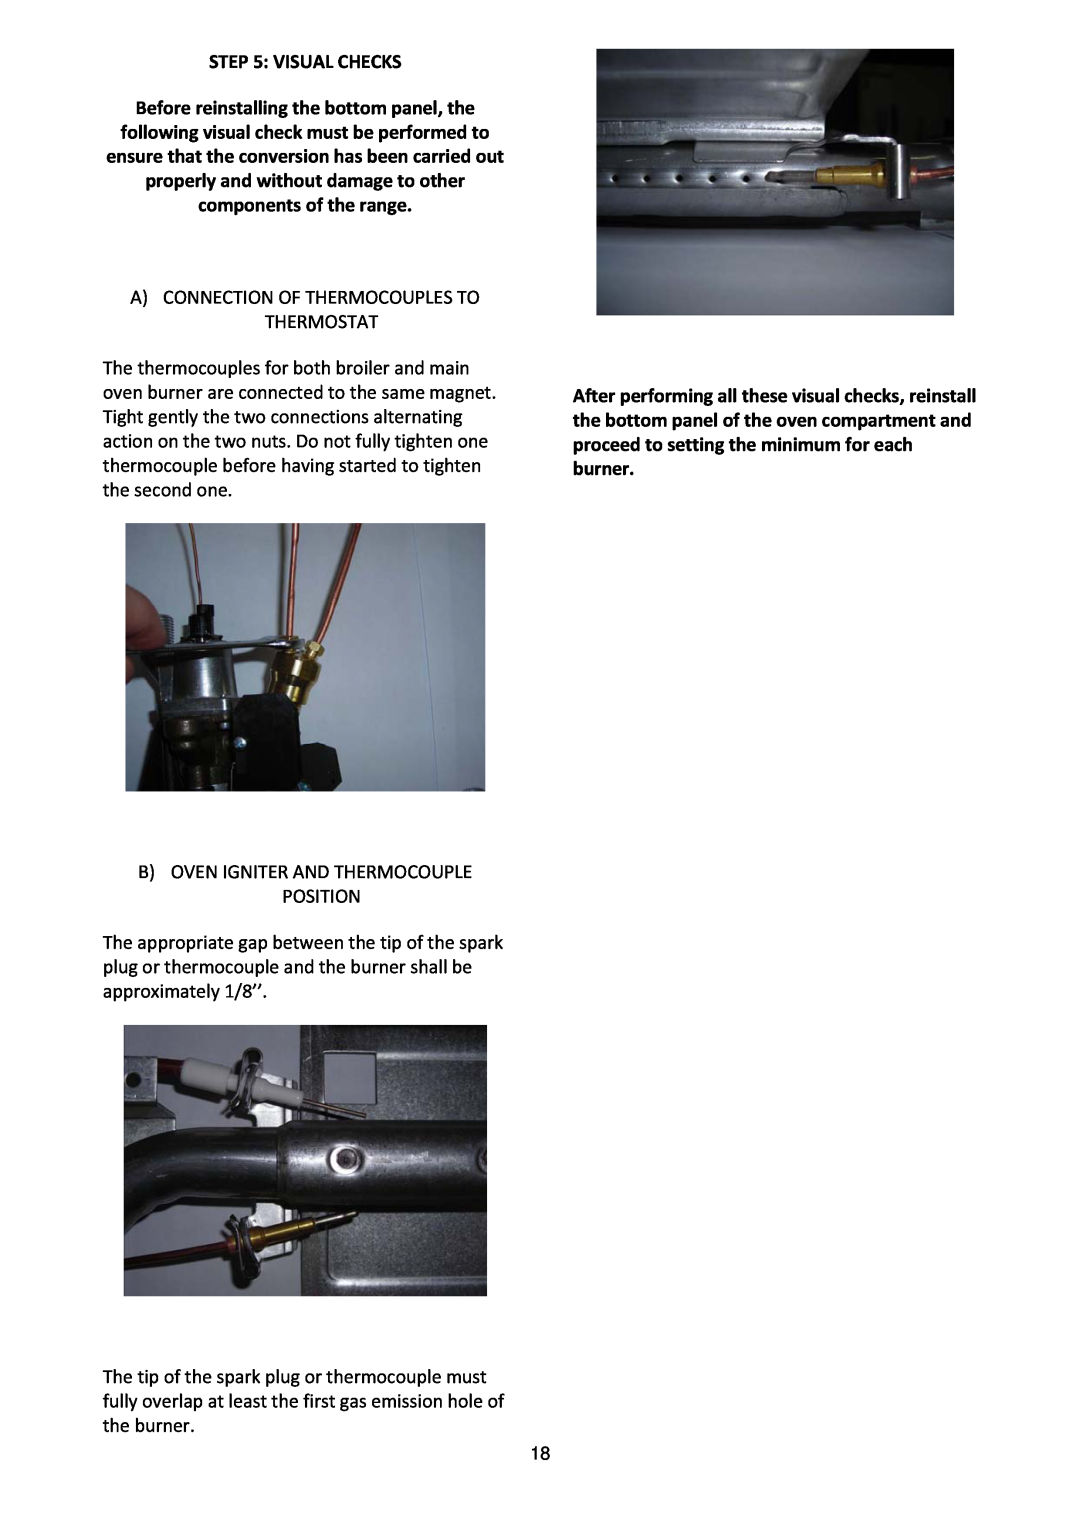
B)OVEN IGNITER AND THERMOCOUPLE
POSITION
The appropriate gap between the tip of the spark plug or thermocouple and the burner shall be approximately 1/8’’.
The tip of the spark plug or thermocouple must fully overlap at least the first gas emission hole of the burner.
After performing all these visual checks, reinstall the bottom panel of the oven compartment and proceed to setting the minimum for each burner.
18