OPERATION
Controls
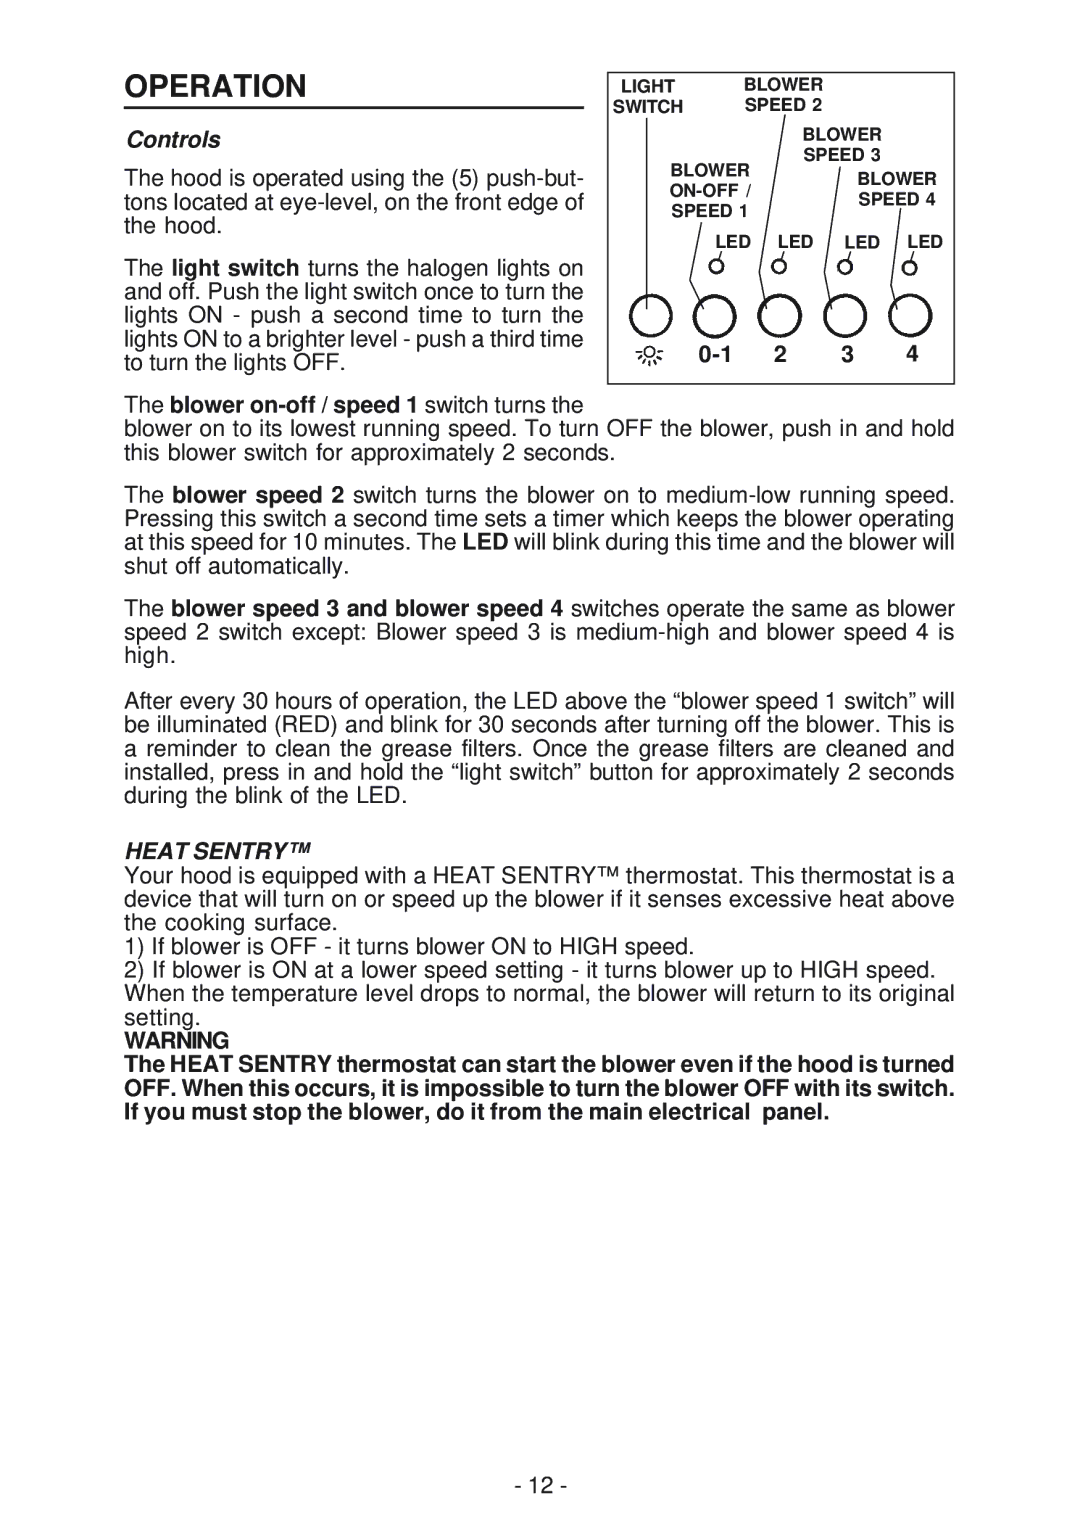
The hood is operated using the (5)
The light switch turns the halogen lights on and off. Push the light switch once to turn the lights ON - push a second time to turn the lights ON to a brighter level - push a third time to turn the lights OFF.
LIGHT | BLOWER |
SWITCH | SPEED 2 |
BLOWER
SPEED 3
BLOWERBLOWER
LED LED LED LED
0-1 2 3 4
The blower on-off / speed 1 switch turns the
blower on to its lowest running speed. To turn OFF the blower, push in and hold this blower switch for approximately 2 seconds.
The blower speed 2 switch turns the blower on to
The blower speed 3 and blower speed 4 switches operate the same as blower speed 2 switch except: Blower speed 3 is
After every 30 hours of operation, the LED above the “blower speed 1 switch” will be illuminated (RED) and blink for 30 seconds after turning off the blower. This is a reminder to clean the grease filters. Once the grease filters are cleaned and installed, press in and hold the “light switch” button for approximately 2 seconds during the blink of the LED.
HEAT SENTRY™
Your hood is equipped with a HEAT SENTRY™ thermostat. This thermostat is a device that will turn on or speed up the blower if it senses excessive heat above the cooking surface.
1)If blower is OFF - it turns blower ON to HIGH speed.
2)If blower is ON at a lower speed setting - it turns blower up to HIGH speed. When the temperature level drops to normal, the blower will return to its original setting.
WARNING
The HEAT SENTRY thermostat can start the blower even if the hood is turned OFF. When this occurs, it is impossible to turn the blower OFF with its switch. If you must stop the blower, do it from the main electrical panel.
- 12 -
