Maintenance and care

Clearing Clogs

Low suction or poor pickup may be due to a clog in the vacuum cleaner. If you notice a change in the sound of the motor, check for clogs.

1.Turn power switch off. Unplug cleaner from electrical outlet.

2.Empty dirt container.

3.Check upper tank for build up or clogs.

4.If you notice a clog in the upper tank, remove the inner cyclone (see section “cleaning the upper tank” on listed below.)

5.Grasp the hose and separate it from the hose wand base. Check for a clog in the base or in the hose itself.

6.Remove the Twist ‘n Snap hose from the vacuum by turning to the left. Straighten the hose and unclog with a long, narrow object such as a broom handle.

7.If the clog persists, follow the instructions for “checking the rotating floor brush and drive belt” on page 10 and inspect the passageway for obstructions.

CAUTION:

To reduce the risk of injury from moving parts, turn off vacuum cleaner and dis- connect power plug from electrical outlet.

5 3 5 2 - 3 6 2 - 0 0 8


a c . l l e s s i b . w w w

12


.verrouillage de languettes les contre


bute qu’il ce jusqu’à droite la vers tourner


le-faites et l’appareil dans intérieur cyclone


le Poussez .l'appareil de l'avant vers placées


sont cyclone le sur languettes les que assurant


vous en intérieur cyclone le Alignez .supérieur


boîtier le dans glisser faisant le en intérieur


cyclone le replacez nettoyage, le Après

.4


.dommages des subir pourrait appareil


votre contraire, cas le dans : nouveau de


l'assembler de avant sec entièrement est qu’il


vous-Assurez .doux détergent un avec nettoyés


être peuvent évents les et intérieur cyclone Le

.3


.doux savon de solution d’une ou


2

1

d’eau humecté chiffon un avec intérieur cyclone


le et supérieur réservoir du l’intérieur Essuyez

.2


.supérieur


réservoir du l’extraire pour bas le vers cyclone


le Tirez .verrouillage de languettes les contre


bute qu’il ce jusqu’à gauche la vers tourner


le-faites et intérieur cyclone le Saisissez

.1


supérieur réservoir du Nettoyage


.obstruction toute déceler


y pour l’air deinpassagepectez de voiel

a

et courroie la de et tournante brosse la de


l’action de vérification la sur 10 page la de


directives les suivez persiste, l’obstruction Si

.7


.balai à manche un comme


étroit et long objet un avec le-désobstruez et


tuyau le Étalez .gauche la vers tournant le en


MC

Snap ‘n Twist tuyau le Retirez

.6


l’aspirateur de


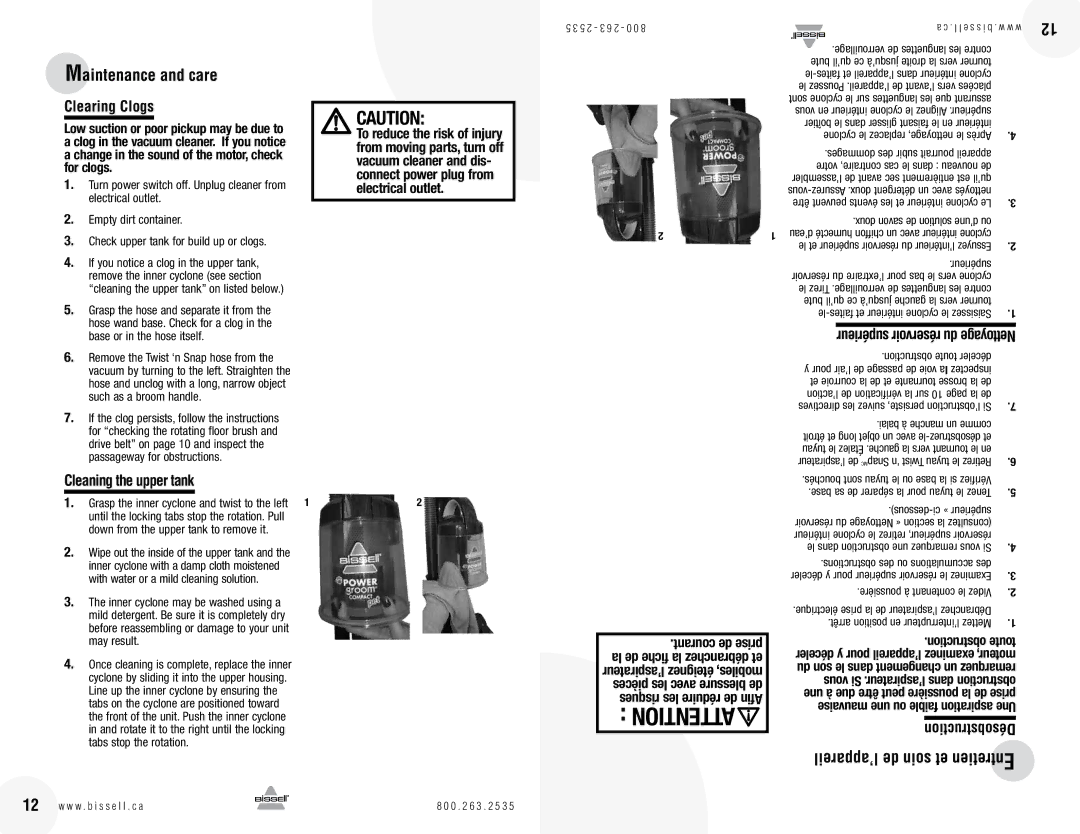
Cleaning the upper tank

1.

Grasp the inner cyclone and twist to the left 1

2


until the locking tabs stop the rotation. Pull


down from the upper tank to remove it.


2.

Wipe out the inside of the upper tank and the


inner cyclone with a damp cloth moistened


with water or a mild cleaning solution.


3.

The inner cyclone may be washed using a


mild detergent. Be sure it is completely dry


before reassembling or damage to your unit


may result.


4.

Once cleaning is complete, replace the inner


cyclone by sliding it into the upper housing.


Line up the inner cyclone by ensuring the


tabs on the cyclone are positioned toward


the front of the unit. Push the inner cyclone


in and rotate it to the right until the locking


tabs stop the rotation.


12 w w w . b i s s e l l . c a

8 0 0 . 2 6 3 . 2 5 3 5

.courant de prise la de fiche la débranchez et l’aspirateur éteignez mobiles, pièces les avec blessure de risques les réduire de Afin : ATTENTION

.bouchés sont tuyau le ou base la si Vérifiez


.base sa de séparer la pour tuyau le Tenez

.5

.dessous)-ci » supérieur


réservoir du Nettoyage « section la (consultez


intérieur cyclone le retirez supérieur, réservoir


le dans obstruction une remarquez vous Si

.4

.obstructions des ou accumulations des


déceler y pour supérieur réservoir le Examinez

.3

.poussière à contenant le Videz

.2

.électrique prise la de l’aspirateur Débranchez


.arrêt position en l’interrupteur Mettez

.1

.obstruction toute

déceler y pour l’appareil examinez moteur,

du son le dans changement un remarquez

vous Si .l’aspirateur dans obstruction

une à due être peut poussière la de prise

mauvaise une ou faible aspiration Une

Désobstruction

l’appareil de soin et ntretienE

Page 12
Image 12
Bissell 13H8 warranty Clearing Clogs, Cleaning the upper tank, Supérieur réservoir du Nettoyage, Désobstruction

13H8 specifications

The Bissell 13H8 is a powerful and versatile carpet cleaner designed to restore the look and feel of your carpets, leaving them looking fresh and new. With its innovative design and advanced cleaning technologies, this machine is an essential tool for maintaining a clean home environment.

One of the standout features of the Bissell 13H8 is its Heatwave Technology, which helps to maintain the water temperature throughout the cleaning process. By ensuring that the water remains hot, this technology enhances the cleaning power, effectively loosening and removing tough stains and embedded dirt from carpets.

The Bissell 13H8 is equipped with a dual tank system that separates clean water and dirty water. This design allows for continuous cleaning without the worry of mixing clean and dirty water, providing a more effective and hygienic cleaning experience. The clean water tank has a generous capacity, reducing the frequency of refills during larger cleaning sessions.

Another significant feature is its powerful suction capability, which not only removes dirt and stains from carpets but also extracts excess moisture, speeding up the drying time. This is particularly important for preventing mold and mildew growth in carpets after cleaning. The Bissell 13H8 is also designed with specialized brushes that agitate carpet fibers to ensure a deep clean, enhancing the effectiveness of the cleaning solution.

For added convenience, this carpet cleaner comes with a variety of handy attachments, including a tough stain tool and a crevice tool, making it easy to tackle difficult spots, upholstery, and even stairs. These tools allow users to clean hard-to-reach areas efficiently and precisely.

Ease of use is another key characteristic of the Bissell 13H8. Its lightweight design means it can be maneuvered comfortably around the home, and the simple control panel makes operation straightforward, even for those new to carpet cleaning.

Overall, the Bissell 13H8 stands out with its combination of advanced cleaning technologies, user-friendly features, and versatile attachments. Whether you're dealing with pet stains, high-traffic areas, or routine maintenance, the Bissell 13H8 offers a reliable solution for keeping carpets looking their best. Its efficient design and robust cleaning capacity make it a popular choice among homeowners seeking to maintain the cleanliness and longevity of their carpets.