89
 Safety Rules and Instructions: Polarized Plug
To reduce the risk of electric shock, this equipment has a polarized plug (one blade is wider than the other). This equipment must be used with a suitable polarized 2 wire or 3 wire extension cord. Polarized connections will fit together only one way. Make sure that the receptacle end of the extension cord has large and small blade slot widths. If the plug does not fit fully into the extension cord, reverse the plug. If it still does not fit, obtain a suitable extension cord. If the extension cord does not fit fully into the outlet, contact a qualified electri- cian to install the proper outlet. Do not change the tool plug or extension cord in any way.
Before Operating
SECURING POWER SUPPLY CORD - Secure the extension cord in the tool's built-in cord retainer as shown in Figure 7A and 7B.
Switch
On/Off Switch (Fig. 1)
For extra control, your blow vac is fitted with a two speed switch located on the handle of the powerhead.
The switch has a central off. Position 0.
To use in low speed, move the switch fully to the rear. Position I.
To change to high speed push the switch back to the off position and then fully forward. Position II. NOTE: The switch will not operate if the release button, shown in Figure 1, is depressed.
To turn the tool ON, slide the switch forward, as shown in Figure 1. To turn tool OFF, slide switch to the middle position.
Assembly
USE AS A BLOWER: ALWAYS WEAR SAFETY GLASSES, WEAR A FILTER MASK IF THE OPERATION IS DUSTY. USE OF RUBBER GLOVES AND SUBSTANTIAL FOOTWEAR IS RECOMMENDED WHEN WORKING OUTDOORS. FOR HOUSEHOLD USE ONLY.
 WARNING: When turning the tool off for tube installation or any other reason, wait 10 seconds for the fan to stop rotating before disassembly.
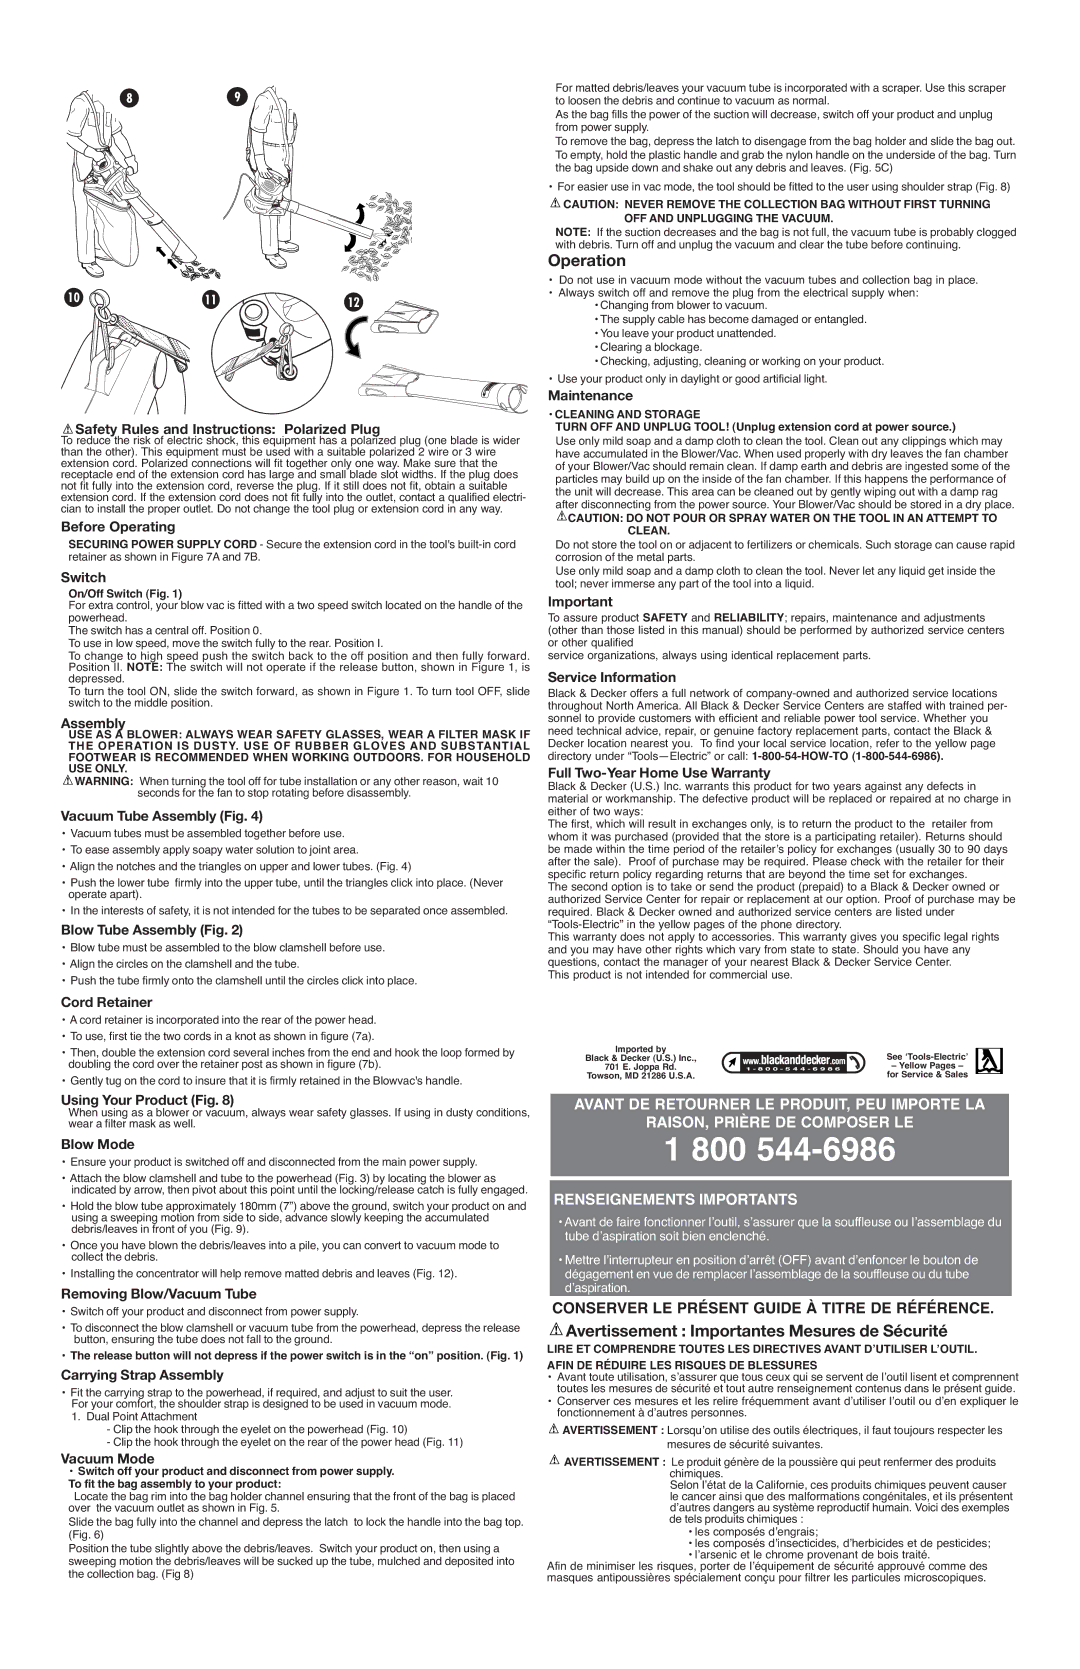
Vacuum Tube Assembly (Fig. 4)
•Vacuum tubes must be assembled together before use.
•To ease assembly apply soapy water solution to joint area.
•Align the notches and the triangles on upper and lower tubes. (Fig. 4)
•Push the lower tube firmly into the upper tube, until the triangles click into place. (Never operate apart).
•In the interests of safety, it is not intended for the tubes to be separated once assembled.
Blow Tube Assembly (Fig. 2)
•Blow tube must be assembled to the blow clamshell before use.
•Align the circles on the clamshell and the tube.
•Push the tube firmly onto the clamshell until the circles click into place.
For matted debris/leaves your vacuum tube is incorporated with a scraper. Use this scraper to loosen the debris and continue to vacuum as normal.
As the bag fills the power of the suction will decrease, switch off your product and unplug from power supply.
To remove the bag, depress the latch to disengage from the bag holder and slide the bag out. To empty, hold the plastic handle and grab the nylon handle on the underside of the bag. Turn the bag upside down and shake out any debris and leaves. (Fig. 5C)
• For easier use in vac mode, the tool should be fitted to the user using shoulder strap (Fig. 8)
 CAUTION: NEVER REMOVE THE COLLECTION BAG WITHOUT FIRST TURNING OFF AND UNPLUGGING THE VACUUM.
NOTE: If the suction decreases and the bag is not full, the vacuum tube is probably clogged with debris. Turn off and unplug the vacuum and clear the tube before continuing.
Operation
•Do not use in vacuum mode without the vacuum tubes and collection bag in place.
•Always switch off and remove the plug from the electrical supply when:
•Changing from blower to vacuum.
•The supply cable has become damaged or entangled.
•You leave your product unattended.
•Clearing a blockage.
•Checking, adjusting, cleaning or working on your product.
•Use your product only in daylight or good artificial light.
Maintenance
•CLEANING AND STORAGE
TURN OFF AND UNPLUG TOOL! (Unplug extension cord at power source.)
Use only mild soap and a damp cloth to clean the tool. Clean out any clippings which may have accumulated in the Blower/Vac. When used properly with dry leaves the fan chamber of your Blower/Vac should remain clean. If damp earth and debris are ingested some of the particles may build up on the inside of the fan chamber. If this happens the performance of the unit will decrease. This area can be cleaned out by gently wiping out with a damp rag
after disconnecting from the power source. Your Blower/Vac should be stored in a dry place.
 CAUTION: DO NOT POUR OR SPRAY WATER ON THE TOOL IN AN ATTEMPT TO CLEAN.
Do not store the tool on or adjacent to fertilizers or chemicals. Such storage can cause rapid corrosion of the metal parts.
Use only mild soap and a damp cloth to clean the tool. Never let any liquid get inside the tool; never immerse any part of the tool into a liquid.
Important
To assure product SAFETY and RELIABILITY; repairs, maintenance and adjustments (other than those listed in this manual) should be performed by authorized service centers or other qualified
service organizations, always using identical replacement parts.
Service Information
Black & Decker offers a full network of company-owned and authorized service locations throughout North America. All Black & Decker Service Centers are staffed with trained per- sonnel to provide customers with efficient and reliable power tool service. Whether you need technical advice, repair, or genuine factory replacement parts, contact the Black & Decker location nearest you. To find your local service location, refer to the yellow page directory under “Tools—Electric” or call: 1-800-54-HOW-TO(1-800-544-6986).
Full Two-Year Home Use Warranty
Black & Decker (U.S.) Inc. warrants this product for two years against any defects in material or workmanship. The defective product will be replaced or repaired at no charge in either of two ways:
The first, which will result in exchanges only, is to return the product to the retailer from whom it was purchased (provided that the store is a participating retailer). Returns should be made within the time period of the retailer’s policy for exchanges (usually 30 to 90 days after the sale). Proof of purchase may be required. Please check with the retailer for their specific return policy regarding returns that are beyond the time set for exchanges.
The second option is to take or send the product (prepaid) to a Black & Decker owned or authorized Service Center for repair or replacement at our option. Proof of purchase may be required. Black & Decker owned and authorized service centers are listed under “Tools-Electric” in the yellow pages of the phone directory.
This warranty does not apply to accessories. This warranty gives you specific legal rights and you may have other rights which vary from state to state. Should you have any questions, contact the manager of your nearest Black & Decker Service Center.
This product is not intended for commercial use.