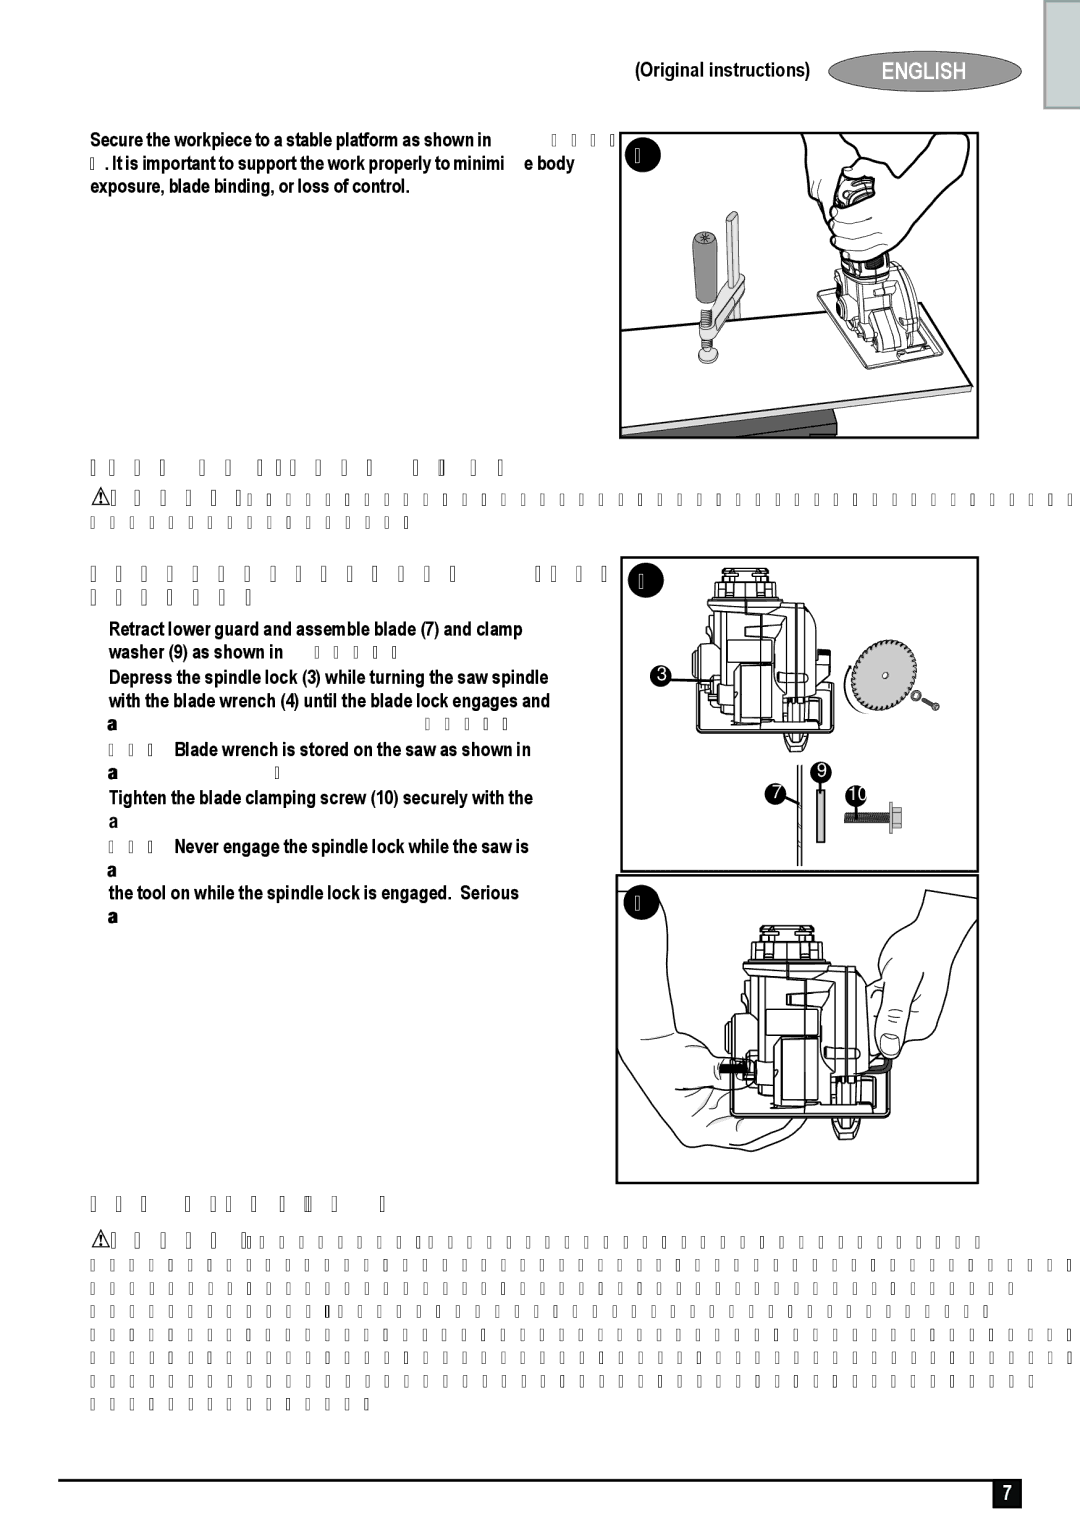
Secure the workpiece to a stable platform as shown in Figure D. It is important to support the work properly to minimize body exposure, blade binding, or loss of control.
(Original instructions) | ENGLISH |
D
ASSEMBly/ADjUSTMENT SET-UP
![]() WARNING: To reduce the risk of injury, always remove battery from saw before any of the following adjustment operations.
WARNING: To reduce the risk of injury, always remove battery from saw before any of the following adjustment operations.
ATTACHING AND REMOVING THE BlADE: | E |
|
FIGURE E & F |
|
|
• Retract lower guard and assemble blade (7) and clamp |
|
|
washer (9) as shown in Figure E. | 3 |
|
• Depress the spindle lock (3) while turning the saw spindle |
| |
with the blade wrench (4) until the blade lock engages and |
|
|
the blade stops rotating as shown in Figure F. |
|
|
NOTE: Blade wrench is stored on the saw as shown in |
|
|
Parts and Features. | 7 | 9 |
• Tighten the blade clamping screw (10) securely with the | 10 | |
blade wrench. |
|
|
NOTE: Never engage the spindle lock while the saw is |
|
|
running, or engage in an effort to stop the tool. Never turn |
|
|
the tool on while the spindle lock is engaged. Serious | F |
|
damage to your saw will result. |
| |
|
|
lOWER BlADE GUARD
![]() WARNING: laceration Hazard. The lower blade guard is a safety feature which reduces the risk of serious personal injury. Never use the saw if the lower guard is missing, damaged,
WARNING: laceration Hazard. The lower blade guard is a safety feature which reduces the risk of serious personal injury. Never use the saw if the lower guard is missing, damaged,
7
