ASSEMBLY
ASSEMBLY TOOLS REQUIRED (NOT SUPPLIED):
-Adjustable Wrench
-Phillips Screwdriver
APPROXIMATE ASSEMBLY TIME: 15 minutes
![]() CAUTION: CHECK TO BE SURE THAT THE LEGS ARE SECURELY LOCKED before assembling any miter saw to the stand.
CAUTION: CHECK TO BE SURE THAT THE LEGS ARE SECURELY LOCKED before assembling any miter saw to the stand.
2.ATTACHING THE WORK STOP & ROLLER SUPPORT
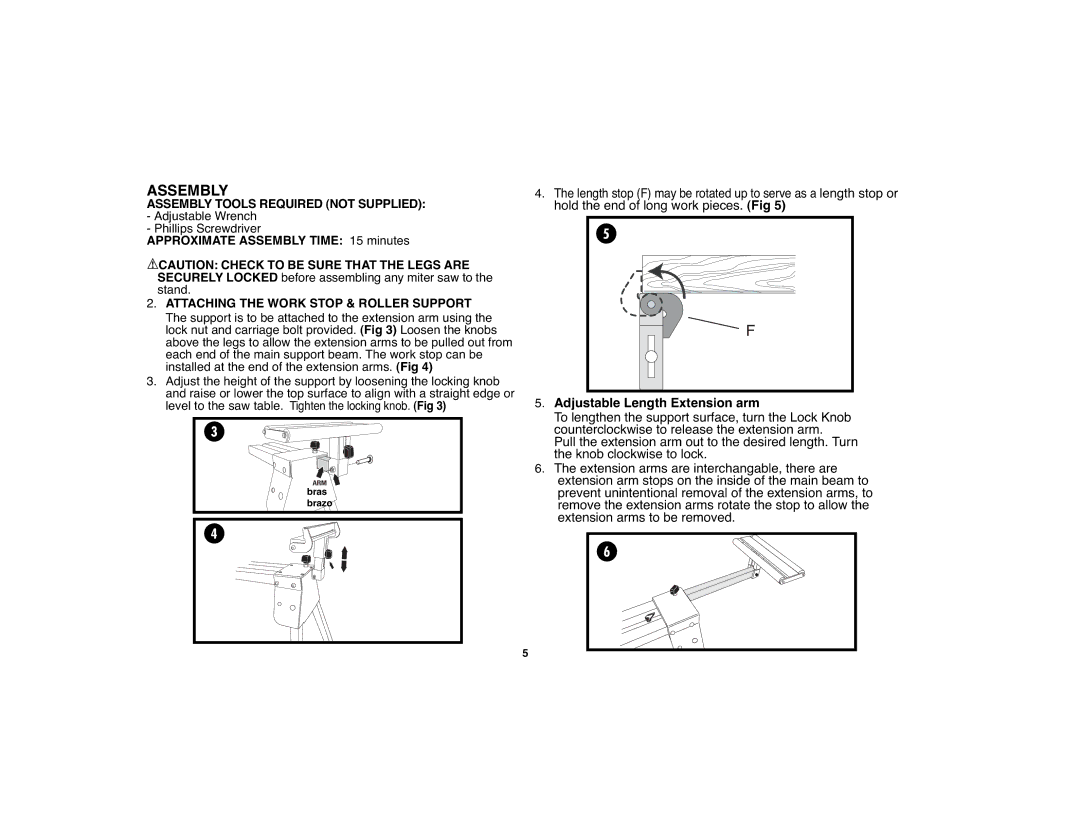
The support is to be attached to the extension arm using the lock nut and carriage bolt provided. (Fig 3) Loosen the knobs above the legs to allow the extension arms to be pulled out from each end of the main support beam. The work stop can be installed at the end of the extension arms. (Fig 4)
3.Adjust the height of the support by loosening the locking knob and raise or lower the top surface to align with a straight edge or level to the saw table. Tighten the locking knob. (Fig 3)
3
3
ARM
bras brazo
4
4.The length stop (F) may be rotated up to serve as a length stop or hold the end of long work pieces. (Fig 5)
55
F
5.Adjustable Length Extension arm
To lengthen the support surface, turn the Lock Knob counterclockwise to release the extension arm.
Pull the extension arm out to the desired length. Turn the knob clockwise to lock.
6.The extension arms are interchangable, there are extension arm stops on the inside of the main beam to prevent unintentional removal of the extension arms, to remove the extension arms rotate the stop to allow the extension arms to be removed.
6
5
