
DCM2161B specifications
The Black & Decker DCM2161B is a popular coffee maker that seamlessly combines style, functionality, and ease of use. Designed to cater to both casual coffee drinkers and aficionados alike, this model brings a host of features that enhance the brewing experience while fitting neatly into any kitchen space.One of the standout features of the DCM2161B is its 12-cup capacity. This means you can brew multiple servings at once, making it a perfect choice for families or individuals who enjoy entertaining guests. The carafe is constructed from durable glass and features a classic design, allowing for easy pouring and serving. Additionally, this model includes measurement markings to help you ensure the perfect brew every time.
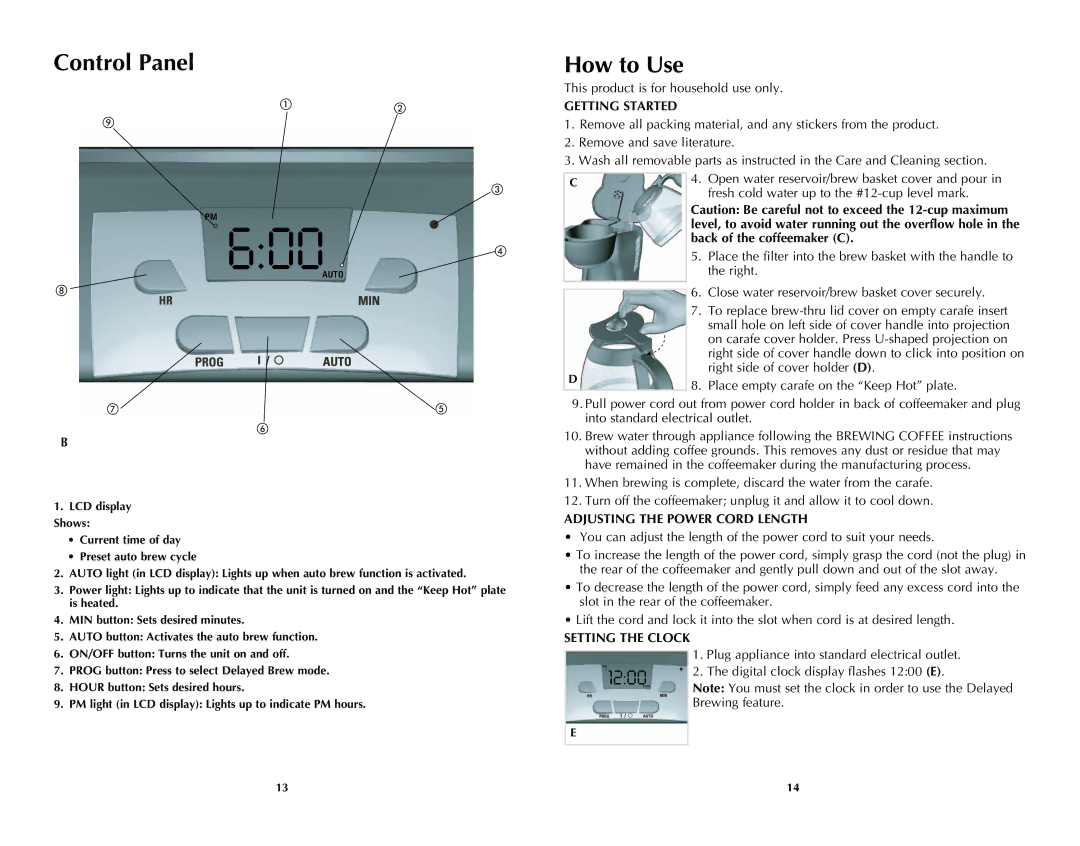
The DCM2161B incorporates a simple yet effective brewing system that is both user-friendly and efficient. The adjustable brew strength selector allows you to customize the strength of your coffee, catering to personal preferences—whether you prefer a mild brew or a bolder flavor. The water reservoir is easily accessible with its flip-top lid, allowing for quick refills and simplifying the cleaning process.
Another technology that stands out is the “Sneak-A-Cup” feature. This innovative design lets you pause and pour a cup of coffee before the brew cycle is complete, so you don’t have to wait for the entire pot to finish brewing. This handy feature is especially useful for those busy mornings when you need that caffeine fix in a hurry.
The DCM2161B also boasts a programmable timer that enables you to set your coffee to brew at a specific time. This means that you can wake up to the enticing aroma of fresh coffee each morning without having to put in extra effort. A built-in cleaning cycle indicator is also included to remind you when it’s time for maintenance, ensuring your coffee maker remains in top working condition.
Cleaning is a breeze with this coffee maker, as it features a removable filter basket that is dishwasher-safe. This helps streamline the cleaning process, making the DCM2161B a low-maintenance option in the busy lives of coffee lovers.
Overall, the Black & Decker DCM2161B is an excellent coffee maker that offers remarkable features, user-friendly technology, and solid performance. Ideal for those seeking quality and convenience in their daily caffeine ritual, this model will undoubtedly find a cherished spot on your countertop.