assembly
NOTE: Ensure the sweeper is switched off and the battery is removed before attaching or removing the sweeper tubes. The tube assembly must be assembled to the housing before use.
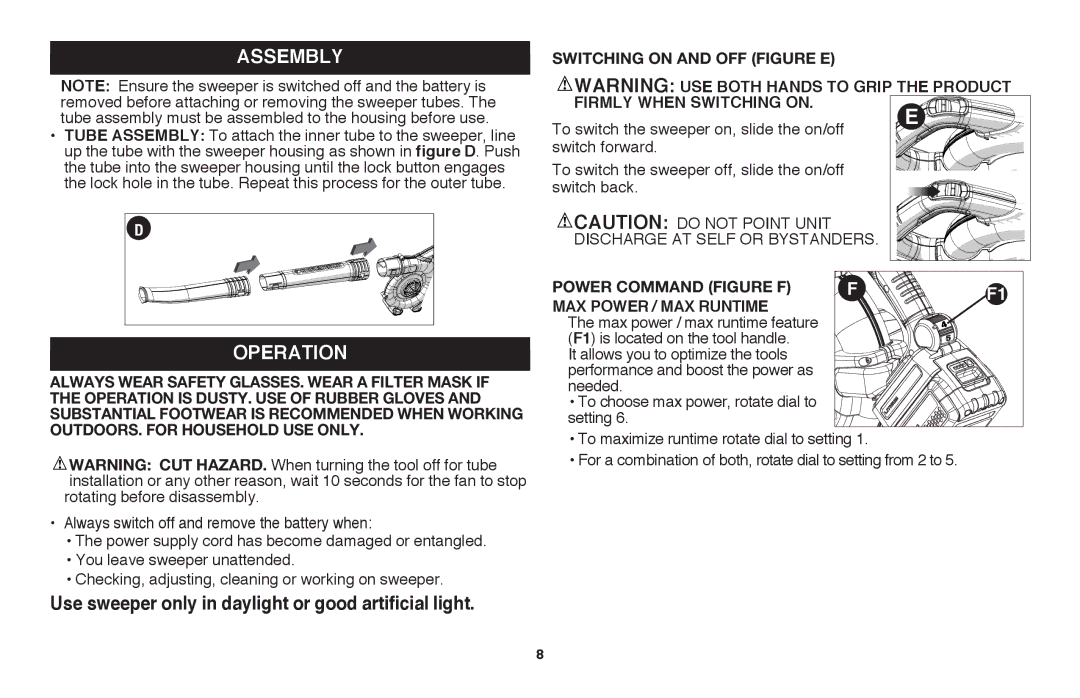
• tube assembly: To attach the inner tube to the sweeper, line up the tube with the sweeper housing as shown in figure D. Push the tube into the sweeper housing until the lock button engages the lock hole in the tube. Repeat this process for the outer tube.
D |
operation |
always wear safety glasses. wear A filter mask if the operation is dusty. use of rubber gloves and substantial footwear is recommended when working outdoors. For household use only.
![]() WARNING: Cut Hazard. When turning the tool off for tube installation or any other reason, wait 10 seconds for the fan to stop rotating before disassembly.
WARNING: Cut Hazard. When turning the tool off for tube installation or any other reason, wait 10 seconds for the fan to stop rotating before disassembly.
•Always switch off and remove the battery when:
•The power supply cord has become damaged or entangled.
•You leave sweeper unattended.
•Checking, adjusting, cleaning or working on sweeper.
Use sweeper only in daylight or good artificial light.
Switching on and off (Figure E)
WARNING: Use both hands to grip the product | ||
firmly when switching on. |
| E |
To switch the sweeper on, slide the on/off |
| |
switch forward. |
|
|
To switch the sweeper off, slide the on/off |
|
|
switch back. |
|
|
CAUTION: Do not point unit |
|
|
discharge at self or bystanders. |
| |
POWER COMMAND (Figure F) | F | F1 |
Max Power / Max Runtime |
|
|
The max power / max runtime feature |
|
|
(F1) is located on the tool handle. |
|
|
It allows you to optimize the tools |
|
|
performance and boost the power as |
|
|
needed. |
|
|
• To choose max power, rotate dial to |
|
|
setting 6. |
|
|
•To maximize runtime rotate dial to setting 1.
•For a combination of both, rotate dial to setting from 2 to 5.
8