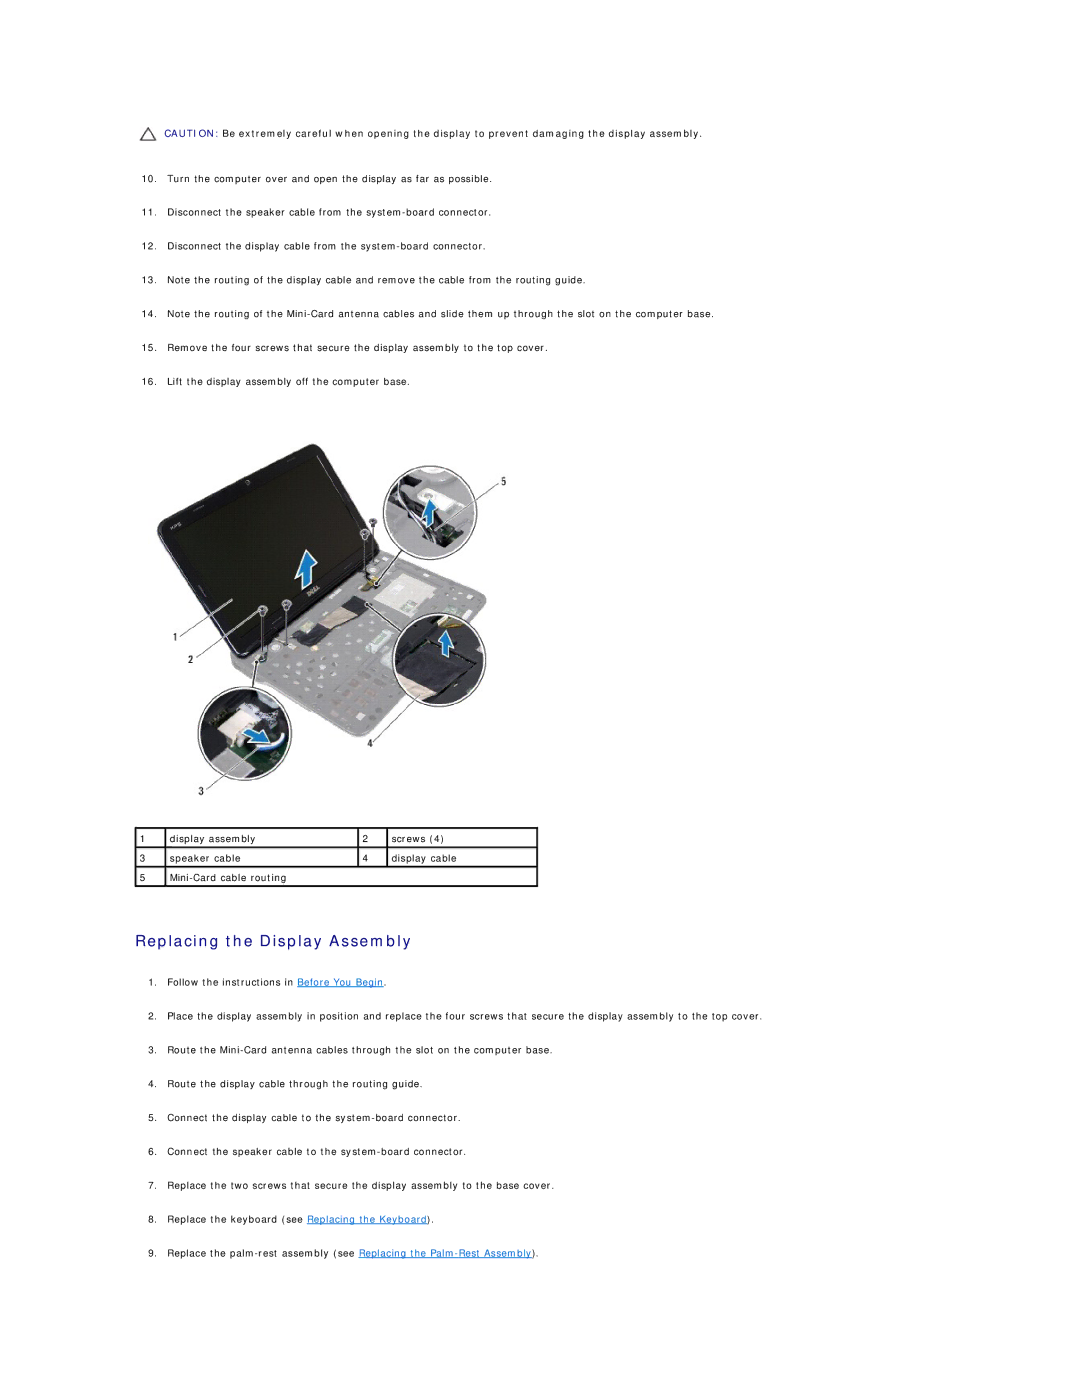
CAUTION: Be extremely careful when opening the display to prevent damaging the display assembly.
10.Turn the computer over and open the display as far as possible.
11.Disconnect the speaker cable from the
12.Disconnect the display cable from the
13.Note the routing of the display cable and remove the cable from the routing guide.
14.Note the routing of the
15.Remove the four screws that secure the display assembly to the top cover.
16.Lift the display assembly off the computer base.
1 | display assembly | 2 | screws (4) |
|
|
|
|
3 | speaker cable | 4 | display cable |
5 |
|
| |
|
|
|
|
Replacing the Display Assembly
1.Follow the instructions in Before You Begin.
2.Place the display assembly in position and replace the four screws that secure the display assembly to the top cover.
3.Route the
4.Route the display cable through the routing guide.
5.Connect the display cable to the
6.Connect the speaker cable to the
7.Replace the two screws that secure the display assembly to the base cover.
8.Replace the keyboard (see Replacing the Keyboard).
9.Replace the