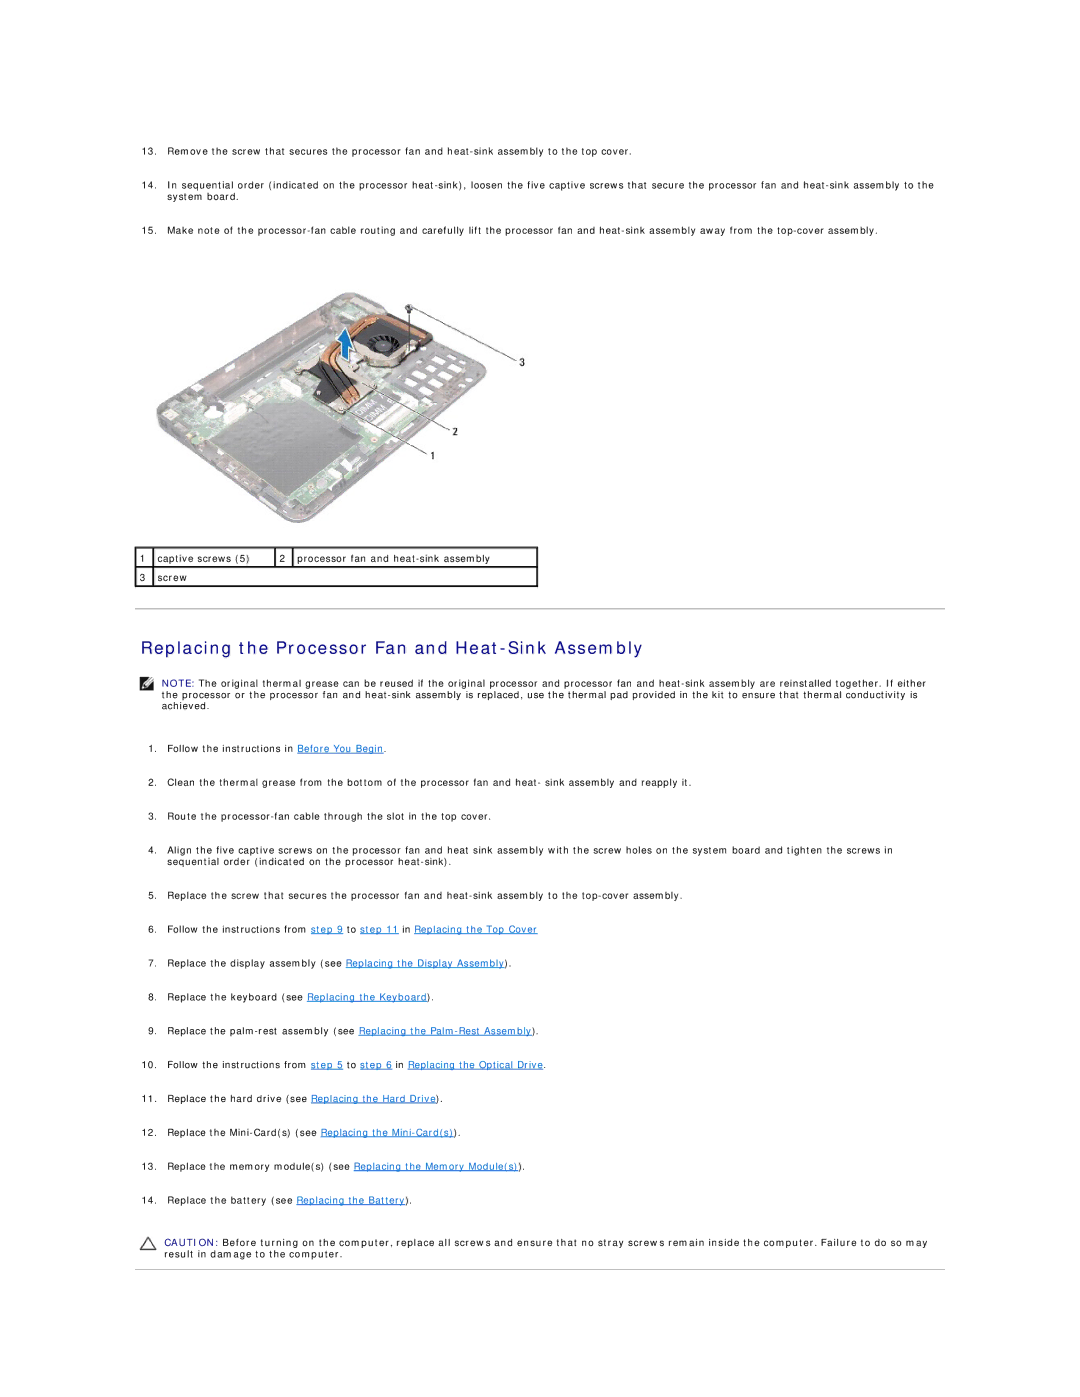
13.Remove the screw that secures the processor fan and
14.In sequential order (indicated on the processor
15.Make note of the
1 | captive screws (5) | 2 | processor fan and |
|
|
|
|
|
|
3 | screw |
|
|
|
|
|
|
|
|
|
|
|
|
|
Replacing the Processor Fan and Heat-Sink Assembly
NOTE: The original thermal grease can be reused if the original processor and processor fan and
1.Follow the instructions in Before You Begin.
2.Clean the thermal grease from the bottom of the processor fan and heat- sink assembly and reapply it.
3.Route the
4.Align the five captive screws on the processor fan and heat sink assembly with the screw holes on the system board and tighten the screws in sequential order (indicated on the processor
5.Replace the screw that secures the processor fan and
6.Follow the instructions from step 9 to step 11 in Replacing the Top Cover
7.Replace the display assembly (see Replacing the Display Assembly).
8.Replace the keyboard (see Replacing the Keyboard).
9.Replace the
10.Follow the instructions from step 5 to step 6 in Replacing the Optical Drive.
11.Replace the hard drive (see Replacing the Hard Drive).
12.Replace the
13.Replace the memory module(s) (see Replacing the Memory Module(s)).
14.Replace the battery (see Replacing the Battery).
CAUTION: Before turning on the computer, replace all screws and ensure that no stray screws remain inside the computer. Failure to do so may result in damage to the computer.