
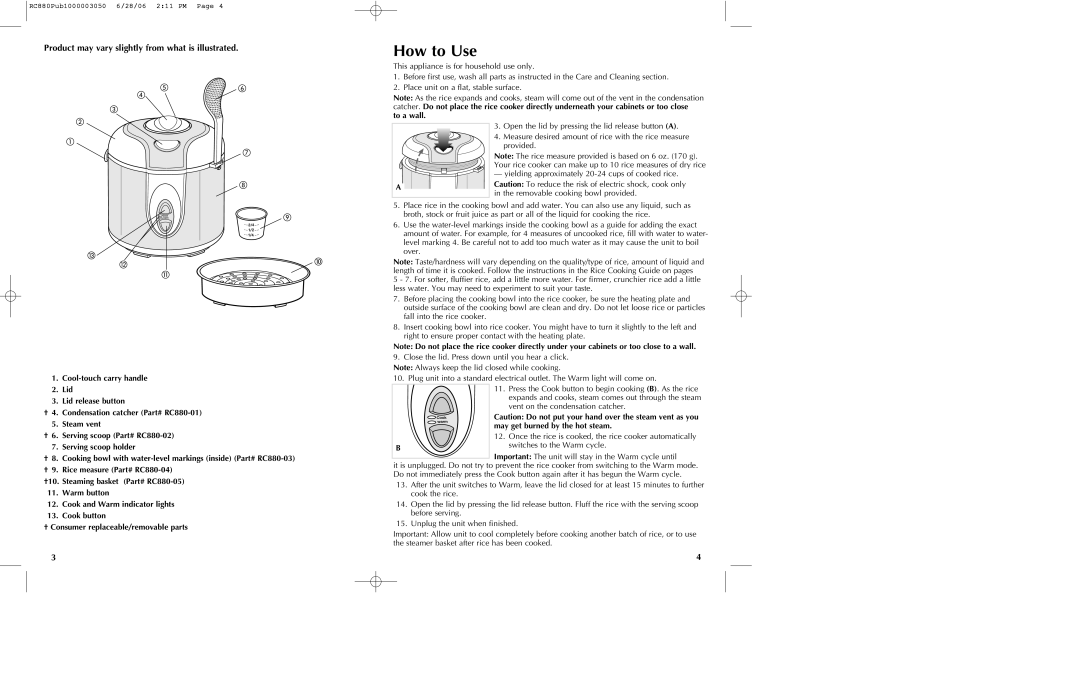
RC880 specifications
The Black & Decker RC880 is a versatile and efficient rice cooker that caters to both novice and experienced cooks. With its sleek design and advanced features, it has become a popular choice in kitchens around the world. The RC880 boasts a substantial capacity, allowing it to prepare up to 8 cups of cooked rice, making it ideal for family gatherings, meal prepping, or entertaining guests.One of the standout features of the RC880 is its one-touch cooking function. This intuitive design allows users to easily select the desired cooking mode, whether for white rice, brown rice, or even steaming vegetables. The model comes equipped with a built-in measurement cup and a spatula, simplifying the cooking process and ensuring consistent results each time.
The advanced technology in the Black & Decker RC880 includes a programmable timer, which enables users to set cooking times in advance. This feature is particularly helpful for busy individuals who want to come home to a perfectly cooked meal. With a delay start function, users can prepare their ingredients and have the rice cooker start cooking at a later time, ensuring that dinner is ready right when you need it.
Durability is another highlight of the RC880. The non-stick inner pot is not only easy to clean but also resistant to scratches, ensuring that it maintains its quality over time. Additionally, the cooker features a steam vent for excess moisture, which prevents overflow and ensures rice is cooked evenly and thoroughly.
Safety is a top priority for Black & Decker, and the RC880 is no exception. It comes with an automatic shut-off feature that activates once cooking is complete, preventing overcooking and potential hazards. Furthermore, the cool-touch exterior ensures users can handle the cooker safely without the risk of burns.
The Black & Decker RC880 is truly a well-rounded appliance that combines functionality, ease of use, and safety. Whether you're preparing a simple side dish or looking to elevate your culinary skills, this rice cooker is an asset that can seamlessly fit into any kitchen. With its array of features, it stands out in a crowded market, appealing to a diverse audience of home chefs.