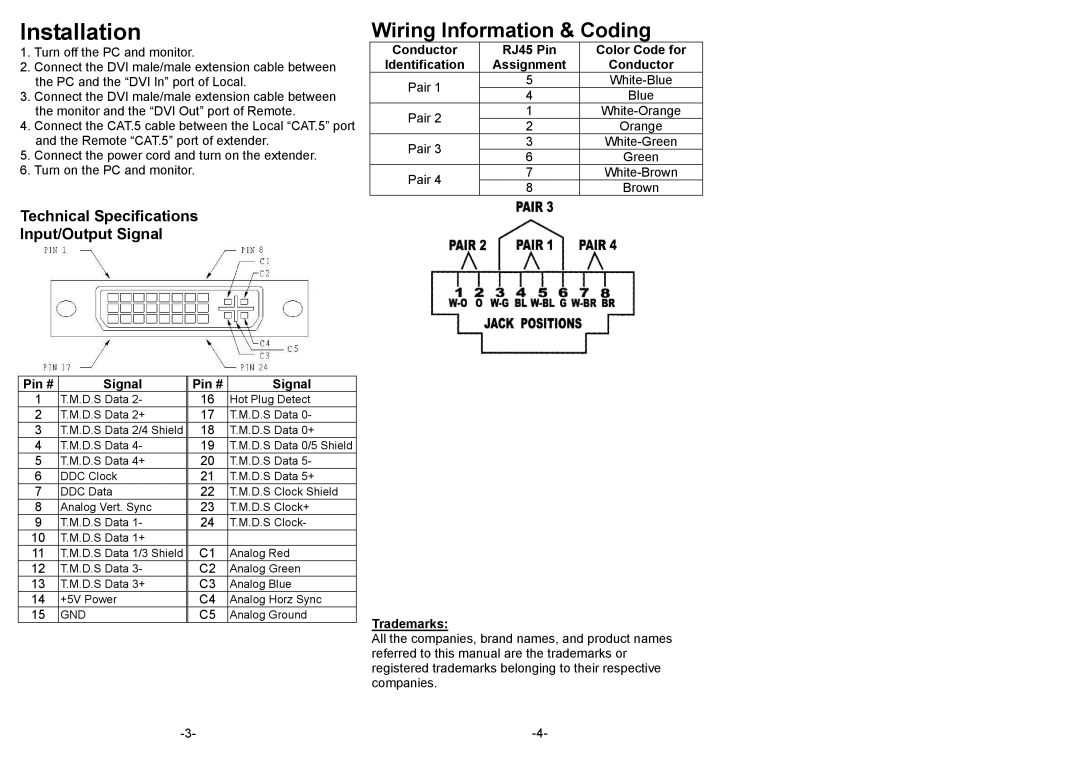
DVI-D Extender, ACS2001A specifications
The Black Box DVI-D Extender, specifically the ACS2001A model, is a powerful solution for transmitting high-quality DVI-D video signals over long distances. With the increasing need for high-definition video in various fields such as education, corporate settings, and digital signage, the ACS2001A stands out for its robust performance and reliability.One of the main features of the ACS2001A is its ability to extend DVI-D signals up to 50 meters (164 feet) using a single CAT5e/6 cable. This capability eliminates the limitations of traditional DVI connections, which are restricted by distance due to signal degradation. The extender supports a resolution of up to 1920 x 1200 at 60 Hz, ensuring that users can enjoy crystal-clear video quality without any compromise.
The ACS2001A utilizes advanced technology to maintain signal integrity over long distances. It employs equalization and amplification features, which help in compensating for any loss of signal quality that may occur during transmission. This ensures that the video output remains sharp and vibrant, making it ideal for high-definition applications.
Moreover, the ACS2001A is designed with user-friendliness in mind. It features a plug-and-play installation process, which eliminates the need for complex configurations or additional software. Users can easily set up the system, connecting the DVI source to the transmitter and the display to the receiver without any hassle. The compact design of the units also allows for flexible placement in tight spaces.
Another important characteristic of the ACS2001A is its compatibility with a variety of devices. It works seamlessly with DVI-equipped devices such as computers, projectors, monitors, and other display technologies. This versatility makes it a valuable addition to any AV setup.
Furthermore, the extender is engineered for durability and long-lasting performance. It is housed in a sturdy casing that offers protection against everyday wear and tear, making it suitable for both home and professional environments.
In summary, the Black Box DVI-D Extender ACS2001A is a reliable and efficient solution for extending high-quality video signals. With its impressive range, superior resolution support, user-friendly installation, and robust durability, it is the perfect choice for anyone looking to enhance their DVI connections while maximizing performance and flexibility.

