Chapter 3: Installation

3.1.2 Rack mount

Note: The module switches are not accessible once it is inserted into the rack, therefore, check all settings before insertion.

1Place the rack securing plate (available as a separate kit) onto the front of the module and secure it with the two countersunk screws.

2Orient the module on its side so that its labeled face is the correct way up.

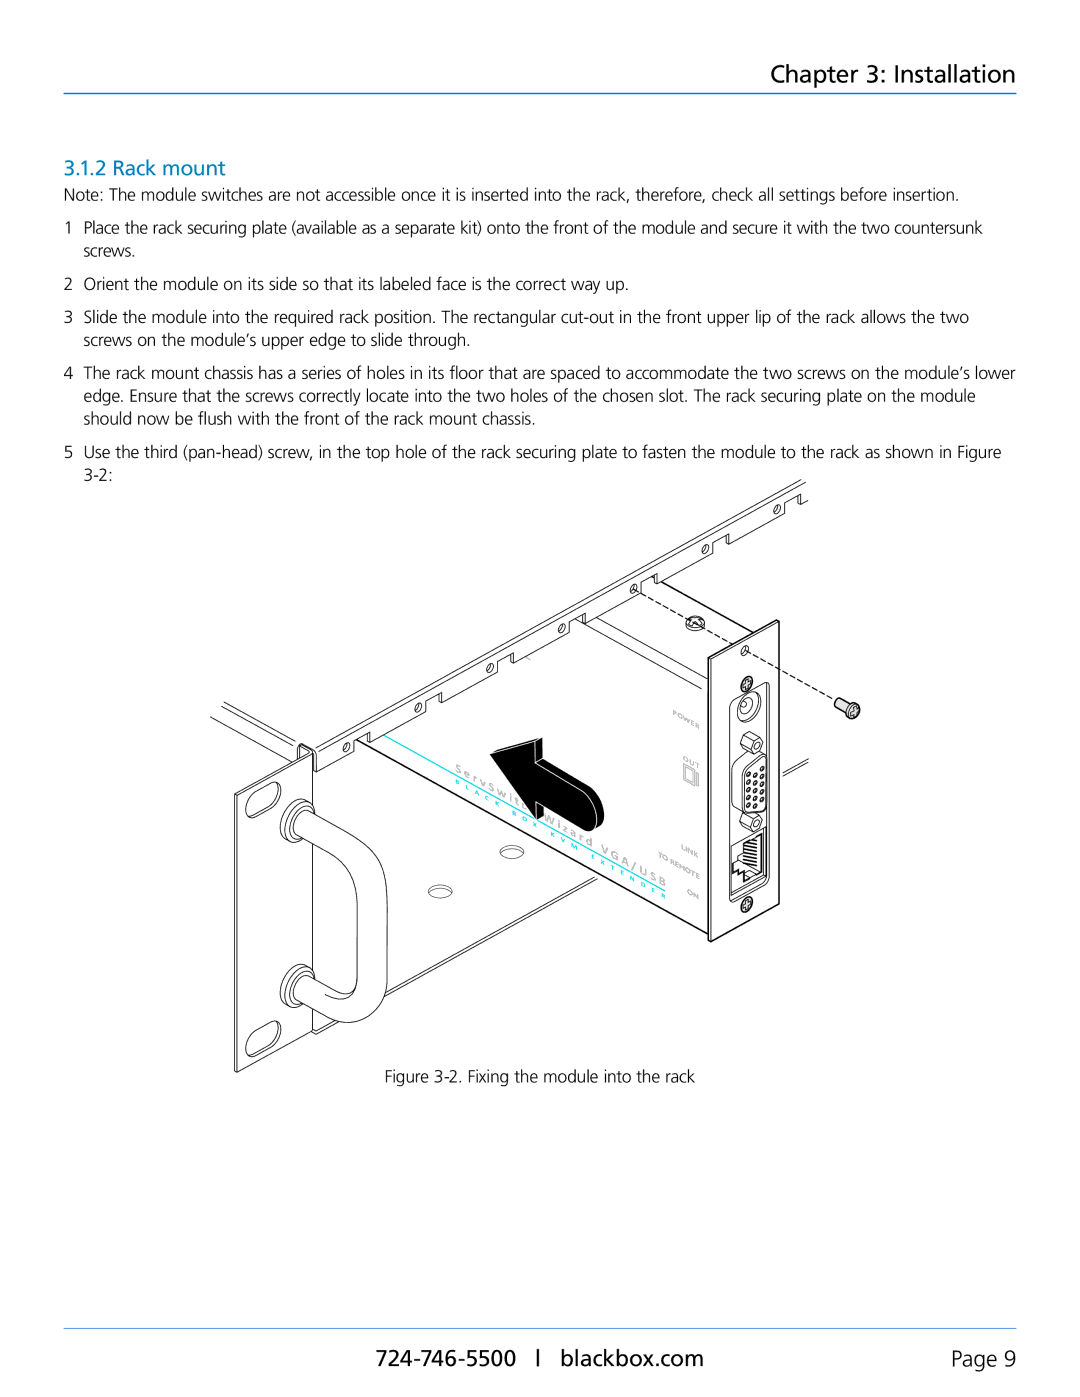
3Slide the module into the required rack position. The rectangular cut-out in the front upper lip of the rack allows the two screws on the module’s upper edge to slide through.

4The rack mount chassis has a series of holes in its floor that are spaced to accommodate the two screws on the module’s lower edge. Ensure that the screws correctly locate into the two holes of the chosen slot. The rack securing plate on the module should now be flush with the front of the rack mount chassis.

5Use the third (pan-head) screw, in the top hole of the rack securing plate to fasten the module to the rack as shown in Figure

3-2:

IN

IN

ON 1

2


PO


WER

S


OUT


e


B


r

v


L

A


C


i


K


t


B

c


O


X

i


K

z

a

r


V


M


LIN


TO


K


E

X


/


REMO


T

E


N

D

S

B

TE


E

ON


R

Figure 3-2. Fixing the module into the rack

724-746-5500 blackbox.com

Page 9

Page 9
Image 9
Black Box ServSwitch Wizard VGA/USB, ACU5050A-R2 manual Installation, Rack mount

ACU5050A-R2, ServSwitch Wizard VGA/USB specifications

The Black Box ServSwitch Wizard VGA/USB is a versatile KVM (Keyboard, Video, Mouse) switch that allows users to control multiple computers from a single set of peripherals. This product plays a crucial role in IT environments where efficient management of numerous systems is required. The ServSwitch Wizard, particularly the ACU5250A-R2 and ACU505A-R2 models, boasts several innovative features and technologies that enhance its functionality and user experience.

One of the standout features of the ServSwitch Wizard is its support for multiple video resolutions, ensuring compatibility with a wide range of display devices. This capability allows users to utilize high-definition video outputs up to 1920 x 1200 pixels, making it suitable for professional applications, such as graphic design and video editing. The switch also supports various VGA and USB interfaces, enabling seamless connections with different types of devices.

The ACU5250A-R2 model is particularly notable for its ability to connect up to 8 computers, while the ACU505A-R2 provides support for 4 computers. This scalability makes these devices ideal for small to medium-sized businesses, data centers, and home office setups, where space and efficiency are paramount. Users can easily switch between connected systems using a simple hotkey or button press, streamlining workflows and improving productivity.

In addition to video and peripheral support, the ServSwitch Wizard features advanced cable management options. Each unit includes an integrated cable organizer that helps prevent tangling and clutter, ensuring that the setup remains tidy and functional. The robust design also enhances durability, making these switches suitable for continuous use in demanding environments.

Both models emphasize ease of installation and use, making them accessible even for users with minimal technical knowledge. Plug-and-play functionality allows for quick setup, with no additional software required. The switches also come equipped with a built-in LED indicator that facilitates the identification of active devices.

Moreover, the Black Box ServSwitch Wizard is designed to ensure reliable performance with minimal signal degradation. This is particularly important for users who rely on high-quality video output for critical tasks. The combination of innovative features, user-friendly design, and robust technology makes the ACU5250A-R2 and ACU505A-R2 an excellent choice for anyone looking to optimize their workspace while maintaining control over multiple computers.