
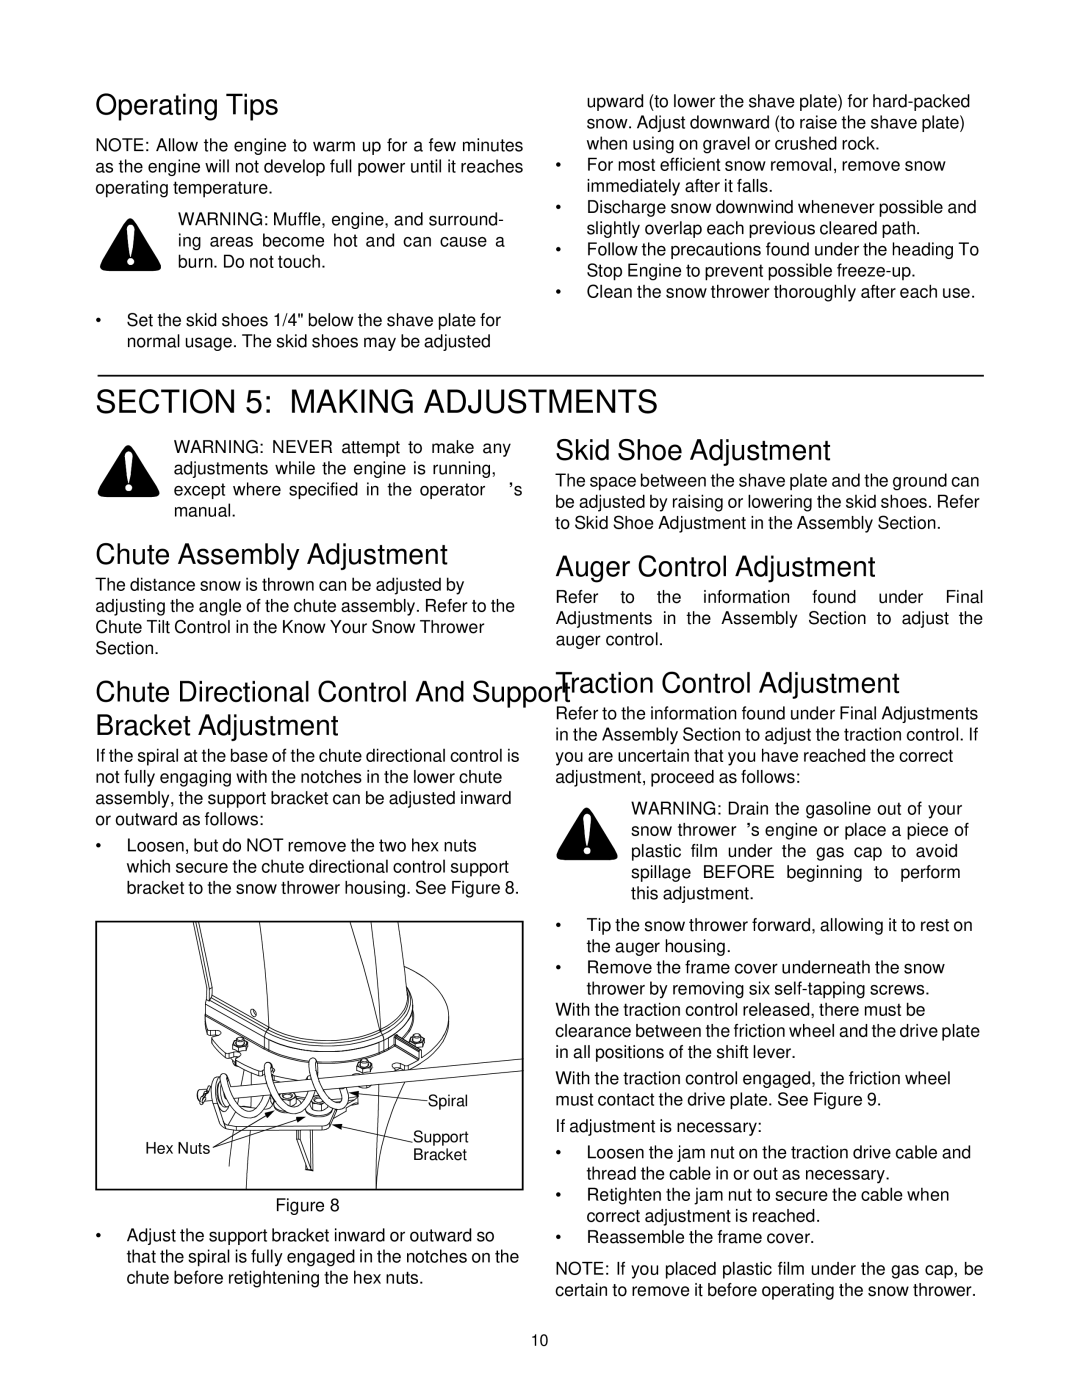
750, 550 specifications
The Bolens 750 and 550 are robust garden tractors renowned for their reliability and performance in lawn care and gardening tasks. Designed for both amateur and professional gardeners, these machines provide an exceptional blend of power and versatility.The Bolens 750 features a powerful engine, typically a 17-20 HP Briggs & Stratton or Kohler, known for their durability and efficient fuel consumption. This tractor is fitted with a hydrostatic transmission system, which ensures smooth operation and ease of use. The hydrostatic system allows the user to control speed and direction effortlessly, making it an ideal choice for navigating tight spaces and varied terrains.
On the other hand, the Bolens 550 offers a slightly lower horsepower, usually around 15 HP, but maintains many of the same core features found in its counterpart. The 550 is designed for users who may need a more compact option without sacrificing performance. Both tractors have a rugged steel frame construction, ensuring longevity and strength, even when subjected to heavy-duty tasks.
A major highlight of both models is their cutting deck, available in various sizes, from 42 inches up to 54 inches. The adjustable cutting height feature allows users to set the desired grass length, providing flexibility for different lawn types and personal preferences. The side discharge option efficiently handles grass clippings, while mulch kits are also available for those who prefer returning nutrients to the soil.
One significant technological advancement in the Bolens 750 and 550 models is their ergonomic design. The comfortable seating, well-placed controls, and easy access points for maintenance make these tractors user-friendly. With a tight turning radius, they excel in maneuverability, making them suitable for properties with intricate landscaping.
Moreover, both tractors come equipped with standard rear and front hitch capabilities, allowing for the attachment of various accessories, such as snow plows, tillers, and aerators. This versatility makes them indispensable tools for year-round yard care and maintenance.
In summary, the Bolens 750 and 550 stand out with their powerful engines, innovative features, and rugged build quality. They cater to a variety of gardening and landscaping needs, offering users unmatched reliability and efficiency in their outdoor tasks. Whether you are tackling expansive gardens or compact lawns, these tractors deliver performance that can help transform any landscape with ease and precision.