MAINTENANCE & REPAIR INSTRUCTIONS
This unit is
Extreme care and knowledge of the system is required when servicing a
This section covers both SplitLine™ and standard single line installation.
Always use genuine factory parts 0.065 in. (1.65 mm) replacement line. Using line other than the specified may make the unit overheat or fail.
WARNING: Never use
There are two methods to replace the trimming line:
•Wind the inner reel with new line
•Install a prewound inner reel
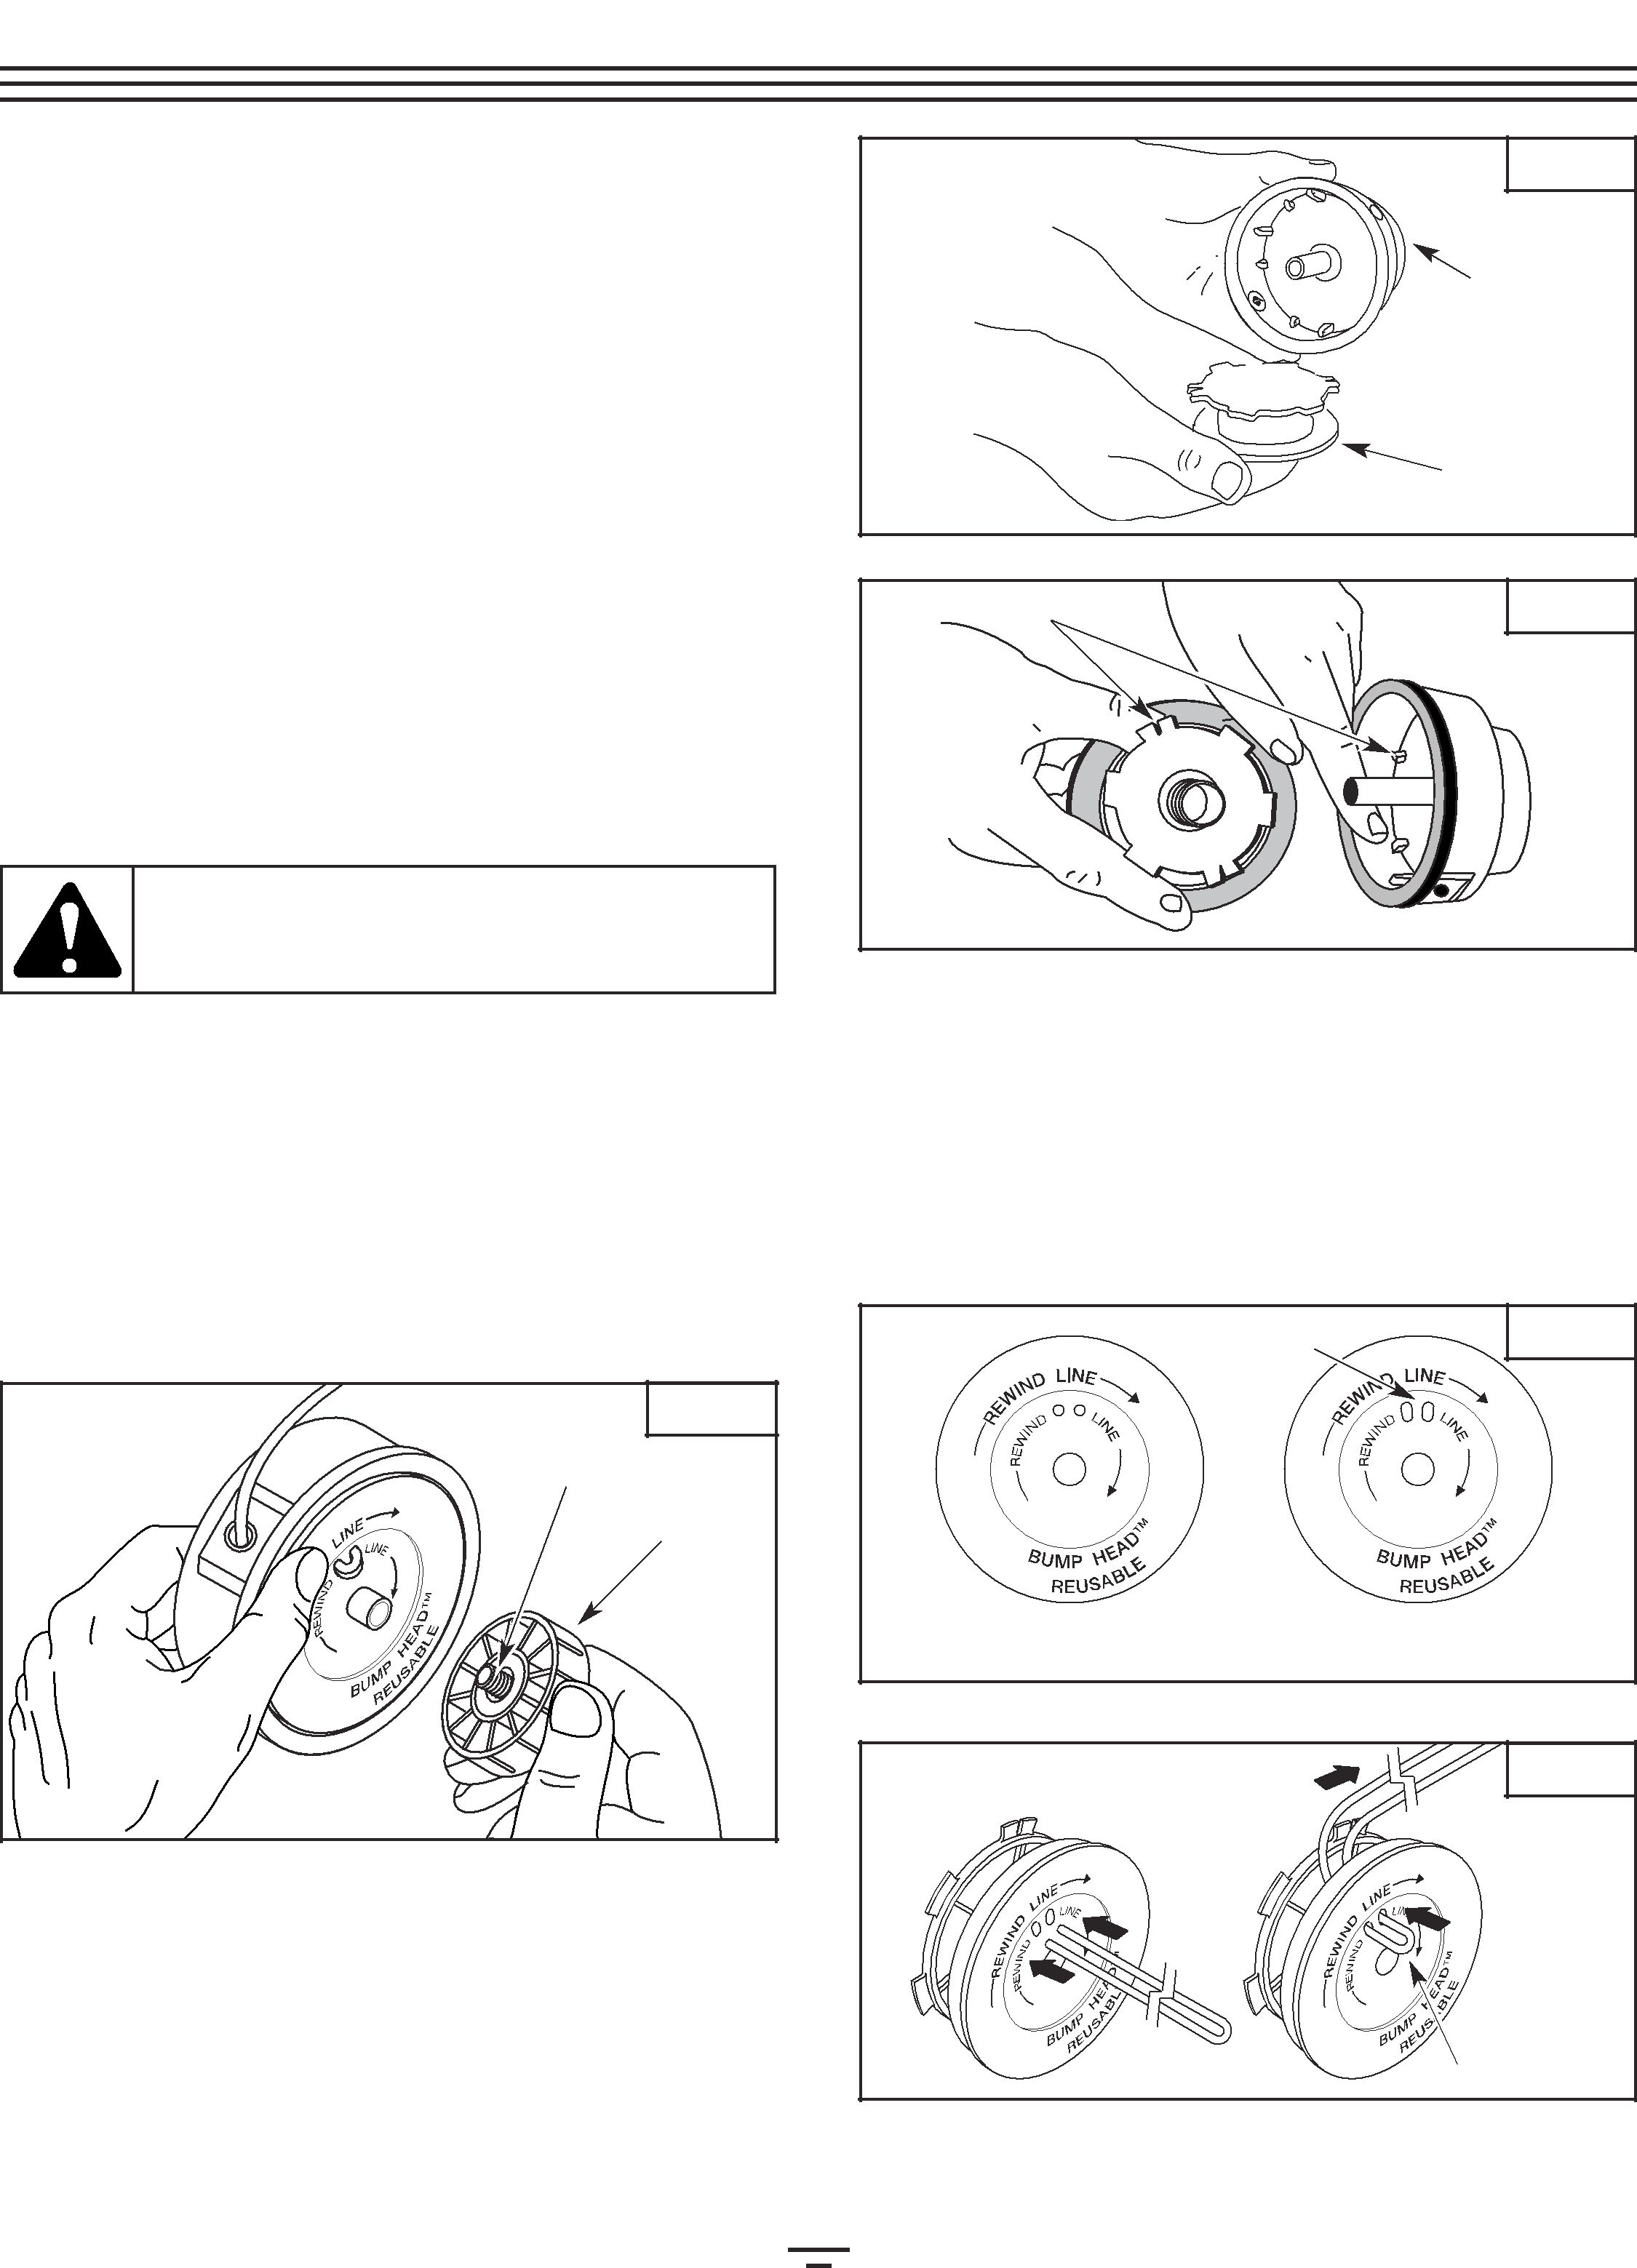
Winding the Existing Inner Reel1.Hold the outer spool with one hand and unscrew the bump knob counterclockwise (Fig. 10). Inspect the bolt inside the bump knob to make sure it moves freely. Replace the bump knob if damaged.
Fig. 10
Bolt
Bump Knob
2.Remove the inner reel from the outer spool (Fig. 11).
3.Remove spring from the inner reel (Fig. 11).
4.Use a clean cloth to clean the inner reel, spring, shaft, and inner surface of the outer spool.
5.Check the indexing teeth on the inner reel and outer spool for wear (Fig. 12). If necessary, remove burrs or replace the reel and spool.
Fig. 11
Outer Spool

 Spring
Inner Reel
Indexing Teeth | Fig. 12 |
NOTE: SplitLine™ can only be used with the inner reel with the slotted holes. Single line can be used on either type of inner reel. Use Figure 13 to identify the inner reel you have.
NOTE: Always use the correct line length when installing trimming line on the unit. The line may not release properly if the line is too long.
Slotted Holes | Fig. 13 |
For Use with | For Use with SplitLine™ |
Single Line ONLY | or Single Line |
Fig. 14
Loop
10