ES1260 EchoStream® Passive Infrared Motion Detector
Installation and Operation Manual - 03900D
1 Overview
The ES1260 is a low-current motion detector highly sensitive to moving heat (infrared radiation) sources. It features increased immunity to radio frequency interference (RFI), vibration, static, lightning, ambient temperature changes, and other common causes of false alarms.
1.1 Inovonics Wireless Contact Information
If you have any problems with this procedure, contact Inovonics Wireless technical services:
•E-mail: support@inovonics.com
•Phone: (800) 782-2709; (303) 939-9336
2 Installation and Startup
2.1 Select Frequency Band
EchoStream products are able to use a range of radio frequencies, and must be configured for your geographic area. To configure the ES1247:
1.Insert a small flat-blade screwdriver at the tab on the bottom of the unit. The screwdriver will enter the slot at about a 45° angle. Press downward on the handle of the screwdriver until the latch holding the cover to the housing base releases (Fig. 1).
Fig. 1 Open the Housing
2.Place a selection jumper on the appropriate frequency band selection pins (Fig. 1).
•Place the jumper on the right two pins to select 921-928 MHz for New Zealand.
•Place the jumper on the middle two pins to select 868-869 MHz for Europe.
•Place the jumper on the left two pins to select 915-928 MHz for Australia.
•Leave the jumper off the pins to select 902-928 MHz for North America.
3.Press the Reset button.
A
B
C
D
E
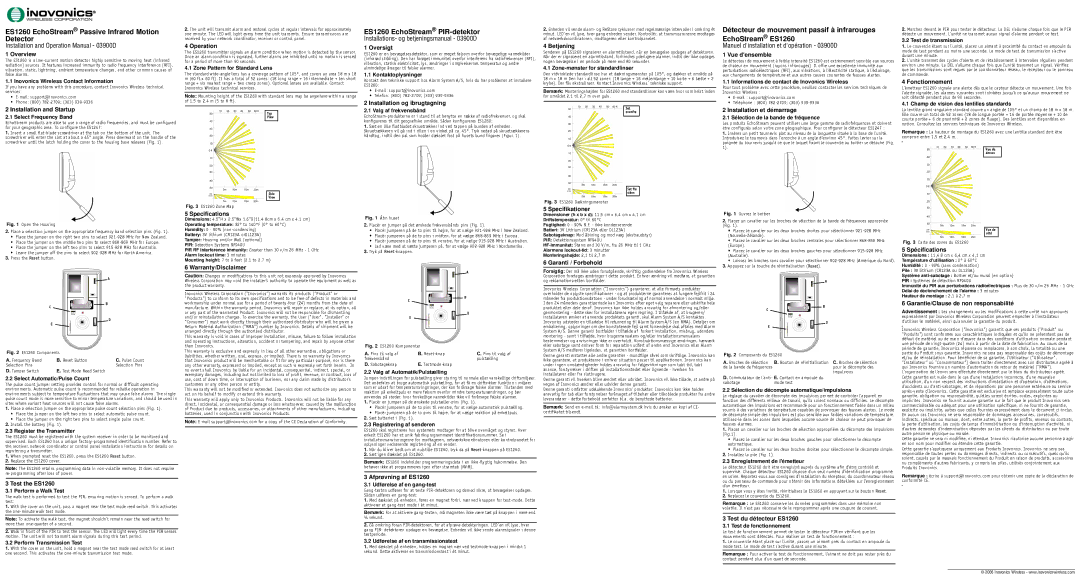
Fig. 2 ES1260 Components | |
A. Frequency Band | B. Reset Button | C. Pulse Count |
Selection Pins | | Selection Pins |
D. Tamper Switch | E. Test Mode Reed Switch | |
2.2 Select Automatic/Pulse Count
The pulse count jumper setting provides control for normal or difficult operating environments. Automatic pulse count is recommended for reliable operation in environments subject to temperature fluctuations that may cause false alarms. The single pulse count mode is more sensitive to minor temperature variations, and should be used in sites where variant heat sources will not cause false alarms.
1.Place a selection jumper on the appropriate pulse count selection pins (Fig. 1).
•Place the jumper on the left two pins to select automatic pulse count.
•Place the jumper on the right two pins to select single pulse count.
2.Install the battery (Fig. 1).
2.3 Register the Transmitter
The ES1260 must be registered with the system receiver in order to be monitored and supervised. Each ES1260 has a unique factory-programmed identification number. Refer to the receiver, network coordinator or control panel installation instructions for details on registering a transmitter.
1.When prompted reset the ES1260, press the ES1260 Reset button.
2.Replace the ES1260 cover.
Note: The ES1260 retains programming data in non-volatile memory. It does not require re-programming after loss of power.
3 Test the ES1260
3.1 Perform a Walk Test
The walk test is performed to test the PIR, ensuring motion is sensed. To perform a walk test:
1.With the cover on the unit, pass a magnet near the test mode reed switch. This activates the one-minute walk test mode.
Note: To activate the walk test, the magnet shouldn’t remain near the reed switch for more than one-quarter of a second.
2.Walk in front of the PIR to test the sensor. The LED will light every time the PIR senses motion. The unit will not transmit alarm signals during this test period.
3.2 Perform Transmission Test
1.With the cover on the unit, hold a magnet near the test mode reed switch for at least one second. This activates the one-minute transmission test mode.
2.The unit will transmit alarm and restoral cycles at regular intervals for approximately one minute. The LED will light every time the unit transmits. Ensure transmissions are received by your network coordinator, receiver or control panel.
4 Operation
The ES1260 transmitter signals an alarm condition when motion is detected by the sensor. Once an alarm condition is signaled, further alarms are inhibited until no motion is sensed for a period of more than 90 seconds.
4.1 Zone Pattern for Standard Lens
The standard wide-angle lens has a coverage pattern of 105°, and covers an area 18 m x 18 m (60 ft x 60 ft). It has a total of 52 zones: (18 long range + 16 intermediate + ten short range + six nearest range + two creep zones). Optional lenses are available. Contact Inovonics Wireless technical services.
Note: Mounting height of the ES1260 with standard lens may be anywhere within a range of 1.5 to 2.4 m (5 to 8 ft).
Top
View
Side
View
Fig. 3 ES1260 Zone Map
5 Specifications
Dimensions: 4.5”H x 2.5”Wx 1.6”D(11.4 8cm x 6.4 cm x 4.1 cm)
Operating temperature: 32° to 140°F (0° to 60°C)
Humidity: 0 - 90% (non-condensing)
Battery: 3V lithium (CR123A orDL123A)
Tamper: Housing and/or Wall (optional)
PIR: Detection Systems RF940U
PIR RF interference immunity: Greater than 30 v/m 26 MHz - 1 GHz
Alarm lockout time: 3 minutes
Mounting height: 7 to 9 feet (2.1 to 2.7 m)
6 Warranty/Disclaimer
Caution: Changes or modifications to this unit not expressly approved by Inovonics Wireless Corporation may void the installer's authority to operate the equipment as well as the product warranty.
Inovonics Wireless Corporation ("Inovonics") warrants its products ("Product" or "Products") to conform to its own specifications and to be free of defects in materials and workmanship under normal use for a period of twenty-four (24) months from the date of manufacture. Within the warranty period, Inovonics will repair or replace, at its option, all or any part of the warranted Product. Inovonics will not be responsible for dismantling and/or reinstallation charges. To exercise the warranty, the User ("User", "Installer" or "Consumer") must work directly through their authorized distributor who will be given a Return Material Authorization ("RMA") number by Inovonics. Details of shipment will be arranged directly through the authorized distributor.
This warranty is void in cases of improper installation, misuse, failure to follow installation and operating instructions, alteration, accident or tampering, and repair by anyone other than Inovonics.
This warranty is exclusive and expressly in lieu of all other warranties, obligations or liabilities, whether written, oral, express, or implied. There is no warranty by Inovonics that Inovonics product will be merchantable or fit for any particular purpose, nor is there any other warranty, expressed or implied, except as such is expressly set forth herein. In no event shall Inovonics be liable for an incidental, consequential, indirect, special, or exemplary damages, including but not limited to loss of profit, revenue, or contract, loss of use, cost of down time, or interruption of business, nor any claim made by distributor's customers or any other person or entity.
This warranty will not be modified or extended. Inovonics does not authorize any person to act on its behalf to modify or extend this warranty.
This warranty will apply only to Inovonics Products. Inovonics will not be liable for any direct, incidental, or consequential damage or loss whatsoever, caused by the malfunction of Product due to products, accessories, or attachments of other manufacturers, including batteries, used in conjunction with Inovonics Products.
Note: E-mail support@inovonics.com for a copy of the CE Declaration of Conformity.
ES1260 EchoStream® PIR-detektor
Installations- og betjeningsmanual - 03900D
1 Oversigt
ES1260 er en bevægelsesdetektor, som er meget følsom overfor bevægelige varmekilder (infrarød stråling). Den har forøget immunitet overfor interferens fra radiofrekvenser (RFI), vibration, statisk elektricitet, lys, ændringer i omgivelsernes temperatur og andre almindelige årsager til falske alarmer.
1.1 Kontaktoplysninger
Kontakt den tekniske support hos Alarm System A/S, hvis du har problemer at installere ES1260:
•E-mail: support@inovonics.com
•Telefon: (800) 782-2709; (303) 939-9336
2 Installation og ibrugtagning
2.1 Valg af frekvensbånd
EchoStream-produkterne er i stand til at benytte en række af radiofrekvenser, og skal konfigureres til dit geografiske område. Sådan konfigureres ES1260:
1.Sæt en lille fladbladet skruetrækker ind ved tappen på bunden af enheden. Skruetrækkeren vil gå ind i rillen i en vinkel på ca. 45°. Tryk nedad på skruetrækkerens håndtag, indtil den pal som holder dækslet fast på husets bund frigøres (Figur. 1).
Fig. 1 Åbn huset
2.Placér en jumper på det ønskede frekvensbånds pins (Fig. 1).
•Placér jumperen på de to pins til højre, for at vælge 921-928 MHz i New Zealand.
•Placér jumperen på de to pins i midten, for at vælge 868-869 MHz i Europa.
•Placér jumperen på de to pins til venstre, for at vælge 915-928 MHz i Australien.
•Lad være med at sætte jumperen på, for at vælge 902-928 MHz i Nordamerika.
3.Tryk på Reset-knappen.
A
B
C
D
E
Fig. 2 ES1260 Komponenter | |
A. Pins til valg af | B. Reset-knap | C. Pins til valg af |
frekvensbånd | | pulstælling |
D. Sabotageknap | E. Testmode-knap | |
2.2 Valg af Automatik/Pulstælling
Jumper-indstillingen for pulstælling giver styring til normale eller vanskellige driftsmiljøer. Det anbefales at bruge automatisk pulstælling, for at få en driftsikker funktion i miljøer som er udsat for temperatursvingninger, der kan forårsage falske alarmer. Tilstanden med reaktion på enkeltpuls er mere følsom overfor mindre temperaturændringer, og bør anvendes på steder, hvor forskellige varmekilder ikke vil forårsage falske alarmer.
1.Placér en jumper på de ønskede pulstæller-pins (Fig. 1).
•Placér jumperen på de to pins til venstre, for at vælge automatisk pulstælling.
•Placér jumperen på de to pins til højre, for at vælge reaktion på enkeltpuls.
2.Sæt batteriet i (Fig. 1).
2.3 Registrering af senderen
ES1260 skal registreres hos systemets modtager for at blive overvåget og styret. Hver enkelt ES1260 har et unik fabriksprogrammeret identifikationsnummer. Se i installationsanvisningerne for modtageren, netværkskoordinatoren eller kontrolpanelet for oplysninger vedrørende registrering af en sender.
1.Når du bliver bedt om at nulstille ES1260, tryk da på Reset-knappen på ES1260.
2.Sæt igen dækslet på ES1260.
Bemærk: ES1260 indeholder programmeringsdata i en ikke-flygtig hukommelse. Den behøver ikke at programmeres igen efter strømtab (NVM).
3 Afprøvning af ES1260
3.1 Udførelse af en gang-test
Gang-testen udføres for at teste PIR-detektoren og derved sikre, at bevægelser opdages. Sådan udføres en gang-test:
1.Med dækslet på enheden, føres en magnet forbi, nær ved knappen for test-mode. Dette aktiverer et gang-test mode i ét minut.
Bemærk: For at aktivere gang-testen, må magneten ikke være tæt på knappen i mere end ¼ sekund.
2.Gå omkring foran PIR-detektoren, for at afprøve detekteringen. LED´en vil lyse, hver gang PIR- detektoren opdager en bevægelse. Enheden vil ikke sende alarmsignaler i denne testperiode.
3.2 Udførelse af en transmissionstest
1.Med dækslet på enheden, holdes en magnet nær ved testmode-knappen i mindst 1 sekund. Dette aktiverer en transmissionstest i ét minut.
2.Enheden vil sende alarm- og ReStore cyklusser med regelmæssige intervaller i omkring ét minut. LED´en vil lyse, hver gang enheden sender. Kontrollér, at transmissionerne modtages af netværkskoordinatoren, modtageren eller kontrolpanelet.
4 Betjening
Senderen på ES1260 signalerer en alarmtilstand, når en bevægelse opdages af detektoren. Når der er signaleret en alarmtilstand, forhindres yderligere alarmer, indtil der ikke opdages nogen bevægelse i en periode på mere end 90 sekunder.
4.1 Zone-mønster for standardlinser
Den vidvinklede standardlinse har et dækningsmønster på 105°, og dækker et område på 18 m x 18 m Den har i alt 52 zoner: (18 lange + 16 mellemlange + 10 korte + 6 tætte + 2 krybe). Der fås ekstralinser. Kontact Inovonics Wireless´ tekniske support.
Bemærk: Monteringshøjden for ES1260 med standardlinser kan være hvor som helst inden for området 2,1 til 2,7 m over gulv.
Set ovenfra
Set fra siden
Fig. 3 ES1260 Dækningsmønster
5 Specifikationer
Dimensioner (h x b x d): 11,5 cm x 6,4 cm x 4,1 cm
Driftstemperatur: 0° til 60°C
Fugtighed: 0 - 90% R.F. - ikke kondenserende
Batteri: 3V Lithium (CR123A eller DL123A)
Sabotageknap: Mod åbining og mod væg (ekstraudstyr)
PIR: Detektionssystem RF940U
HF-immunitet:Større end 30 V/m, fra 26 MHz til 1 GHz
Alarmens lockout-tid: 3 minutter
Monteringshøjde: 2,1 til 2,7 m
6 Garanti / Forbehold
Forsigtig: Der må ikke uden forudgående, skriftlig godkendelse fra Inovonics Wireless Corporation foretages ændringer i dette produkt. Enhver ændring vil medføre, at garantien og reklamationsretten bortfalder.
Inovonics Wireless Corporation ("Inovonics") garanterer, at alle firmaets produkter overholder de oplyste specifikationer - og at produkterne garanteres at fungere fejlfrit i 24 måneder fra produktionsdatoen - under forudsætning af normal anvendelse i normalt miljø. I den 24 måneders garantiperiode kan Inovonics efter eget valg reparere eller udskifte hele produktet eller dele deraf. Inovonics kan ikke holdes ansvarlig for afmontering og/eller genmontering - dette sker for installatørens egen regning. I tilfælde af, at brugeren/ installatøren ønsker at anvende produktets garanti, skal Alarm System A/S kontaktes. Inovonics udsteder en tilladelse til returnering til Alarm System A/S (en RMA). Detaljer om emballering, oplysninger om den konstaterede fejl samt forsendelse skal aftales med Alarm System A/S. Denne garanti bortfalder i tilfælde af forkert installation, misbrug, udendørs montering - samt i tilfælde, hvor brugermanualens og/eller installationsmanualens bestemmelser og anvisninger ikke er overholdt. Konstruktionsmæssige ændringer, hærværk eller sabotage samt enhver form for reparation udført af andre end Inovonics eller Alarm System A/S medfører ligeledes, at garantien bortfalder.
Denne garanti erstatter alle andre garantier - mundtlige såvel som skriftlige. Inovonics kan ikke garantere, at produkterne i enhver situation passer til applikationen. Inovonics kan under ingen omstændigheder holdes ansvarlig for følgevirkninger som tabt tid, tabt avance, forstyrrelser i driften på installationsstedet eller lignende - hverken fra installatører eller fra slutbrugere.
Denne garanti vil hverken blive ændret eller udvidet. Inovonics vil ikke tillade, at andre på vegne af Inovonics ændrer eller udvider denne garanti.
Denne garanti omfatter udelukkende Inovonics' produkter. Inovonics kan ikke holdes ansvarlig for tab eller forstyrrelser forårsaget af tilbehør eller tilkoblede produkter fra andre leverandører - dette forbehold omfatter bl.a. de benyttede batterier.
Bemærk: Send en e-mail til: info@alarmsystem.dk hvis du ønsker en kopi af CE- certifikatet tilsendt.
Détecteur de mouvement passif à infrarouges EchoStream® ES1260
Manuel d'installation et d'opération - 03900D
1 Vue d'ensemble
Le détecteur de mouvement à faible intensité ES1260 est extrêmement sensible aux sources de chaleur en mouvement (rayons infrarouges). Il offre une excellente immunité aux perturbations radioélectriques (RFI), aux vibrations, à l'électricité statique, à l'éclairage, aux changements de température et aux autres causes courantes de fausses alertes.
1.1 Informations de contact de Inovonics Wireless
Pour tout problème avec cette procédure, veuillez contacter les services techniques de Inovonics Wireless :
•E-mail : support@inovonics.com
•Téléphone : (800) 782-2709; (303) 939-9336
2 Installation et démarrage
2.1 Sélection de la bande de fréquence
Les produits EchoStream peuvent utiliser une large gamme de radiofréquences et doivent être configurés selon votre zone géographique. Pour configurer le détecteur ES1247 :
1.Insérez un petit tournevis plat au niveau de la languette située à la base de l'unité. Introduisez le tournevis dans l'encoche à un angle d'environ 45°. Faites levier sur la poignée du tournevis jusqu'à ce que le loquet fixant le couvercle au boîtier se détache (Fig. 1).
Fig. 1 Ouvrez le boîtier
2.Placez un cavalier sur les broches de sélection de la bande de fréquences appropriée (Fig. 1).
•Placez le cavalier sur les deux broches droites pour sélectionner 921-928 MHz (Nouvelle-Zélande).
•Placez le cavalier sur les deux broches centrales pour sélectionner 868-869 MHz (Europe).
•Placez le cavalier sur les deux broches gauches pour sélectionner 915-928 MHz (Australie).
•Laissez les broches sans cavalier pour sélectionner 902-928 MHz (Amérique du Nord).
3.Appuyez sur la touche de réinitialisation (Reset).
A
B
C
D
E
Fig. 2 Composants du ES1260
A. Broches de sélection | B. Bouton de réinitialisation C. Broches de sélection |
de la bande de fréquences | pour le décompte des |
| impulsions |
D. Commutateur de l'anti- E. Contact en ampoule du |
sabotage | mode test |
2.2 Sélection du décompte automatique/impulsions
Le réglage du cavalier de décompte des impulsions permet de contrôler l'appareil en fonction des différents milieux de travail, qu'ils soient normaux ou difficiles. Le décompte automatique des impulsions est recommandé pour un fonctionnement fiable dans un milieu soumis à des variations de température capables de provoquer des fausses alertes. Le mode de décompte simple des impulsions est plus sensible aux faibles variations de température. Utilisez-le dans les zones dans lesquelles aucune source de chaleur ne peut provoquer de fausses alarmes.
1.Placez un cavalier sur les broches de sélection appropriées du décompte des impulsions (Fig.1).
•Placez le cavalier sur les deux broches gauches pour sélectionner le décompte automatique.
•Placez le cavalier sur les deux broches droites pour sélectionner le décompte simple.
2.Installez la pile (Fig. 1).
2.3 Enregistrement de l'émetteur
Le détecteur ES1260 doit être enregistré auprès du système afin d'être contrôlé et supervisé. Chaque détecteur ES1260 dispose d'un seul numéro d'identification programmé en usine. Reportez-vous aux consignes d'installation du récepteur, du coordonnateur réseau ou du panneau de commande pour obtenir des informations détaillées sur l'enregistrement d'un émetteur.
1.Lorsque vous y êtes invité, réinitialisez le ES1260 en appuyant sur le bouton Reset.
2.Replacez le couvercle du ES1260.
Remarque : Le ES1260 conserve les données programmées dans une mémoire non volatile. Il n'est pas nécessaire de le reprogrammer après une coupure de courant.
3 Test du détecteur ES1260
3.1 Test de fonctionnement
Le test de fonctionnement permet de tester le détecteur PIR en vérifiant que les mouvements sont détectés. Pour réaliser un test de fonctionnement :
1.Le couvercle étant placé sur l'unité, passez un aimant prés du contact en ampoule du mode test. Le mode de test s'active durant une minute.
Remarque : Pour activer le test de fonctionnement, l'aimant ne doit pas rester prés du contact pendant plus d'un quart de seconde.
2.Marchez devant le PIR pour tester le détecteur. La DEL s'allume chaque fois que le PIR détecte un mouvement. L'unité ne transmet aucun signal d'alarme pendant ce test.
3.2 Test de transmission
1.Le couvercle étant sur l'unité, placez un aimant à proximité du contact en ampoule du mode de test pendant au moins une seconde. Le mode de test de transmission s'active durant une minute.
2.L'unité transmet des cycles d'alerte et de rétablissement à intervalles réguliers pendant environ une minute. La DEL s'allume chaque fois que l'unité transmet un signal. Vérifiez que les transmissions sont reçues par le coordonnateur réseau, le récepteur ou le panneau de commande.
4 Fonctionnement
L'émetteur ES1260 signale une alerte dès que le capteur détecte un mouvement. Une fois l'alerte signalée, les alarmes suivantes sont inhibées jusqu'à ce qu'aucun mouvement ne soit détecté pendant plus de 90 secondes.
4.1 Champ de vision des lentilles standards
La lentille grand-angulaire standard couvre un angle de 105° et un champ de 18 m x 18 m. Elle couvre un total de 52 zones (18 de longue portée + 16 de portée moyenne + 10 de courte portée + 6 de proximité + 2 zones de fluage). Des lentilles sont disponibles en option. Consultez les services techniques de Inovonics Wireless.
Remarque : La hauteur de montage du ES1260 avec une lentille standard doit être comprise entre 1,5 et 2,4 m..
Vue du dessus
Vue de côté
Fig. 3 Carte des zones du ES1260
5 Spécifications
Dimensions : 11,4 8 cm x 6,4 cm x 4,1 cm
Température d'utilisation : 0° à 60°C
Humidité : 0 - 90% (sans condensation)
Pile : 3V lithium (CR123A ou DL123A)
Système anti-sabotage :Boîtier et/ou mural (en option)
PIR : Systèmes de détection RF940U
Immunité du PIR aux perturbations radioélectriques : Plus de 30 v/m 26 MHz - 1 GHz
Délai de déclenchement de l'alarme : 3 minutes
Hauteur de montage : 2,1 à 2,7 m
6 Garantie/Clause de non responsabilité
Advertissement : Les changements ou les modifications à cette unité non approuvés expressément par Inovonics Wireless Corporation peuvent empêcher à l'installateur d'utiliser le matériel, ainsi qu'annuler la garantie du produit.
Inovonics Wireless Corporation ("Inovonics") garantit que ses produits ("Produit" ou "Produits") sont conformes aux caractéristiques indiquées et qu'ils ne présentent pas de défaut de matériel ou de main-d'œuvre dans des conditions d'utilisation normale pendant une période de vingt-quatre (24) mois à partir de la date de fabrication. Au cours de la période de garantie, Inovonics réparera ou remplacera, à son choix, la totalité ou une partie du Produit sous garantie. Inovonics ne sera pas responsable des coûts de démontage et/ou de réinstallation. Pour bénéficier de sa garantie, l'Utilisateur ("Utilisateur", "Installateur" où "Consommateur") devra traiter directement avec son distributeur agréé à qui Inovonics fournira un numéro d'autorisation de retour de matériel ("RMA"). L'organisation de l'envoi sera effectuée directement par le biais du distributeur agréé. Cette garantie est nulle dans le cas d'une installation incorrecte, d'une mauvaise utilisation, d'un non respect des instructions d'installation et d'opération, d'altérations, d'accidents ou d'anti-sabotages, et de réparations par une personne extérieure au service aprés-vente d'Inovonics. Cette garantie est exclusive et remplace expressément toute autre garantie, obligation ou responsabilité, qu'elles soient écrites, orales, explicites ou implicites. Inovonics ne fournit aucune garantie sur le fait que le produit Inovonics sera commercialisable ou adéquat pour une utilisation spécifique, ni ne fournit de garantie, explicite ou implicite, autres que celles fournies expressément dans le document ci-inclus. En aucun cas Inovonics ne sera responsable de dommages accessoires, consécutifs, indirects, spéciaux ou moraux, dont, entre autres, la perte de profits, revenus ou contrats, la perte d'utilisation, les coûts de temps d'immobilisation ou d'interruption d'activité, ni d'autres demandes d'indemnisation déposées par les clients du distributeur ou par toute autre personne physique ou morale.
Cette garantie ne sera ni modifiée, ni étendue. Inovonics n'autorise aucune personne à agir en son nom pour modifier ou étendre cette garantie.
Cette garantie s'appliquera uniquement aux Produits Inovonics. Inovonics ne sera pas responsable de toutes pertes ou dommages directs, indirects ou consécutifs, quels qu'ils soient, causés par le mauvais fonctionnement du Produit en raison de produits, accessoires ou compléments d'autres fabricants, y compris les piles, utilisés conjointement aux Produits Inovonics.
Remarque : écrire à support@inovonics.com pour obtenir une copie de la déclaration de conformité CE.