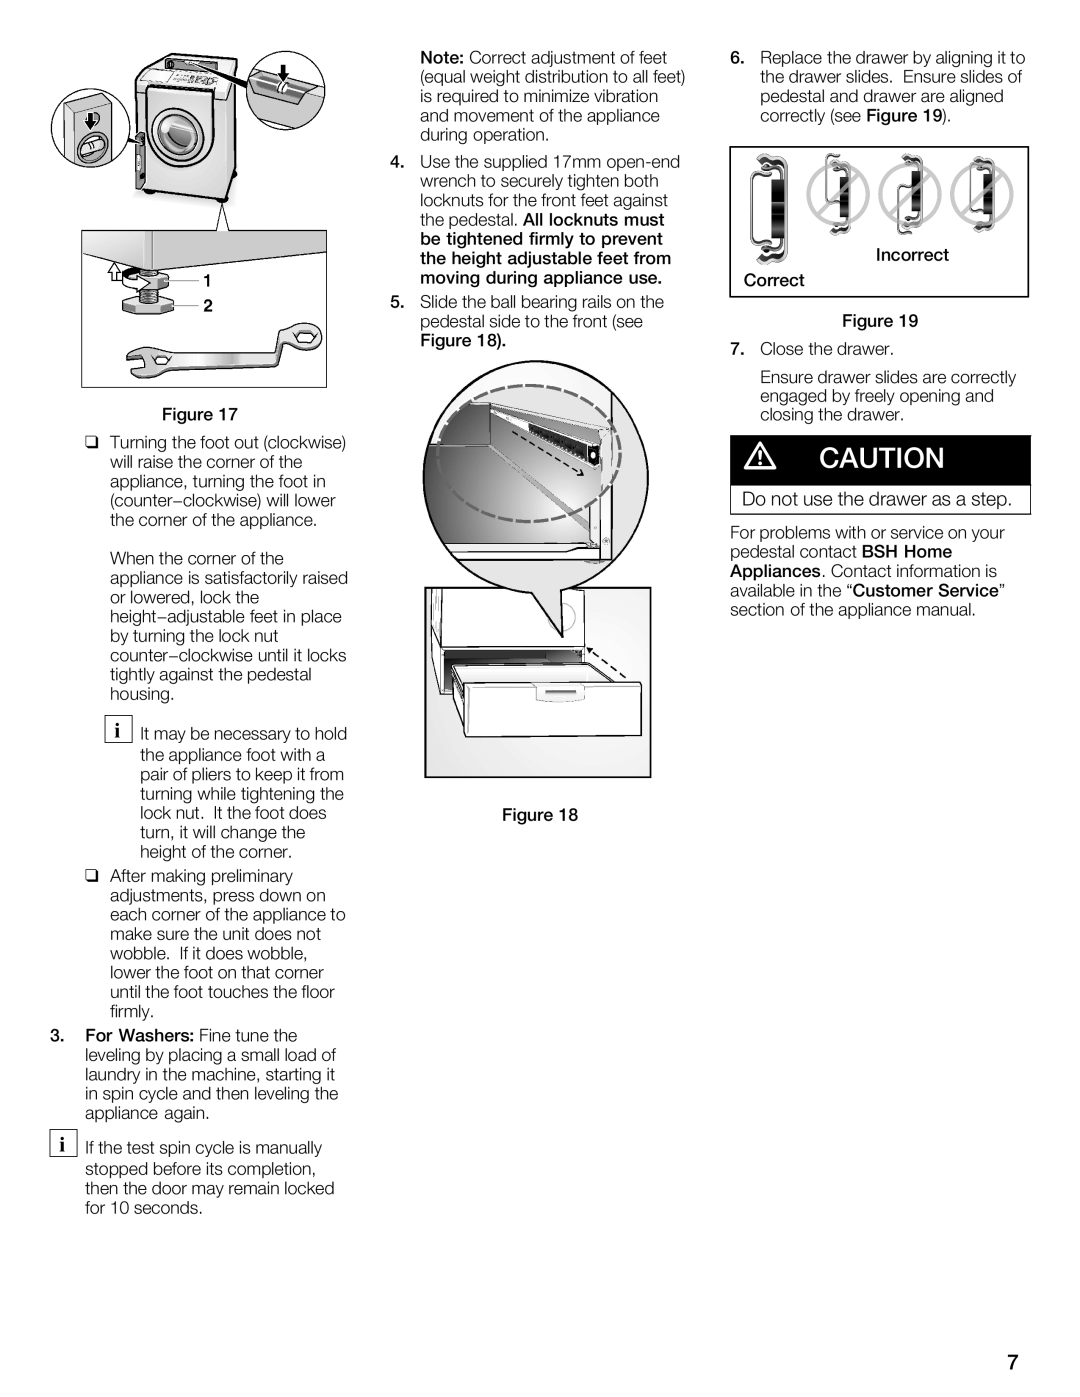
Figure 17
q Turning the foot out (clockwise) will raise the corner of the appliance, turning the foot in
When the corner of the appliance is satisfactorily raised or lowered, lock the
Note: Correct | adjustment | of | feet | 6. Replace | the | drawer | by aligning it | to | |
(equal | weight | distribution | to | all feet) | the drawer | slides. | Ensure slides | of | |
is required to minimize vibration | pedestal and drawer are aligned |
| |||||||
and movement of the appliance | correctly | (seeFigure | 19). |
| |||||
during | operation. |
|
|
|
|
|
|
| |
4.Use the supplied 17mm open^end wrench to securely tighten both locknuts for the front feet against
the pedestal.All locknuts must |
| |
be tightened | firmly to prevent | Incorrect |
the height adjustable feet from | ||
moving during | appliance use. | Correct |
5.Slide the ball bearing rails on the
pedestal side to the front (see |
| Figure 19 | |
Figure 18). | 7. Close | the | drawer. |
| |||
| Ensure drawer slides are correctly | ||
| engaged by freely opening and | ||
| closing | the | drawer. |
d CAUTION
Do not use the drawer as a step.
For problems with or service on your pedestal contactBSH Home Appliances. Contact information is
available in theCustomer• Service" section of the appliance manual.
3.
i
iIt may be necessary to hold
the appliance foot with a |
| |||
pair of pliers to keep it from |
| |||
turning while | tightening | the |
| |
lock nut. | It | the foot | does | Figure 18 |
turn, it will change the |
|
| ||
height of | the | corner. |
|
|
q After making preliminary adjustments, press down on each corner of the appliance to make sure the unit does not wobble. If it does wobble, lower the foot on that corner until the foot touches the floor firmly.
For Washers:Fine tune the
leveling by placing a small load of laundry in the machine, starting it in spin cycle and then leveling the appliance again.
If the test spin cycle is manually stopped before its completion, then the door may remain locked for 10 seconds.
7
